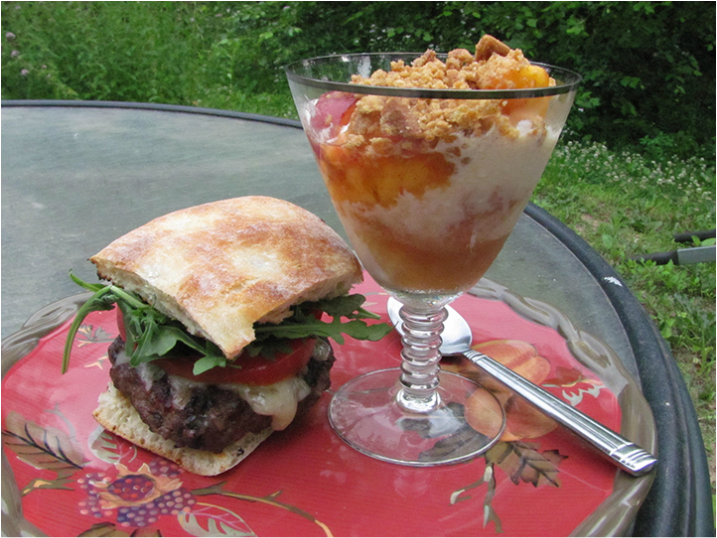
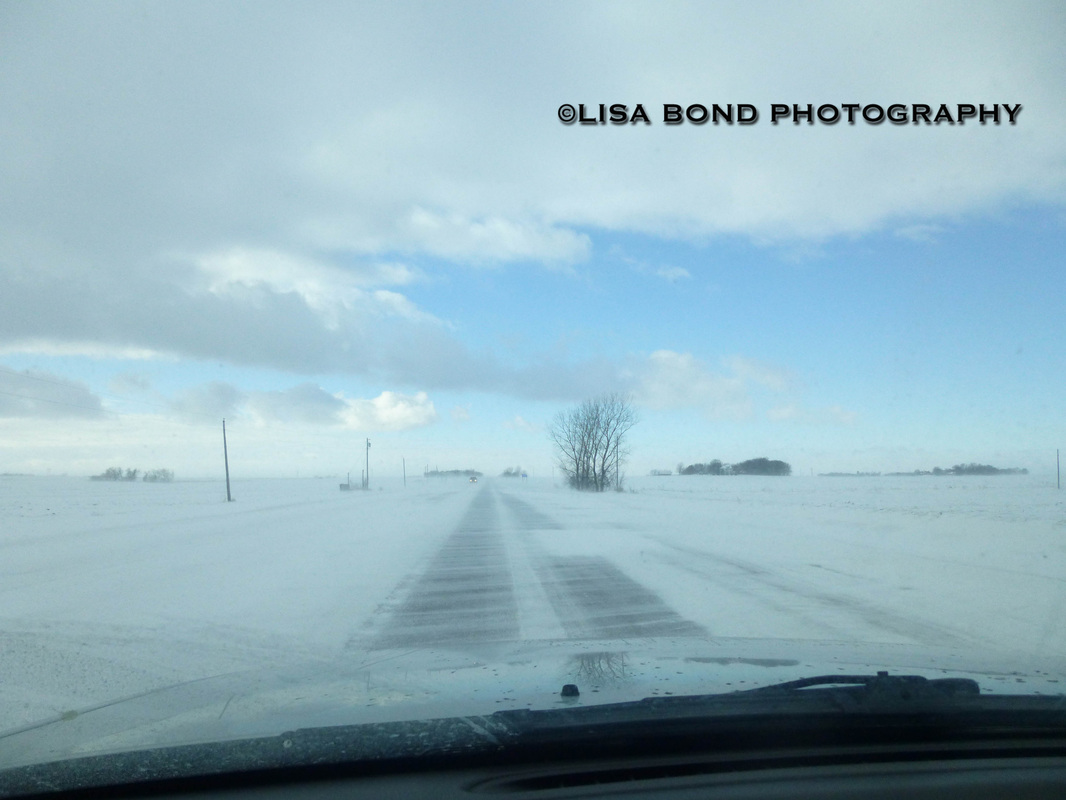
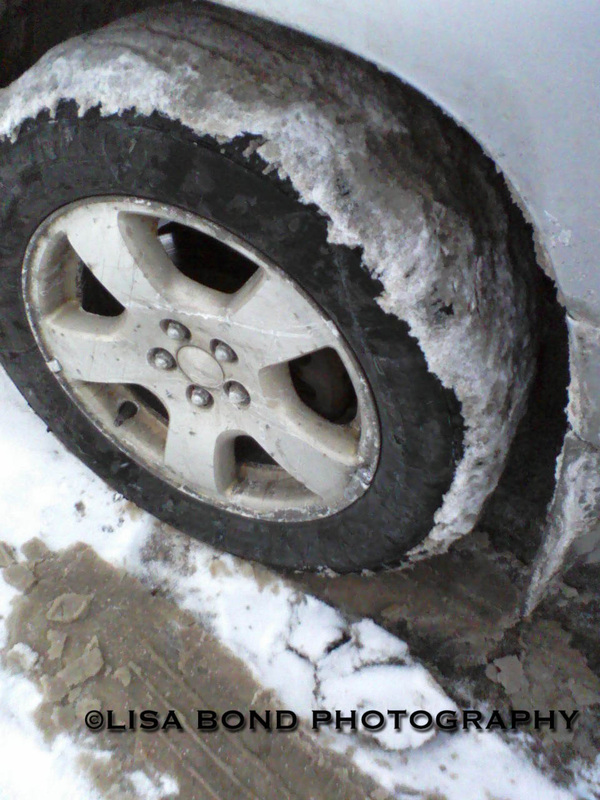
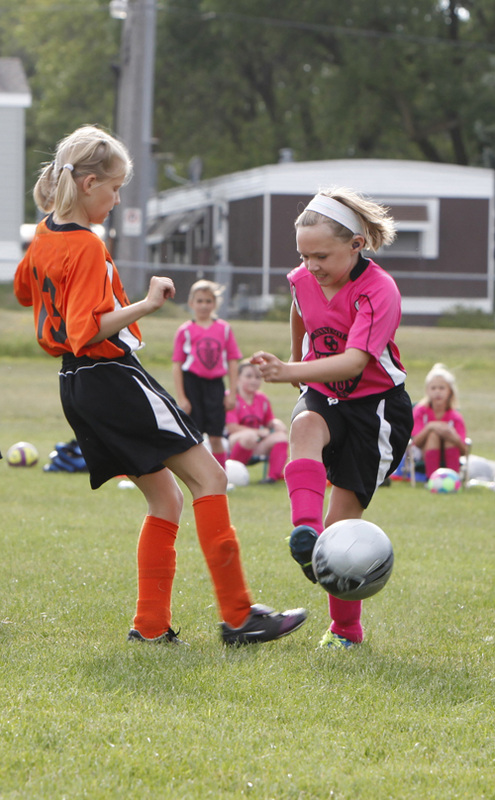
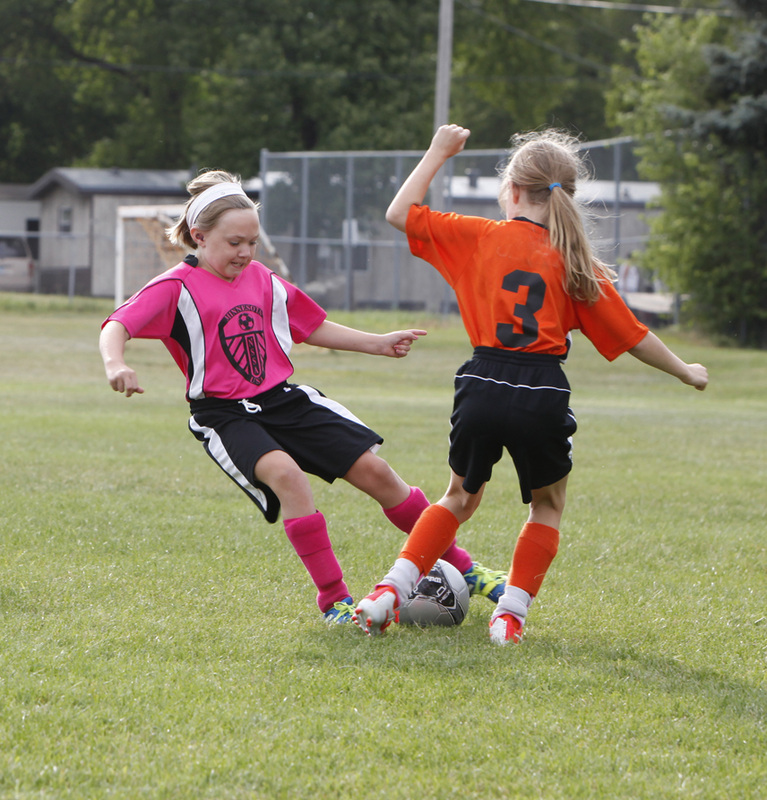
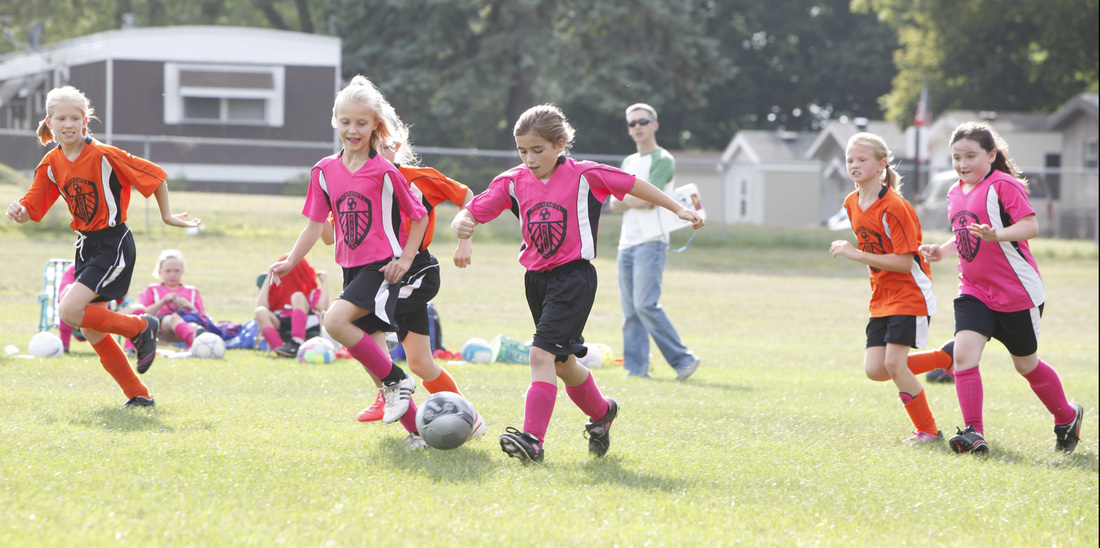
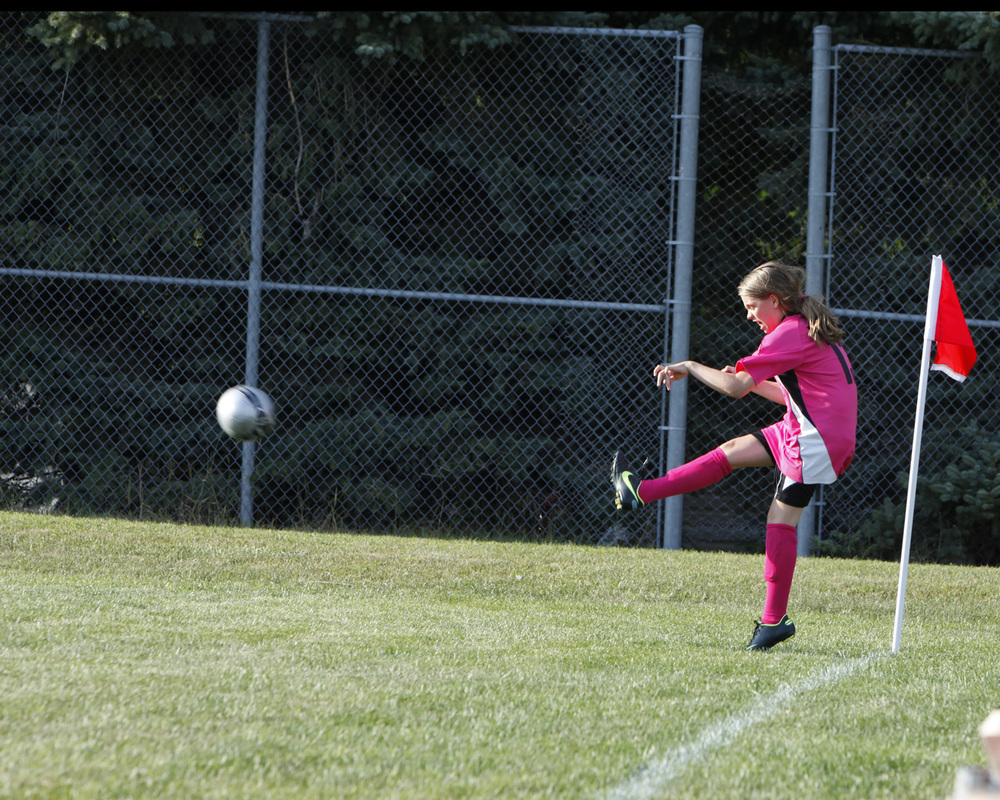
 ©2015 Lisa Bond Photography, All Rights Reserved July 'round here means it's time to make two recipes which reside in my July cookbook: Napa Valley Cabernet Burgers and Cinnamon Crunch Peach Sundaes. These are best made in small stages throughout the course of a day or two. I started in the morning to have everything easily done for dinner at night. Follow along while I make both specialties. Napa Valley Cabernet Burgers comes from a July 2003 issue of Bon Appetit and is James McNair's recipe. I usually double this recipe, but the following is for 4 servings. You can easily make twice the amount by 2x all the ingredients. Ingredients 1 750 ml bottle of Cabernet Sauvignon 1/4 c. minced shallots 9 T. unsalted butter at room temperature 2 t. golden brown sugar 1 T. minced fresh rosemary 1 1/2 lbs. ground beef (15% fat - I have used lean in the past however) 1 t. salt 1/2 t. black pepper 1 c. packed grated extra-sharp white cheddar cheese 4 4-1/2 inch squares focaccia, cut horizontally in half 8 large tomato slices 2 c. arugula Boil wine and shallots in medium saucepan until reduced to 3/4 cup, about 20 minutes. Add 1 T. butter and brown sugar, whisk until butter melts and sugar dissolves. Remove from heat. Mix remaining 8 T. butter and rosemary in small bowl. Set aside. Prepare barbeque (medium-high heat). Mix beef, salt, pepper and 1/4 cup wine-shallot mixture in bowl. Form meat into 4 5-inch squares or rounds. Brush grill rack with oil. Grill burgers until brown on bottom, about 3 minutes. Turn burgers and brush with wine-shallot mixture. Continue grilling burgers until cooked to desired doneness, turning and brushing occasionally with wine-shallot mixture, about 4 minutes longer for medium-rare. Sprinkle with cheese after last turn and grill until cheese melts. Spread cut sides of bread with rosemary butter. Grill, cut side down, until golden, about 2 minutes. Arrange bread, grilled side up, on plates. Top bottom halves with burgers, then tomatoes and arugula. Cover with top halves of bread. Now here is the recipe, step-by-step with my personal photos and commentary. 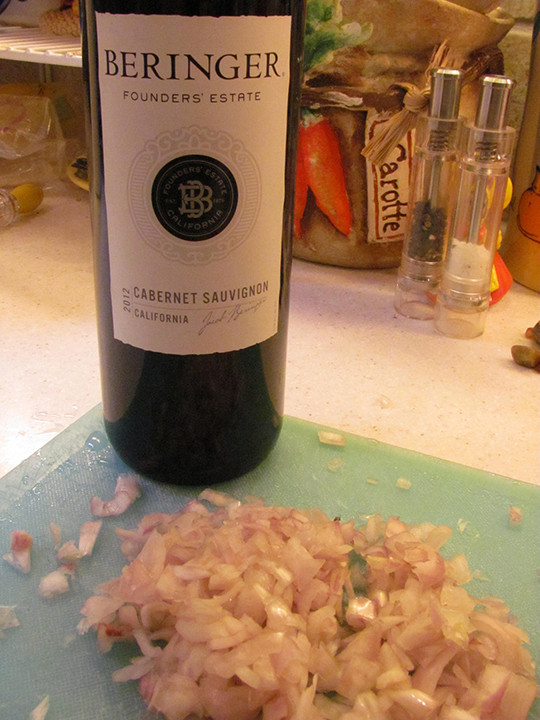 ©2015 Lisa Bond Photography, All Rights Reserved 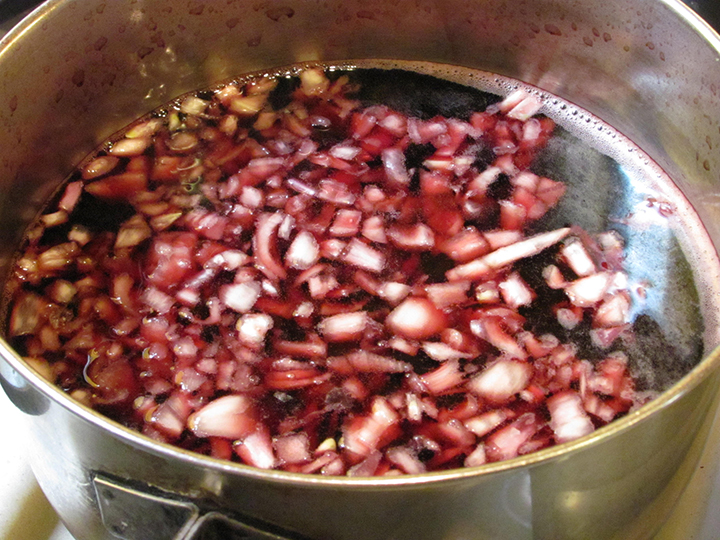 ©2015 Lisa Bond Photography, All Rights Reserved Boil wine and shallots in medium saucepan until reduced to 3/4 cup, about 20 minutes.  ©2015 Lisa Bond Photography, All Rights Reserved  ©2015 Lisa Bond Photography, All Rights Reserved 20 minutes is up. I know from experience that this takes a lot longer than 20 minutes, but I am measuring it so you can see how much over 3/4 c. it still is. 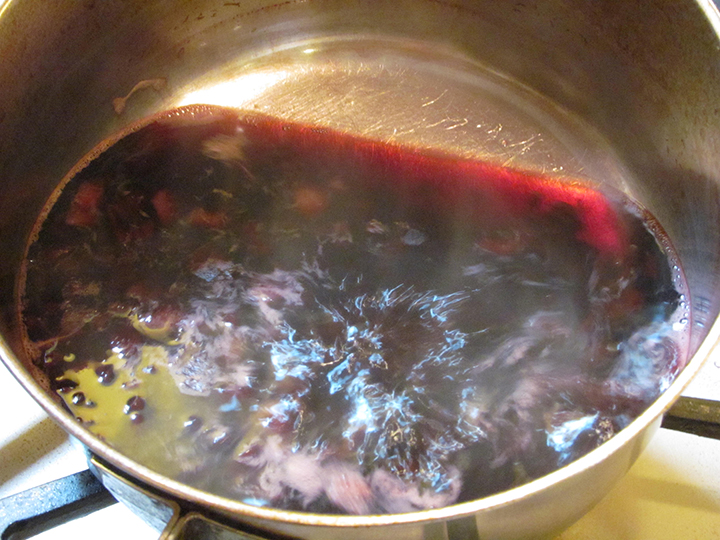 ©2015 Lisa Bond Photography, All Rights Reserved 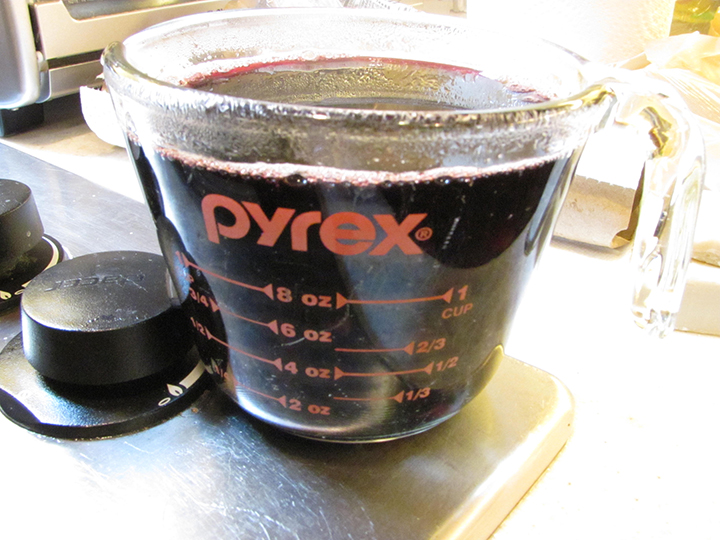 ©2015 Lisa Bond Photography, All Rights Reserved  ©2015 Lisa Bond Photography, All Rights Reserved 15 minutes later, let's check it again. 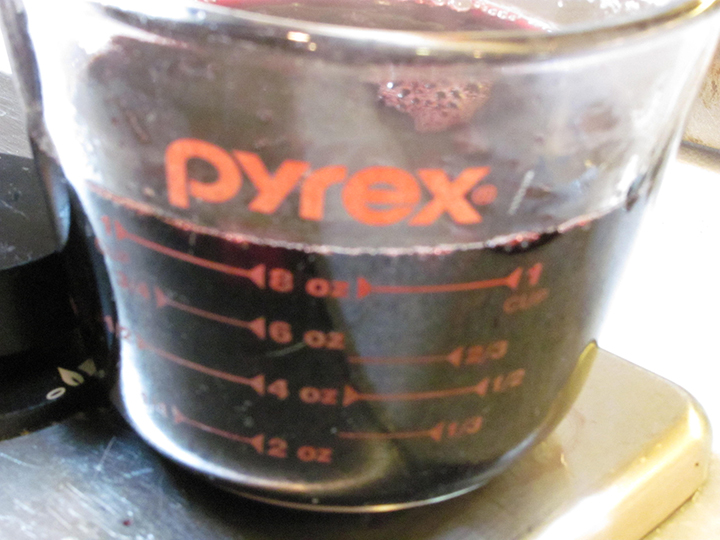 ©2015 Lisa Bond Photography, All Rights Reserved Hmmm, closer, but still over the limit.  ©2015 Lisa Bond Photography, All Rights Reserved This is better, still over, but good enough for me. 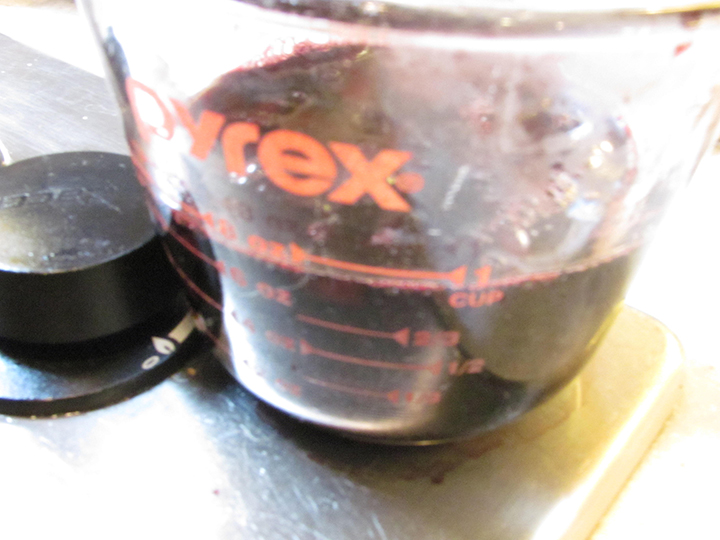 ©2015 Lisa Bond Photography, All Rights Reserved Add 1 T. butter and brown sugar, whisk until butter melts and sugar dissolves. Remove from heat. 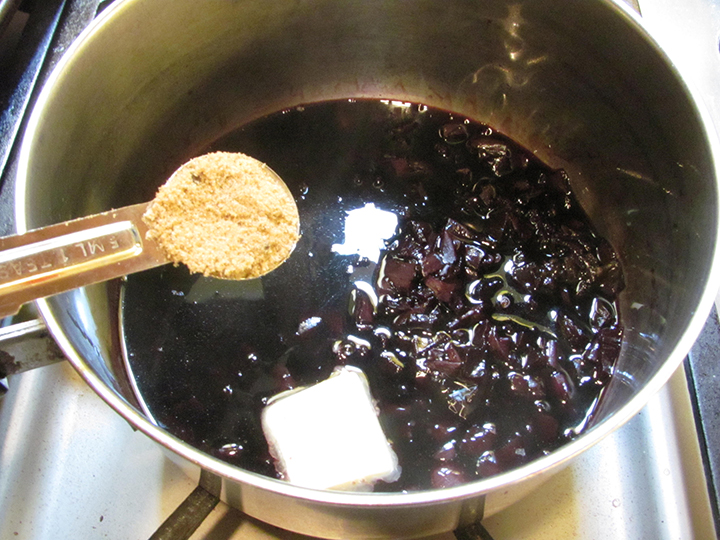 ©2015 Lisa Bond Photography, All Rights Reserved Mix remaining 8 T. butter and rosemary in small bowl. (I use a little less butter, as 2 T. per bun seems a bit much.) Set aside. 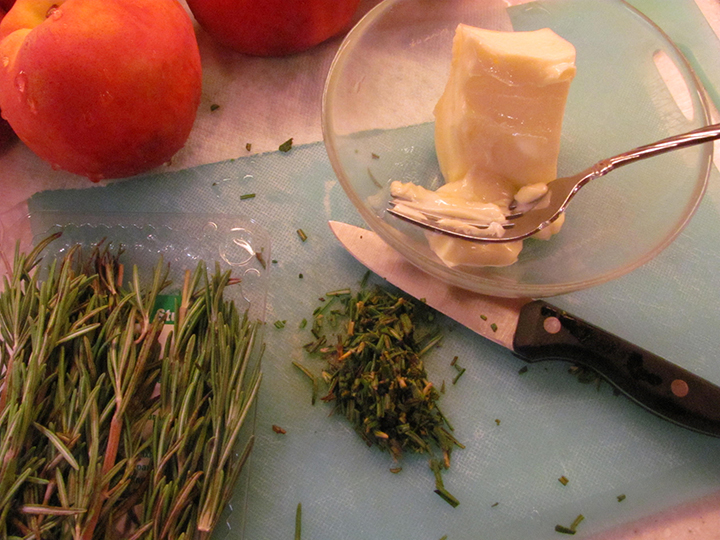 ©2015 Lisa Bond Photography, All Rights Reserved 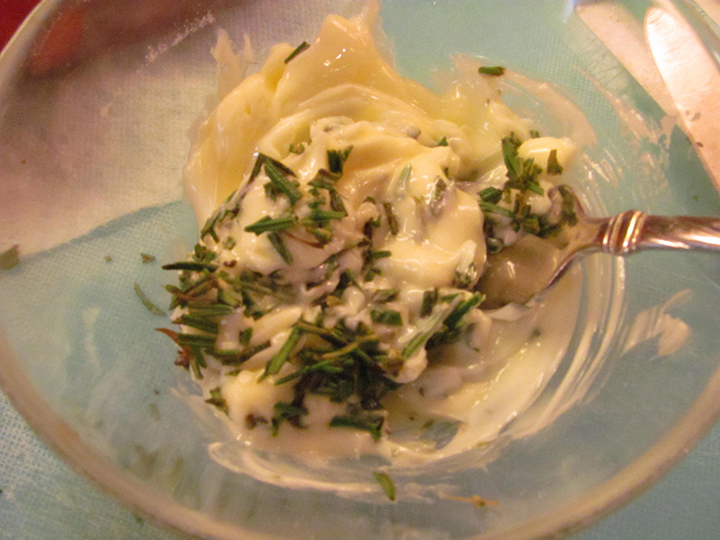 ©2015 Lisa Bond Photography, All Rights Reserved 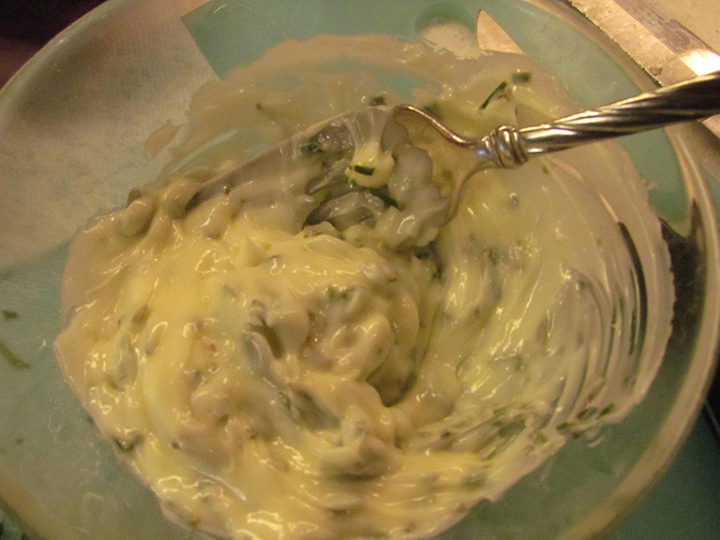 ©2015 Lisa Bond Photography, All Rights Reserved I like to get my focaccia at Trader Joe's because the price is right. This stuff can get pretty spendy. If you need 3 packages of it and it's 5 or 6 bucks a package, well you get the idea. But Trader Joe's didn't have it. I have a minimalist Trader Joe's by me, they are always out-of-stock on stuff. Anyways, I went to the local grocery store and settled on this because it was $1.99 a package. They are pretty small. I know I'm going to need 2 packages for sure. 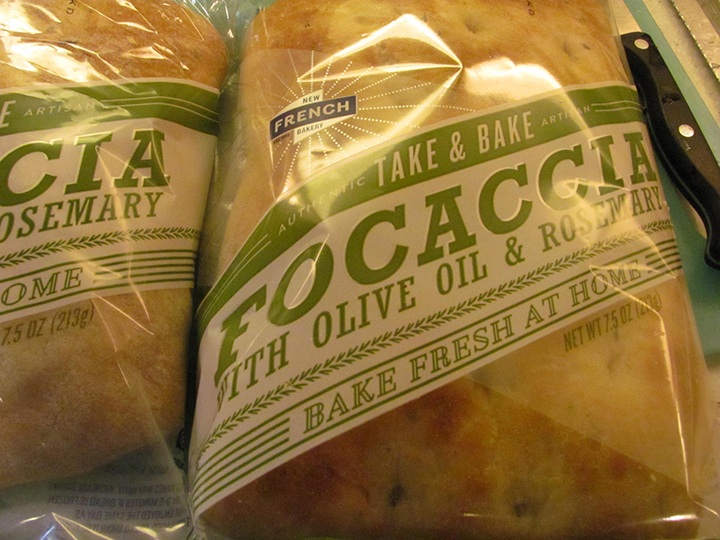 ©2015 Lisa Bond Photography, All Rights Reserved This bread needs to be trimmed to make the edges even. 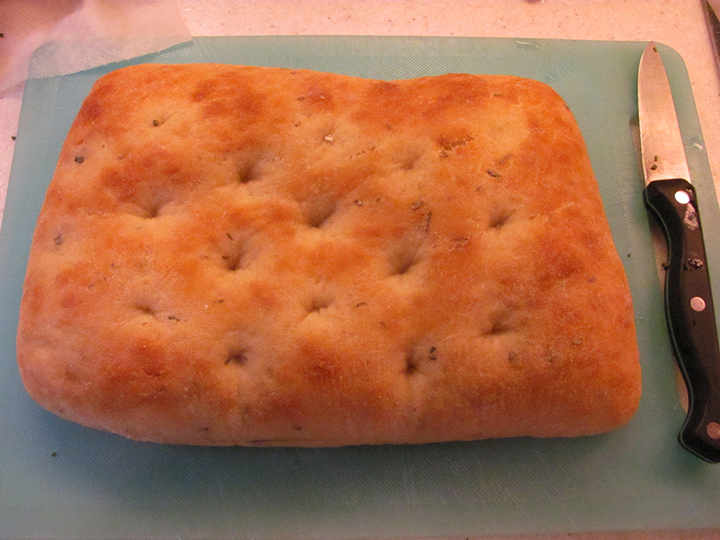 ©2015 Lisa Bond Photography, All Rights Reserved 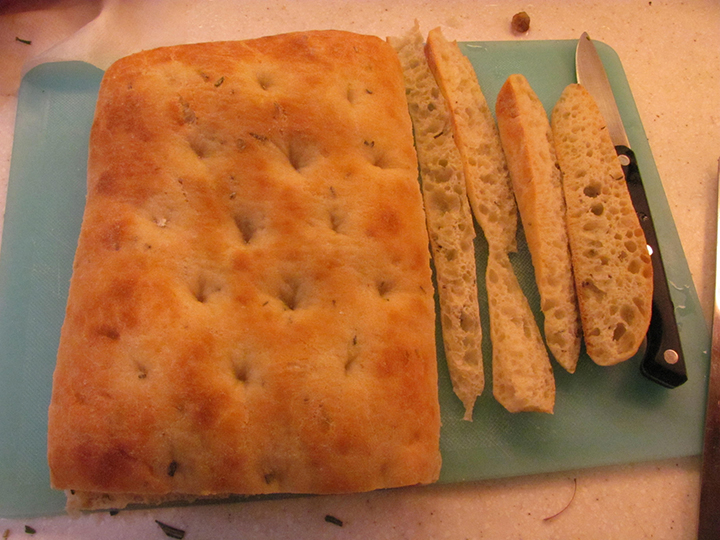 ©2015 Lisa Bond Photography, All Rights Reserved 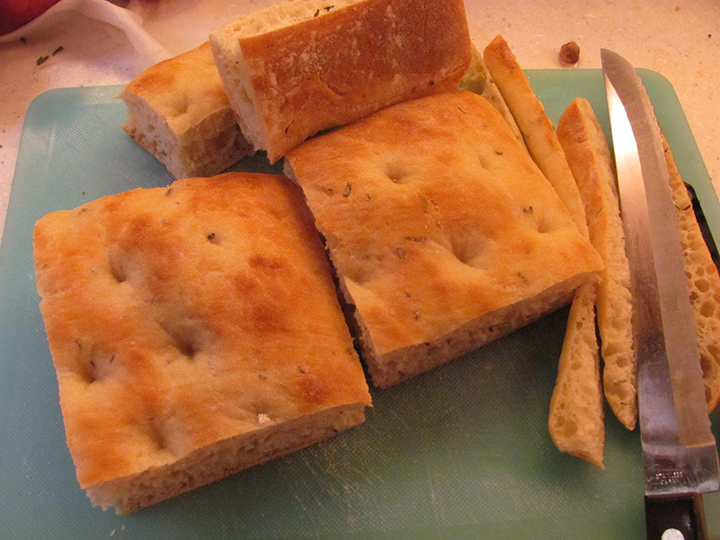 ©2015 Lisa Bond Photography, All Rights Reserved  ©2015 Lisa Bond Photography, All Rights Reserved Spread cut sides of bread with rosemary butter. Grill, cut side down, until golden, about 2 minutes. Arrange bread, grilled side up, on plates. 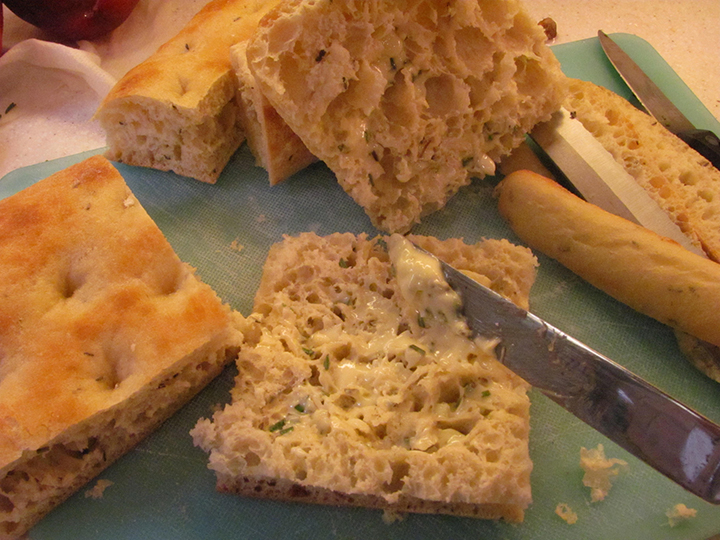 ©2015 Lisa Bond Photography, All Rights Reserved 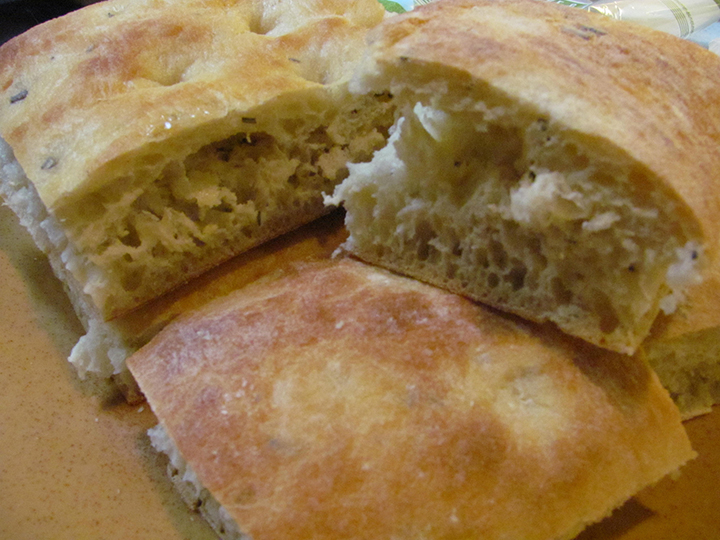 ©2015 Lisa Bond Photography, All Rights Reserved This is a good time to get the arugula ready as well as the cheese and tomatoes. The best price on arugula is again at Trader Joe's. This bag was $1.99. It will cost double that or more at a regular grocery store. This is a very bitter lettuce but it is a nice counter balance for the sharpness of the cheese and the sweetness of the burgers. 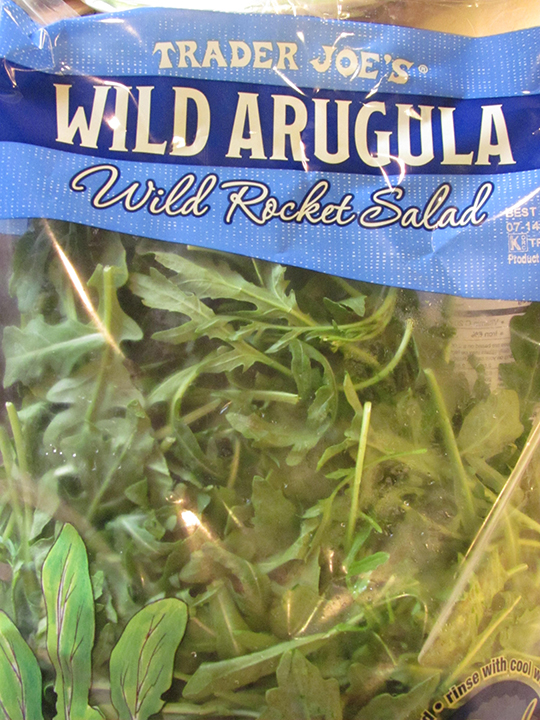 ©2015 Lisa Bond Photography, All Rights Reserved  ©2015 Lisa Bond Photography, All Rights Reserved 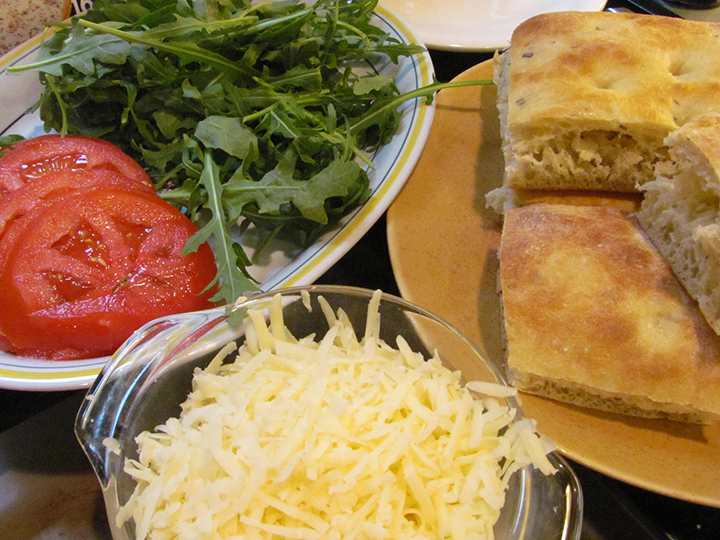 ©2015 Lisa Bond Photography, All Rights Reserved Prepare barbeque (medium-high heat). Mix beef, salt, pepper and 1/4 cup wine-shallot mixture in bowl. (Do not mix this until the last minute. If you mix it ahead of time, it will separate in the bowl or on the plate and there will be wine running everywhere.) Form meat into 4 5-inch squares or rounds. Brush grill rack with oil. Grill burgers until brown on bottom, about 3 minutes. Turn burgers and brush with wine-shallot mixture. 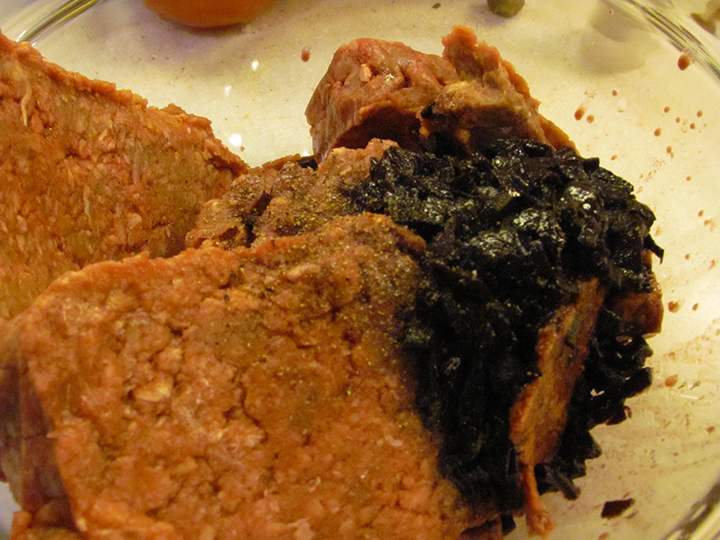 ©2015 Lisa Bond Photography, All Rights Reserved Anyone counting? You are correct, I used extra beef and made this into 6 burgers instead of 4. Some are also a little smaller for people or kids who want a smaller burger. 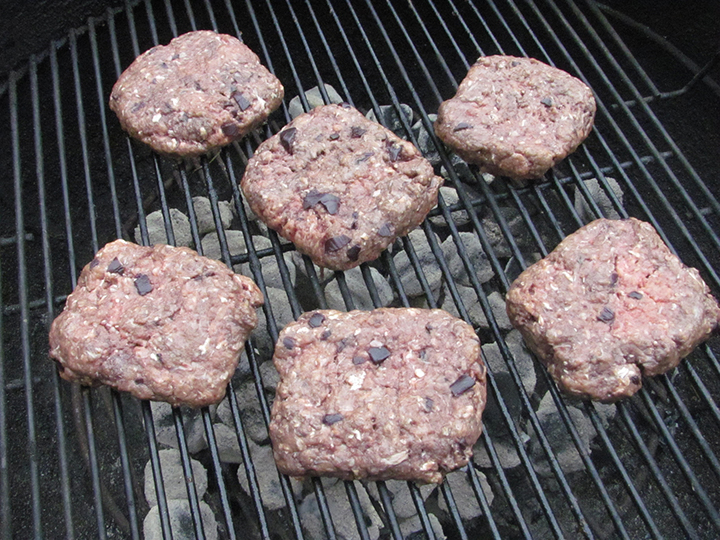 ©2015 Lisa Bond Photography, All Rights Reserved Continue grilling burgers until cooked to desired doneness, turning and brushing occasionally with wine-shallot mixture, about 4 minutes longer for medium-rare. Sprinkle with cheese after last turn and 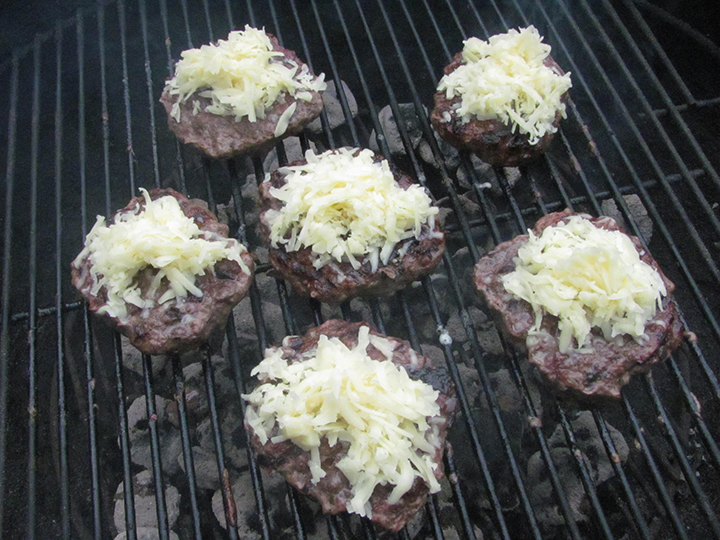 ©2015 Lisa Bond Photography, All Rights Reserved grill until cheese melts. 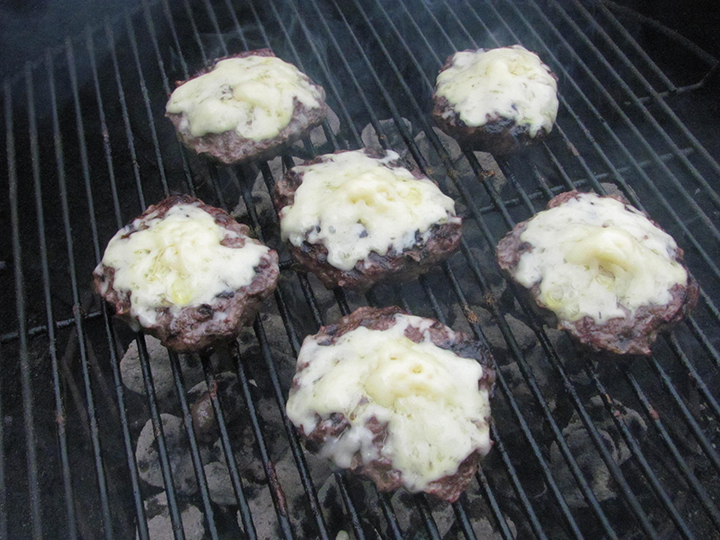 ©2015 Lisa Bond Photography, All Rights Reserved Top bottom halves with burgers, then tomatoes and arugula. Cover with top halves of bread. 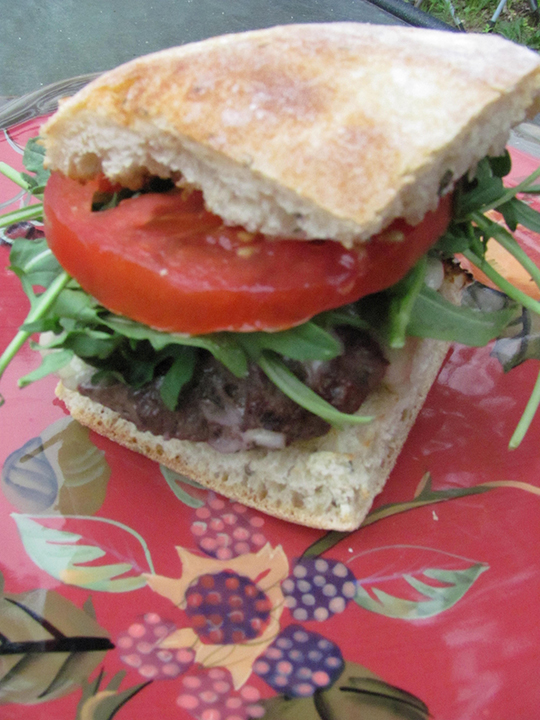 ©2015 Lisa Bond Photography, All Rights Reserved Cinnamon Crunch Peach Sundaes is from an issue of Bon Appetit, not sure of the date. I think this is Barbara Frenzl's recipe. 1 c. plus 6 1/2 T. sugar 3/4 c. water 6 T. dark corn syrup 3 cinnamon sticks, broken in half 6 whole cinnamon graham crackers, crushed to coarse crumbs 4 1/2 T. unsalted butter, melted 6 medium peaches, pitted, sliced into wedges 1 1/2 T. fresh lemon juice 3/4 t. ground cinnamon French vanilla ice cream (or I used vanilla frozen yogurt, just as good IMHO) 6 cinnamon sticks (optional) Stir 1 C. plus 2 T. sugar, 3/4 c. water, corn syrup and halved cinnamon sticks in heavy medium saucepan over medium heat until sugar dissolves; bring to boil. Reduce heat to low; simmer until syrup is reduced to 1 1/2 c., about 20 minutes. Cool, remove cinnamon sticks. (Can be made 1 week ahead. Cover; refrigerate.) Preheat oven to 350 F. Combine cracker crumbs, butter and 1 1/2 T. sugar in small bowl; toss to coat evenly. Spread mixture out on small baking sheet. Bake until golden, stirring occasionally, about 5 minutes. Cool. Mix peaches, 3 T. sugar, lemon juice and ground cinnamon in medium bowl. Let stand until juices form, at least 15 minutes and up to 1hour. Place 2 scoops of ice cream in each of 6 bowls. Spoon peaches and juices over ice cream. Drizzle with syrup and sprinkle with crunch topping. Garnish with cinnamon sticks, if desired, and serve. Again, here is the recipe broken down into steps, with my photos and comments. 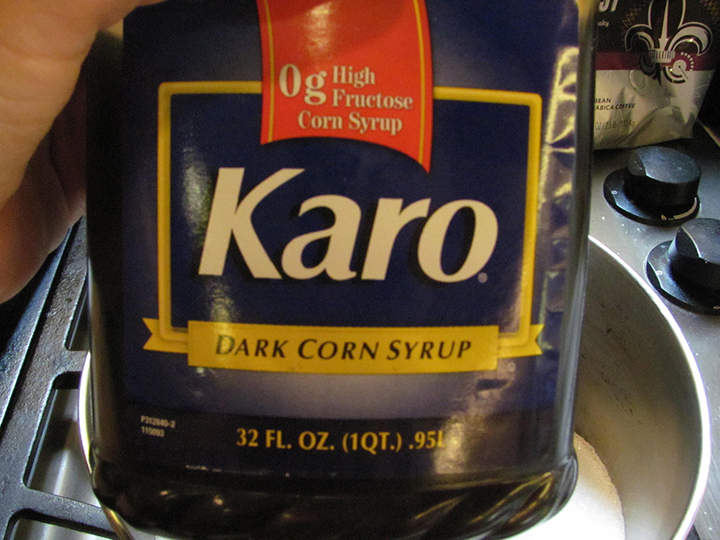 ©2015 Lisa Bond Photography, All Rights Reserved 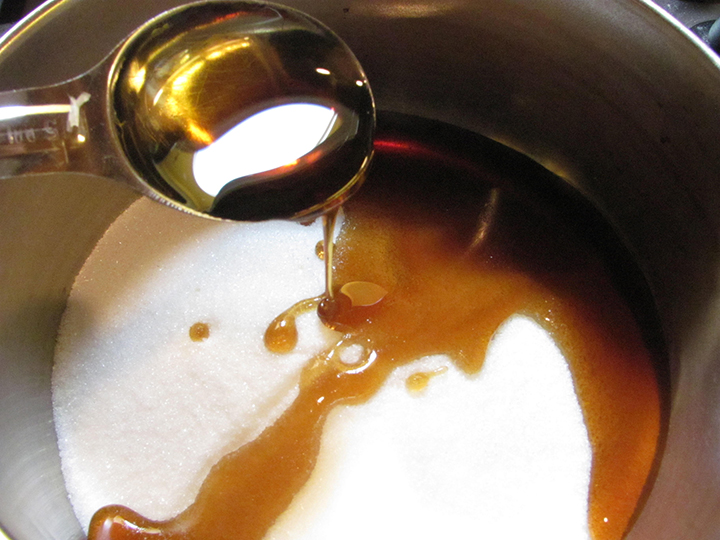 ©2015 Lisa Bond Photography, All Rights Reserved Stir 1 C. plus 2 T. sugar, 3/4 c. water, corn syrup and halved cinnamon sticks in heavy medium saucepan over medium heat until sugar dissolves;  ©2015 Lisa Bond Photography, All Rights Reserved 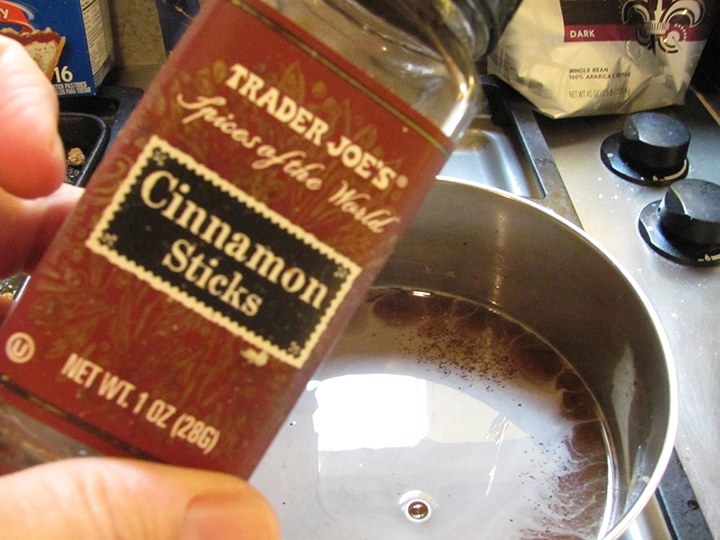 ©2015 Lisa Bond Photography, All Rights Reserved 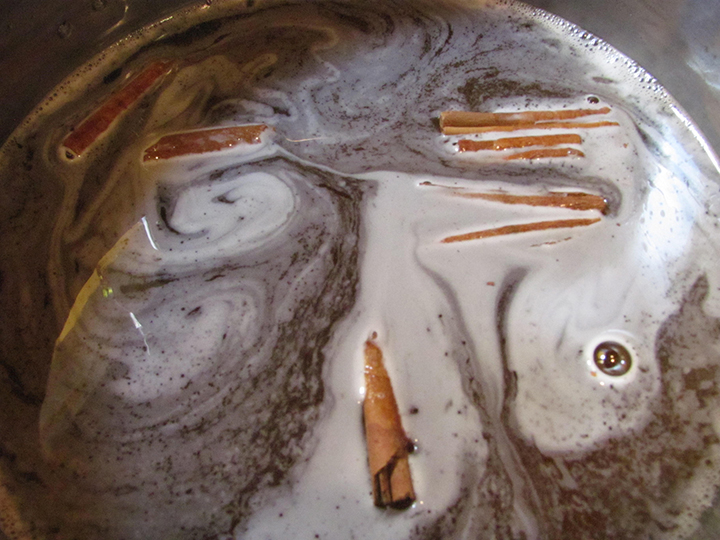 ©2015 Lisa Bond Photography, All Rights Reserved bring to boil. Reduce heat to low; simmer until syrup is reduced to 1 1/2 c., about 20 minutes. 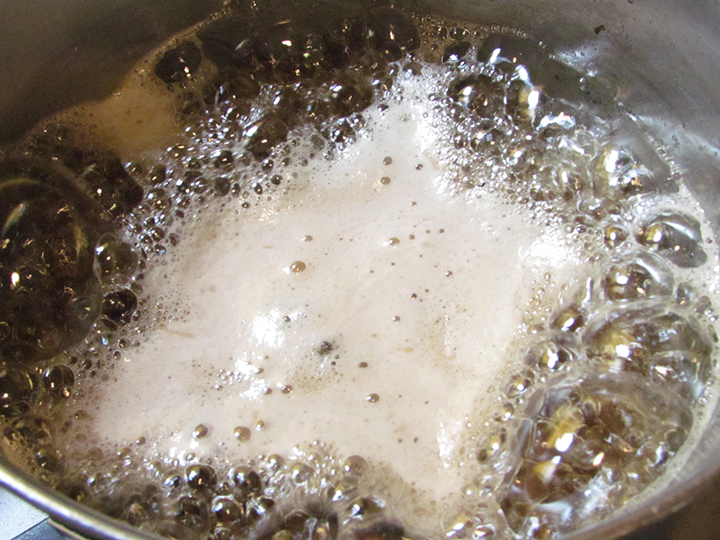 ©2015 Lisa Bond Photography, All Rights Reserved 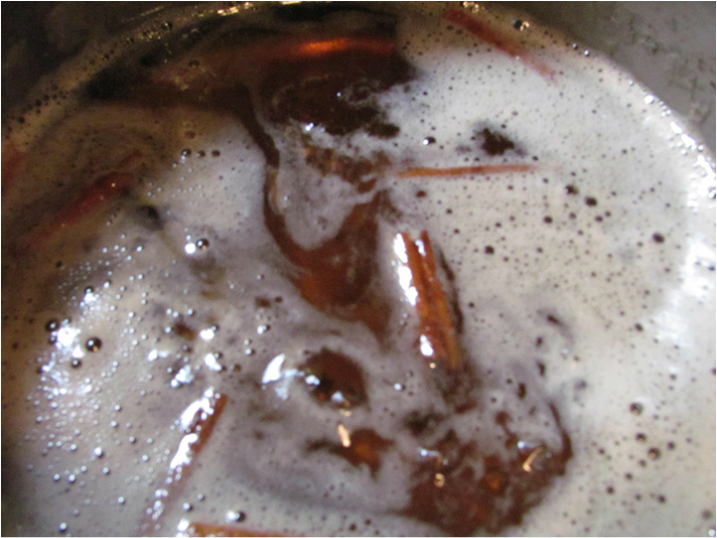 ©2015 Lisa Bond Photography, All Rights Reserved Cool,  ©2015 Lisa Bond Photography, All Rights Reserved remove cinnamon sticks. (Can be made 1 week ahead. Cover; refrigerate.) 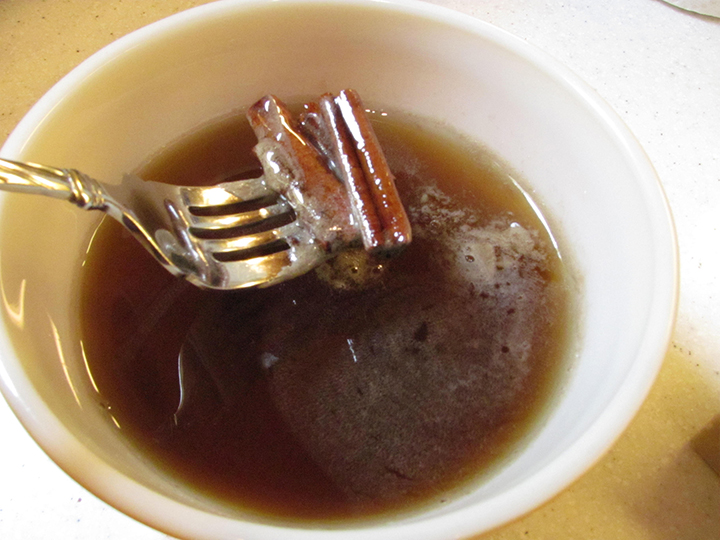 ©2015 Lisa Bond Photography, All Rights Reserved The cinnamon syrup is done. Now let's move on to the cinnamon crunch. Preheat oven to 350 F. Combine cracker crumbs, butter and 1 1/2 T. sugar in small bowl; 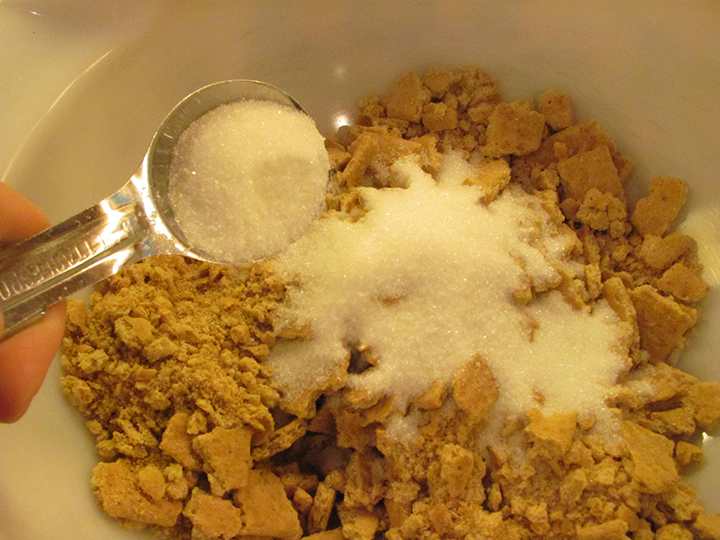 ©2015 Lisa Bond Photography, All Rights Reserved 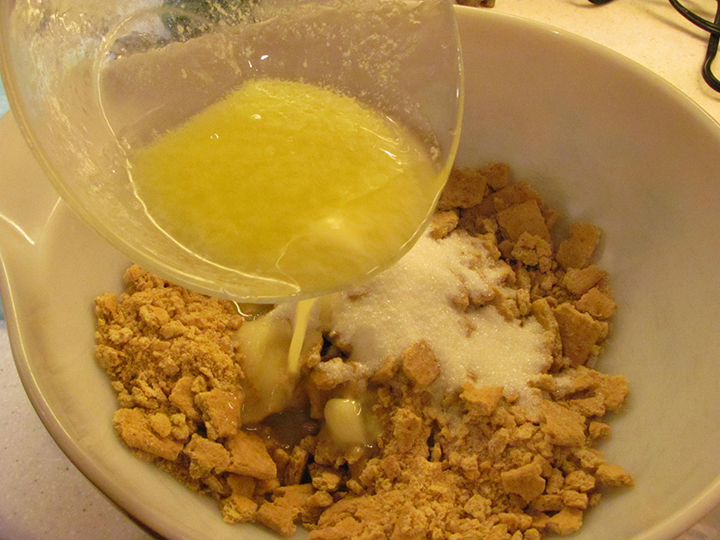 ©2015 Lisa Bond Photography, All Rights Reserved 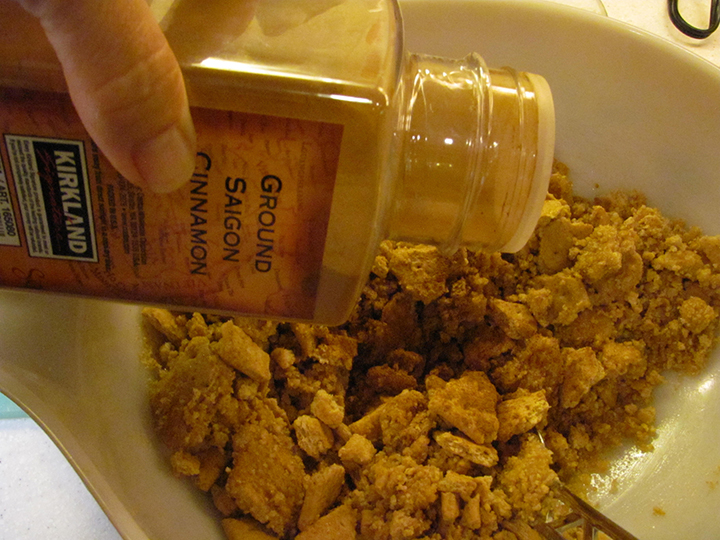 ©2015 Lisa Bond Photography, All Rights Reserved Why am I adding cinnamon? Because I only had regular graham crackers, so I'm turning them into cinnamon graham crackers. toss to coat evenly. 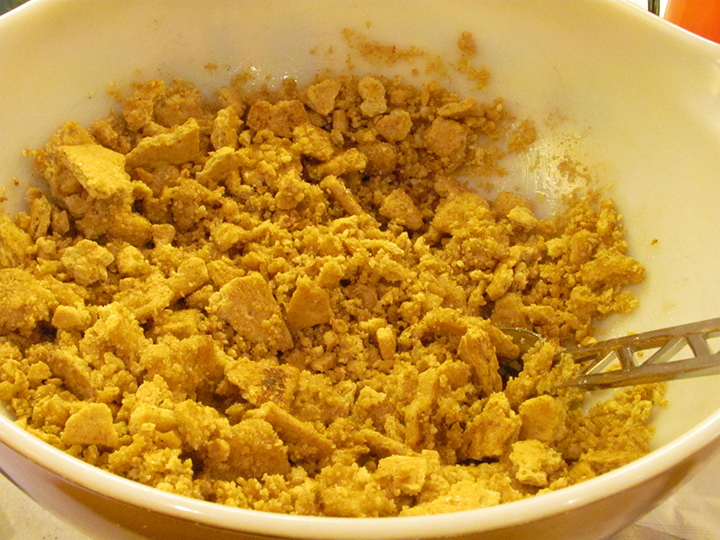 ©2015 Lisa Bond Photography, All Rights Reserved Spread mixture out on small baking sheet. Bake until golden, stirring occasionally, about 5 minutes. Cool. Did I mention that you'll want to double this part of the recipe? Why? Because it's so good you or your kids will be snacking on it and then there won't be enough for the sundaes later. 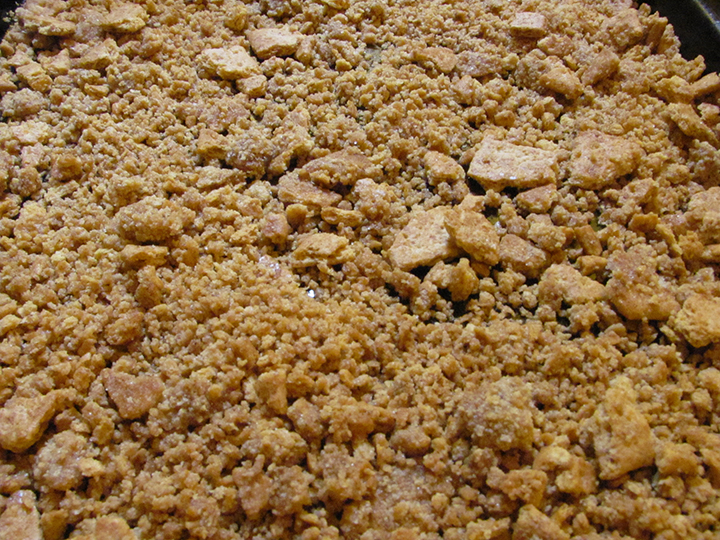 ©2015 Lisa Bond Photography, All Rights Reserved The cinnamon crunch is done. Now for the peach part of the recipe. Mix peaches, 3 T. sugar, lemon juice and ground cinnamon in medium bowl. 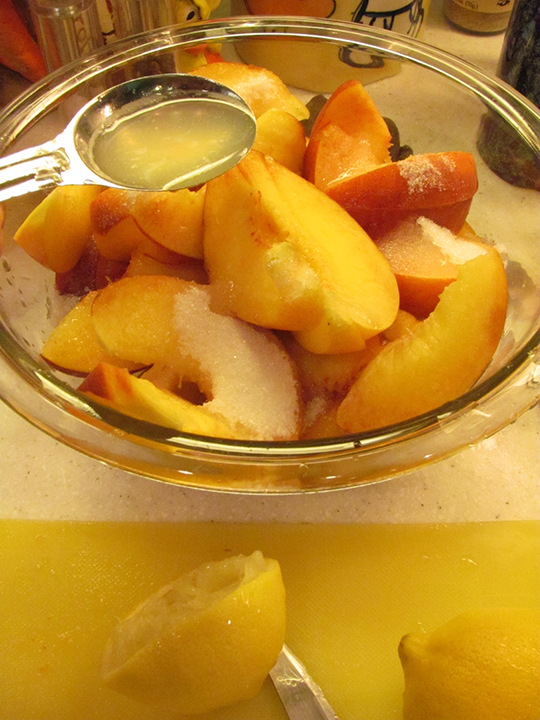 ©2015 Lisa Bond Photography, All Rights Reserved 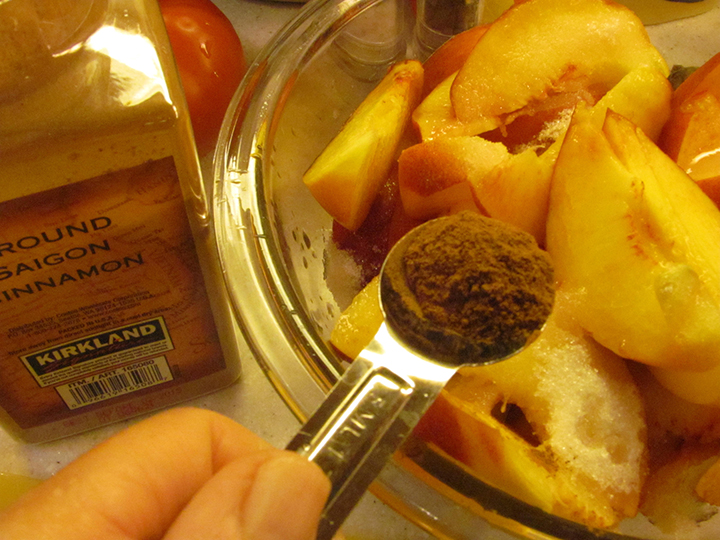 ©2015 Lisa Bond Photography, All Rights Reserved Let stand until juices form, at least 15 minutes and up to 1hour. 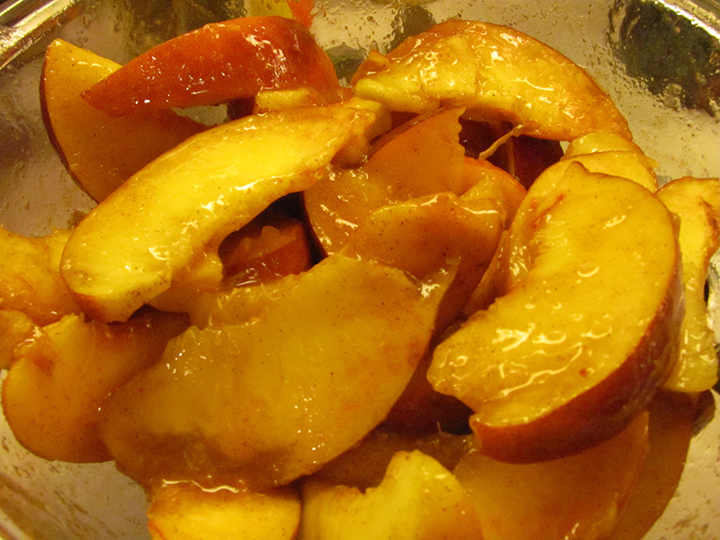 ©2015 Lisa Bond Photography, All Rights Reserved Place 2 scoops of ice cream in each of 6 bowls. Spoon peaches and juices over ice cream. Drizzle with syrup and sprinkle with crunch topping. Garnish with cinnamon sticks, if desired, and serve. 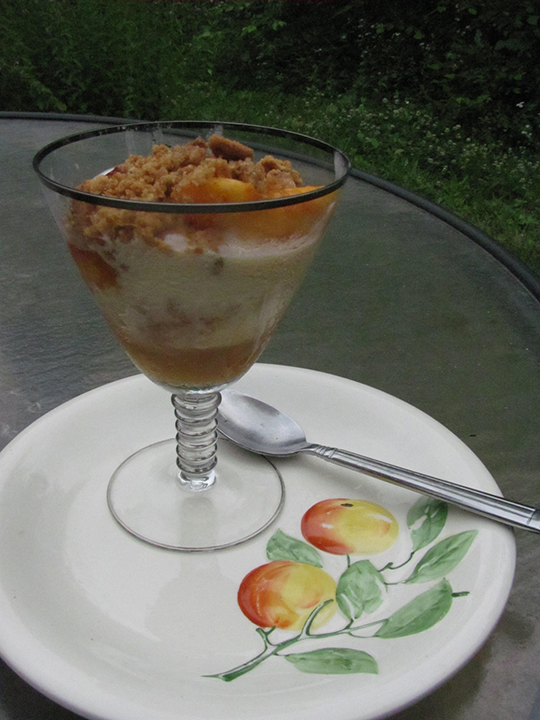 ©2015 Lisa Bond Photography, All Rights Reserved And here is the grand finale. As always, thank you for stopping by and I hope you are enjoying a fabulous summer! 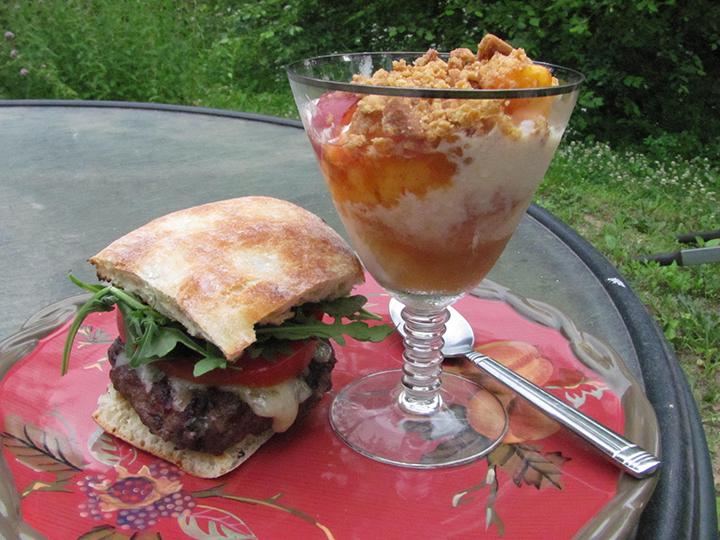 ©2015 Lisa Bond Photography, All Rights Reserved Hello potential Minnesota tourists! Now that we've had our first significant snowfall of the season, it is safe to officially declare the beginning of winter. As such, there might be a traveler or two out there who has Minnesota on their upcoming agenda and might be thinking, "I wonder what the driving is going to be like there?" Wonder no more. This blog will present you with the photos and a few well-chosen words to sum up driving during the four seasons. First off, let's set the record straight. There are actually only two seasons in Minnesota: winter and summer. Fall only lasts for a few weeks and we like to call it Indian Summer around here, as it occurs sometime in September or early October, long before any leaves have dropped and the pools probably still have water in them. Yes, we really do have pools. Every Minnesotan either has a lake or a pool. It's one of our residential rights. Then we play hockey or skate on them in the winter. The last few years, it's been snowing in April and May, therefore, so much for Spring. The mosquitos will be biting by the time the snow melts. That means it's officially summer. Now for those pictures I promised. Here's what you can expect driving in Minnesota in the Summer: As soon as the last barrel is picked up, the snow starts flying. Here's what you can expect in the Winter: Since you might be coming in Winter, it's helpful to know about "White Knuckle" steering. To keep with the times and at least appear hip, let's hereinafter refer to it as WK. It's a simple procedure, you'll be able to learn it quickly and it will come in handy right out of the rental car parking lot. First of all, put your hands in the proper 10 and 2:00 position. Never mind what your teen's driving instructor (the paid one) is telling them about 8 and 4:00. You won't be able to achieve a proper WK doing that. Get your hands at 10-and-2. Now grip the steering wheel as tight and hard as you can, until your knuckles start to turn white. It might take awhile for them to turn white, just keep hanging on. There you go, now you've got it. The reality is, you won't have to practice WK much at all. Once the car starts sliding out of control (what we in Minnesota like to affectionately refer to as "fish-tailing" and it's not something that happens in a boat) WK is an auto-reflex and your hands will immediately know what to do. It doesn't really help steer the car any better, but you will feel more in control knowing that you are hanging on as tight as you can. If you see a patch of ice, do not, I repeat, do not hit the brakes. Engage the WK and start praying out loud as you "glide" across the ice. Taking several deep breaths or breathing rapidly, whatever works for you, might help too. When you come out the other side of it, a small celebration will be in order. Well, there you go. That's about everything you'll need to know about driving here. If you come in the summer, the driving will go as slow as it does in the winter, oh I'd say around 10 mph, 20 if you're lucky on account of all the cones and barrels and lane closures. There's a lot of road repair to be done here after the snowplowing and pot-hole formations (to be explained in a future blog). The road crews do not waste a second getting right to work on fixing the winter damage and coming up with new projects. The roads need to be rebuilt regularly after what they go through every year. You'll have plenty of time to find your way around going at that speed. There might be some horns blaring and fingers flying. Don't be fooled by "Minnesota Nice" and misinterpret it for waving when you are driving. We are one of the top states for Road Rage incidents, particularly in the summer. You can probably see why just looking at the pictures. There is much less road rage in the winter, probably on account of the WK we're all doing. It's best to ignore it and fast forward to the end of the blog. The moral of the story is: leave more time than you think to get there. Double or triple the time it would take you to drive that distance in most other places. If Mapquest tells you 20 minutes, make it 60. You will impress everyone by being on time to your destination. Don't tell 'em you heard it from the Queen of IML8. And on a final note, after all that driving, you deserve to relax. You're likely to see one of these along your route or many other alternatives. We have A LOT of liquor stores here, not like some other states. Pull an immediate right or left and take care of business. You'll thank me later!  Many of summer's good times at my house have revolved around my kids playing sports. This year, I have especially enjoyed watching the 13 year old boys steal bases. When they started stealing a year or two ago, I can't quite remember when it was, they were unsure of themselves, only running when the base coach told them to. Now they are very comfortable with it and seem to enjoy taunting the pitcher, laughing and teasing, hopping back and forth between bases, just waiting for their chance to run. By the time they get a little older, the fun of it seems to wear off and it becomes a lot more predictable. One thing I have noticed about photographing sports is that when you are a spectator, you generally do not see the looks on the players' faces because most people are watching the ball. Since a photographer is able to freeze both in time...the ball and the players' faces, it is fun to look at them later and see the facial expressions you probably missed in the field. Here's hoping your summer has plenty of fun sprinkled in it! Originally published Nov. 4, 2012 Fall as a season is about 3 months short for me. With all due respect to the calendar’s dates, here’s how it goes in Minnesota: Spring 3 months, Summer 3 months, Fall 4-6 weeks, and Winter 5 months. There’s a couple extra weeks in there but this is a flexible calendar. Following is a more detailed analysis, if you are curious. Spring lasts from about April to June so I’d say 3 months, give or take a couple of weeks. Summer runs from somewhere in June until maybe sometime in September, so a good 3 months there as well. Fall is from sometime in September through pretty much most of October making it the shortest season at about 4 or 6 weeks tops. Winter can kick in during October but most likely early November and lasts through March, sometimes even into April making it the longest season here at 5 months plus. 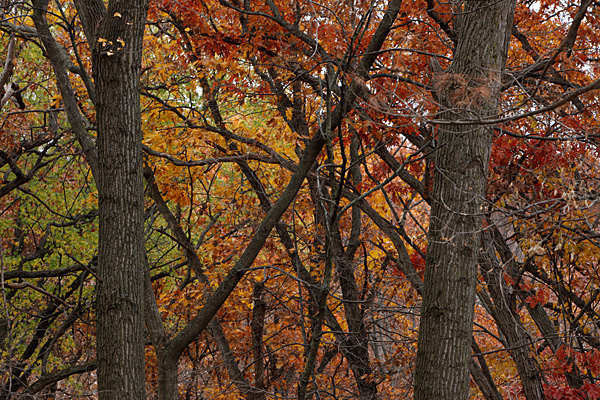
©2012 Lisa M. Bond Photography
When Fall rolls around, it is an intense and concentrated period of color and if you are into capturing it with a camera then one must get busy and focus. Fall also has the same issue as Spring, that being the wind. If one subtracts all the days when it is too windy to shoot, I’m guessing half of those possible 30-40 days of the season just went out the window. If only Fall was Winter we could really kick back and enjoy it. At any rate, one day while I was enjoying the display of colors, I got to thinking there sure is a lot of competition out there for attention. When we survey the landscape, which color grabs our eye the most: red, yellow or green? (I didn’t have any orange in my test acreage.) I guess it’s the hidden psychologist/marketing director inside of me that wanted to know the answer to this question. Here I tried to find trees in order of Green-red-yellow, 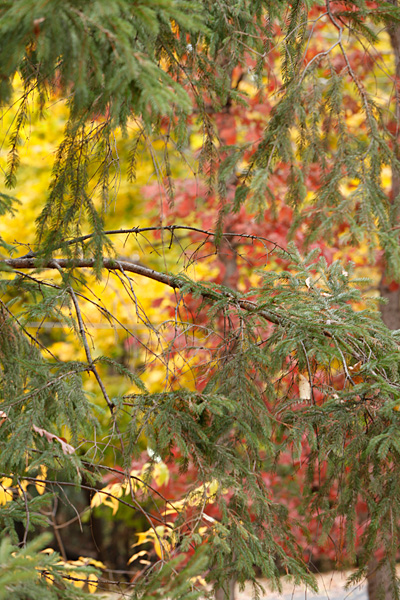
©2012 Lisa M. Bond Photography
Green-yellow-red, 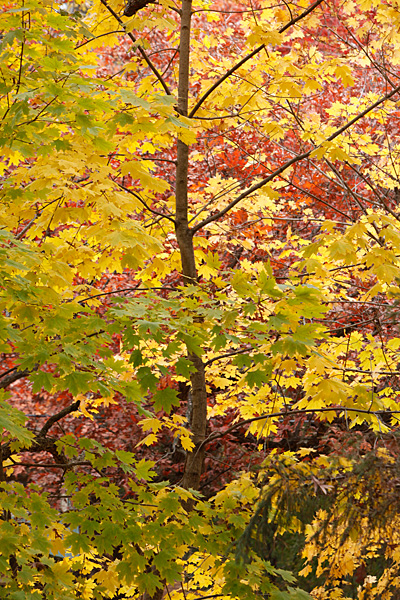
©2012 Lisa M. Bond Photography
Yellow-green-red, 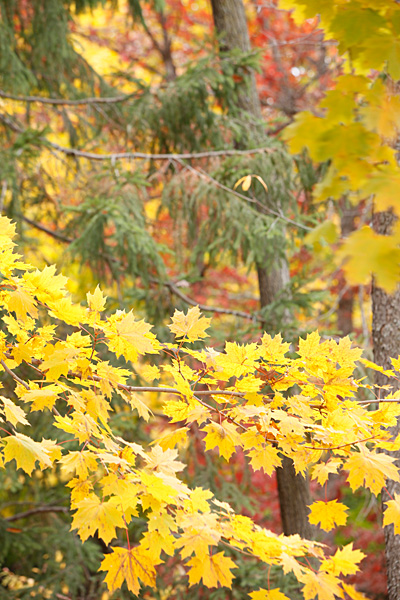
©2012 Lisa M. Bond Photography
Yellow-red-green, 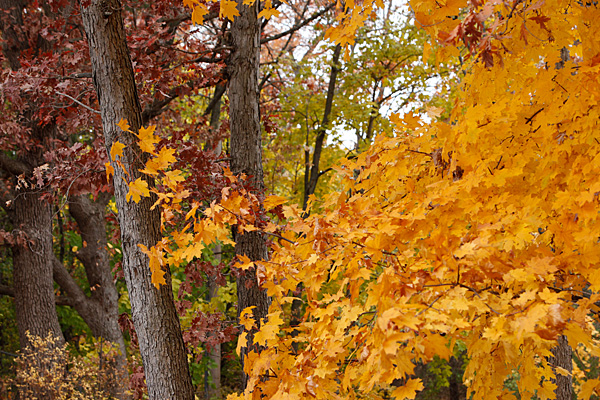
©2012 Lisa M. Bond Photography
Red-green-yellow, 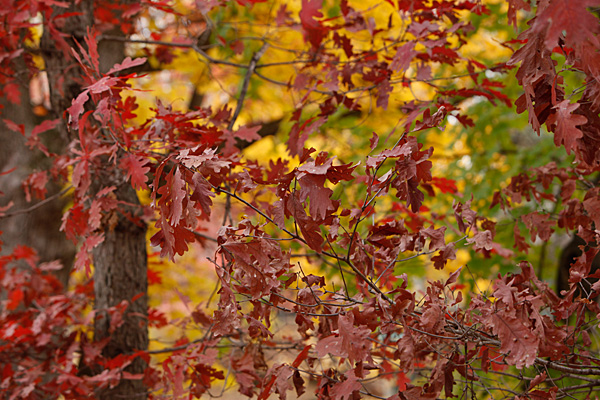
©2012 Lisa M. Bond Photography
and finally Red-yellow-green. 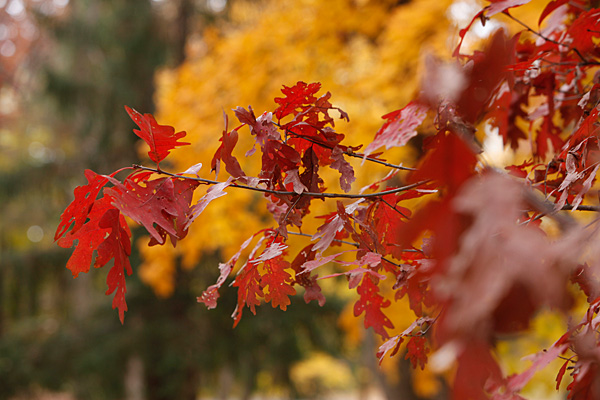
©2012 Lisa M. Bond Photography
What color did you notice first? Did it matter what order they were in? The tree color I noticed first was: Green Yellow Red VoteView Results Polldaddy.com Take Our Poll The tree color I noticed second was: Yellow Red Green VoteView Results Polldaddy.com Take Our Poll The tree color I noticed last was: Red Green Yellow VoteView Results Polldaddy.com Take Our Poll Then I got to thinking some more. Perhaps my experiment had too many variables such as size of tree, number of leaves, and percentage of frame each tree occupies. So I thought I would try it on a smaller scale with one leaf representing each color. Do you notice any differences now? Green-yellow-red, 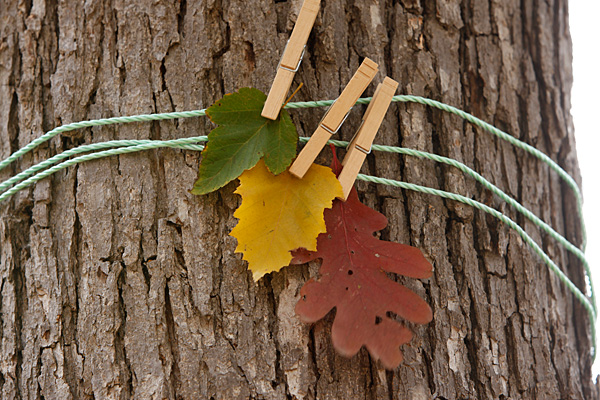
©2012 Lisa M. Bond Photography
Green-red-yellow, 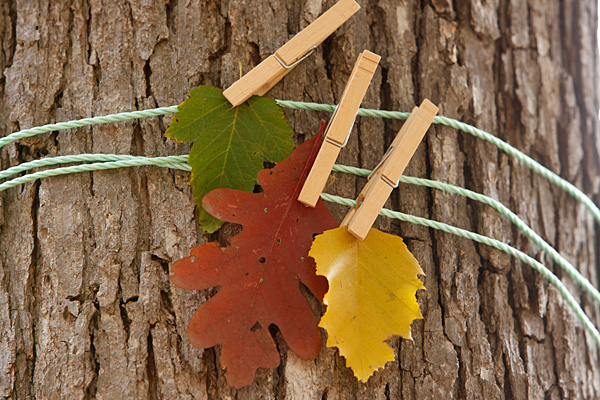
©2012 Lisa M. Bond Photography
Yellow-red-green, 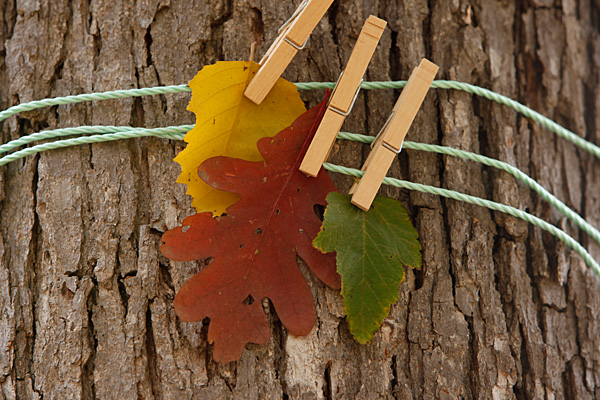
©2012 Lisa M. Bond Photography
Yellow-green-red, 
©2012 Lisa M. Bond Photography
Red-yellow-green, 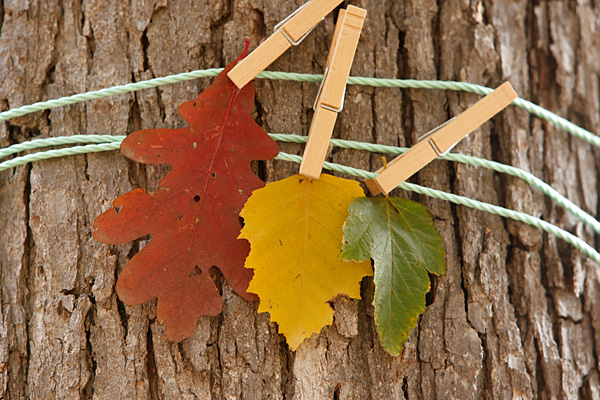
©2012 Lisa M. Bond Photography
and last but not least, Red-green-yellow, 
©2012 Lisa M. Bond Photography
The leaf color I noticed first was:
Green Yellow Red VoteView Results Polldaddy.com Take Our Poll The leaf color I noticed second was: Red Yellow Green VoteView Results Polldaddy.com Take Our Poll The leaf color I noticed last was: Red Yellow Green VoteView Results Polldaddy.com Take Our Poll Perhaps another variable could be whether you are female or male. I am:Male Female VoteView Results Polldaddy.com Take Our Poll Thank you for taking my polls. Maybe this will help you make your next marketing decision, at least as far as color is concerned! Originally published Aug. 18, 2012 Visiting a farmers' market in late summer showcases many different fruits and vegetables than one can find at a spring or early summer market. I have been meaning to visit the market and in addition, a special one that is located in Minneapolis. Today I decided to merge those two “have-to-dos” together. 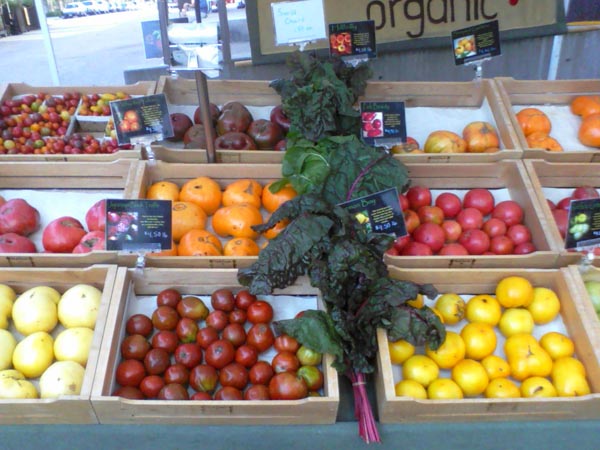  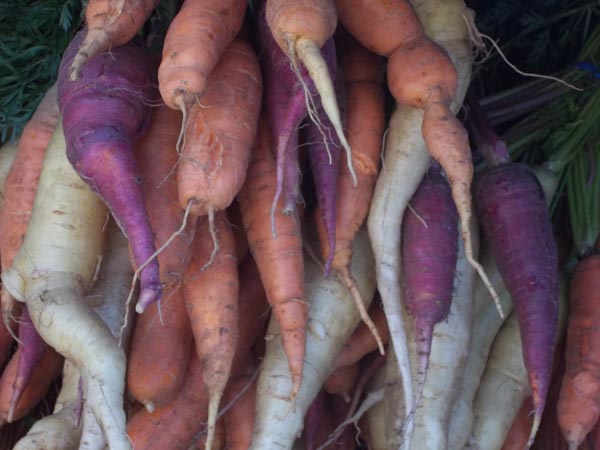 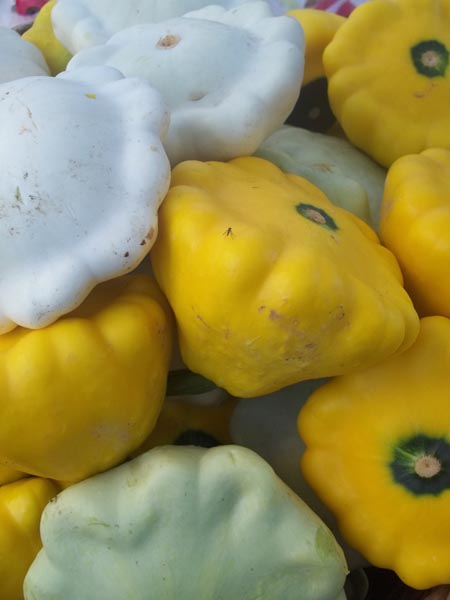 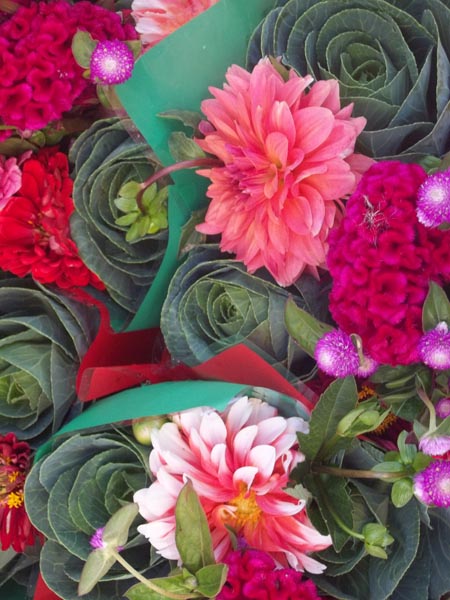 I am not certain how to appropriately describe this market to you. Some words that come to mind are: high-end, organic, exclusive, heirloomish, luxurious, gourmetish. The name is Mill City Farmers' Market. It is only open Saturdays from 8-1 through late October. http://millcityfarmersmarket.org/ 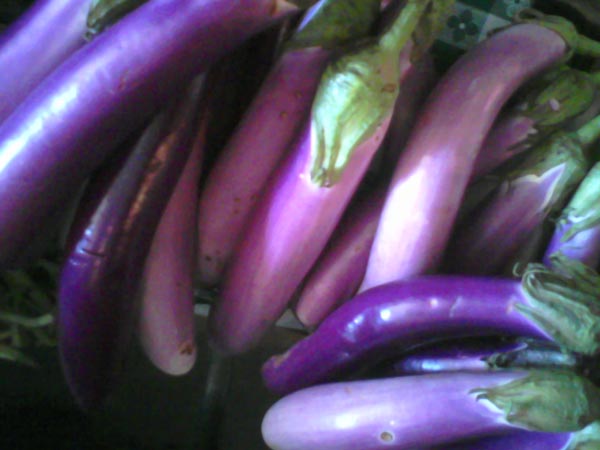 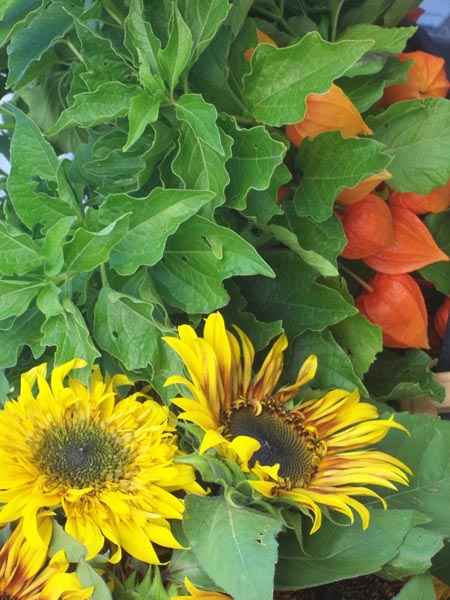 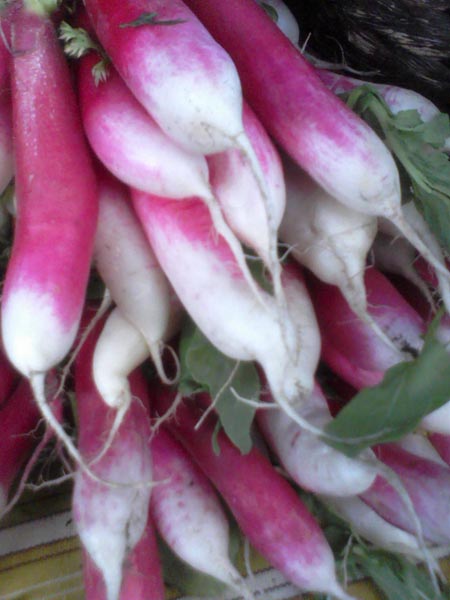 I do apologize about the images that are fuzzy, my little hand-held ran out of batteries and I had to resort to my (old) phone camera. 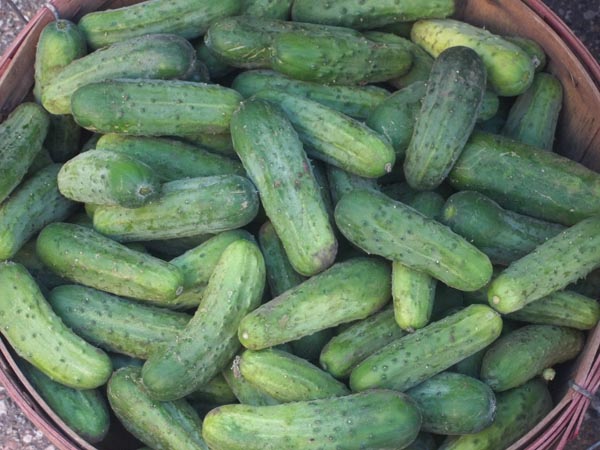 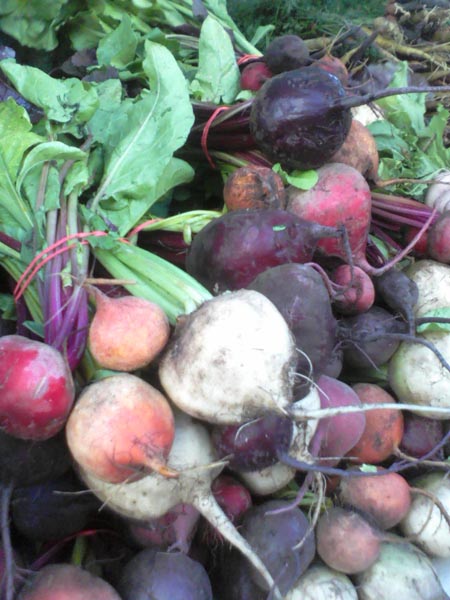 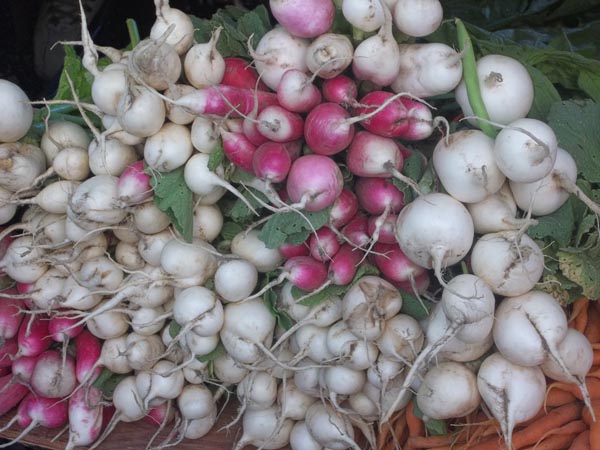  Here is what I ended up bringing home.  ©2012 Lisa M. Bond Photography The prize of my visit is something I have been searching for a few years now. Squash blossoms. They were only two dollars a bunch. I am thrilled to try them. Now, if I can only remember where I saw that recipe!
Originally published July 15, 2012 Now that the 4th of July is behind us, summer can really start going by quickly. Before the leaves start turning colors, I thought I would share one of my favorite summer recipes with you. Some time ago I found myself with a lot of lemons and luckily this limoncello recipe found me. Follow along with me while I make this year’s batch and a pitcher of lemonade with the leftover lemon juice. 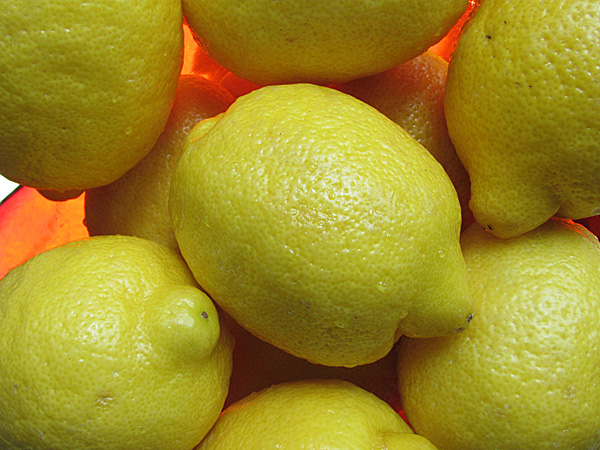
©2012 Lisa M. Bond Photography
First of all, this recipe takes 5 days to make. Please, don’t leave! All good things take time. Most of the work comes at the end when you strain the limoncello through coffee filters. The rest is easier than baking a cake. My guess is this will take less than 3 hours of your time, maybe even two hours total investment. If you like a lemon drop, you will love this beverage. Secondly, if you are going to do it, I recommend doubling the recipe. Since you are making the effort, it will pay off and you will have more to share with friends and family. So mise en place: Limoncello (Single recipe) 2 lbs. lemons 1 quart (4 c.) vodka 6 c. purified water 2 1/2 c. cane or granulated sugar* or if you do it my way… Limoncello (Double recipe) 4 lbs. lemons (I recommend a big bag from Costco) 2 quarts (8 c.) vodka (I also use Kirkland Vodka, made by Gray Goose but half of the GG price) 12 c. purified water 5 c. cane or granulated sugar* *The recipe I am using recommends cane sugar. However, I have found that the limoncello takes on a slightly brownish color which is somewhat unappetizing. So, I now use fine granulated sugar. 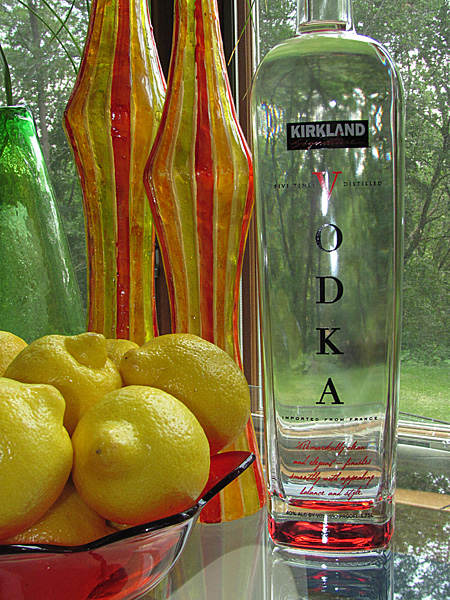
©2012 Lisa M. Bond Photography
That’s easy right? Now, get a very fine grater, a microplane grater, and zest the freshly washed lemons. Just the yellow – no white! 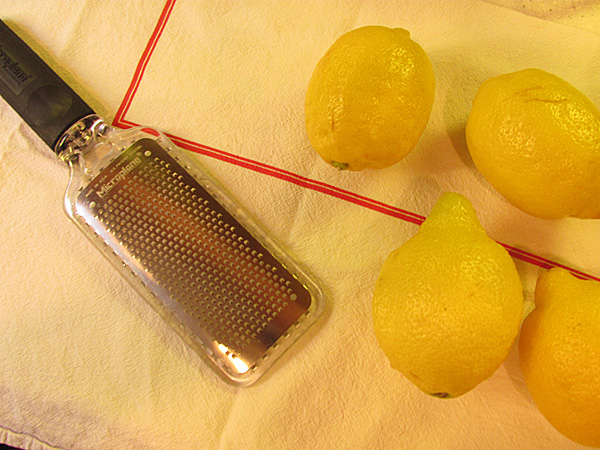 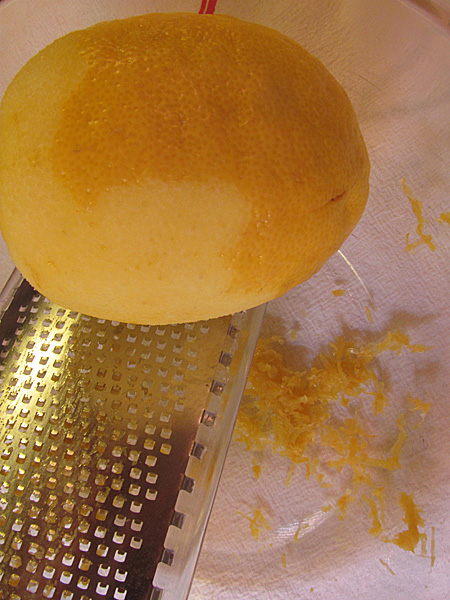 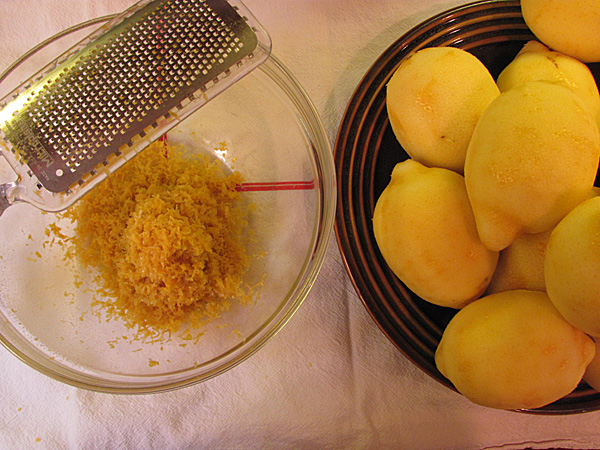 Add the zest to the vodka (use a funnel – I made mine with a piece of plastic cutting board), 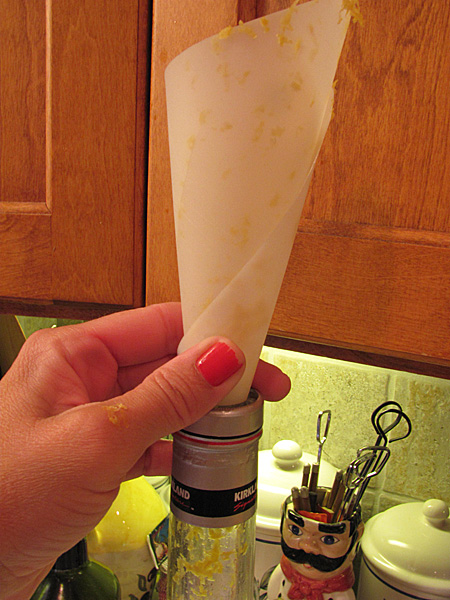
©2012 Lisa M. Bond Photography
seal tightly and store in a dark and cool place for 5 days. 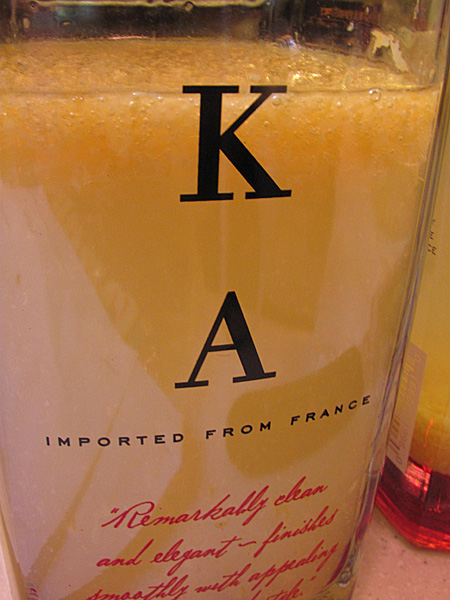
©2012 Lisa M. Bond Photography
As you can see, I have accumulated a few vodka bottles over the years. I save them for this very reason. When you add the simple syrup later, you will need the extra room, so it makes sense now to use only half of the bottle’s space. 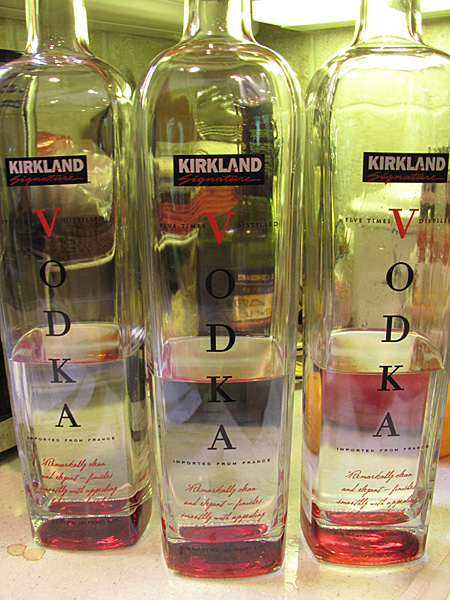
©2012 Lisa M. Bond Photography
Now, take the lemons that have been zested, cut them in half 
©2012 Lisa M. Bond Photography
and use a juicer to extract all the lemon juice. 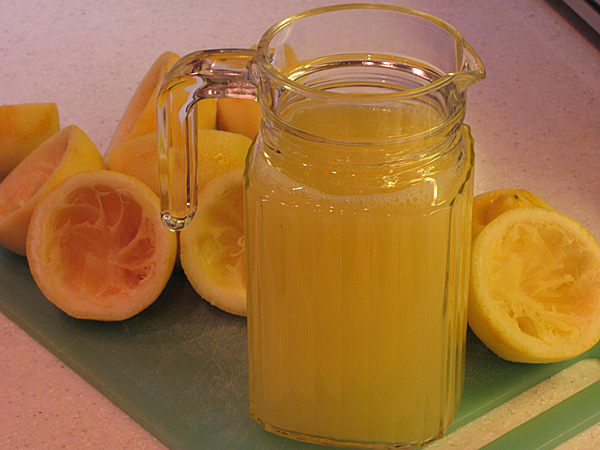
©2012 Lisa M. Bond Photography
Pour the lemon juice in a pitcher, add sugar and water. In my case, since I doubled the recipe, I ended up with 2 cups of lemon juice. So I took 1 1/2 cups of lemon juice (set the other 1/2 cup to the side), add 1 to 1 1/2 cups of sugar (depending on how sweet you like it) and 3 cups of water. Stir and refrigerate. The lemonade is done. Now, take the extra 1/2 cup lemon juice and if you have a tiny ice-cube tray, pour the lemon juice into each little cube. Mine is about 1 Tablespoon per cube. 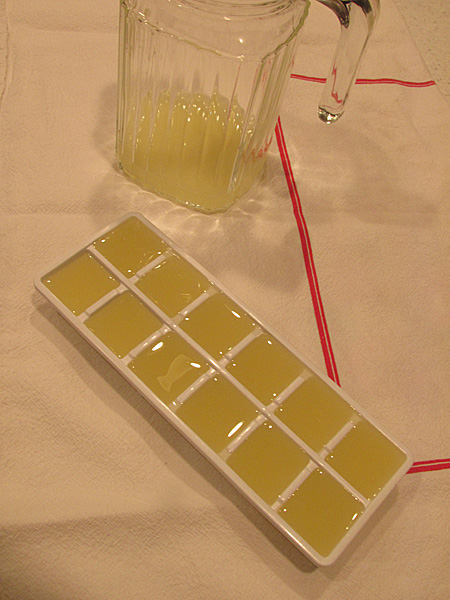
©2012 Lisa M. Bond Photography
Freeze these until frozen, then pop out and store in a plastic freezer bag and keep them in the freezer. You now have fresh lemon juice by the tablespoon whenever needed. If you only have a regular ice-cube tray, then measure out 1 Tablespoon per cube. They will be smaller cubes but better than having a 2 or 3 Tablespoon cube, which might be too big. Back to the limoncello. Every day, take the bottles out and shake them vigorously. Do this two times a day, such as breakfast and dinner time. 
©2012 Lisa M. Bond Photography
After 5 days, your vodka should be sufficiently flavored. Now strain the zest through a fine sieve. 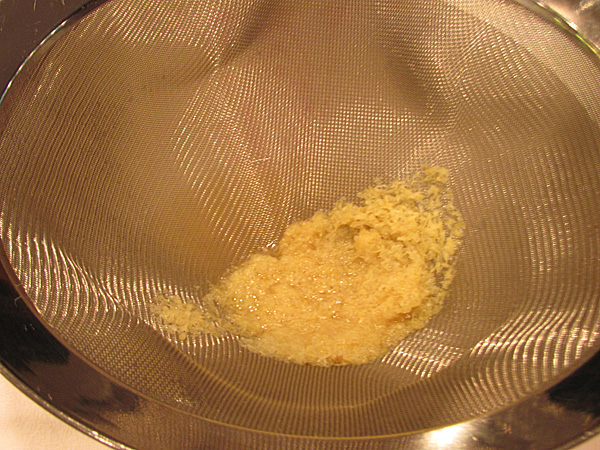 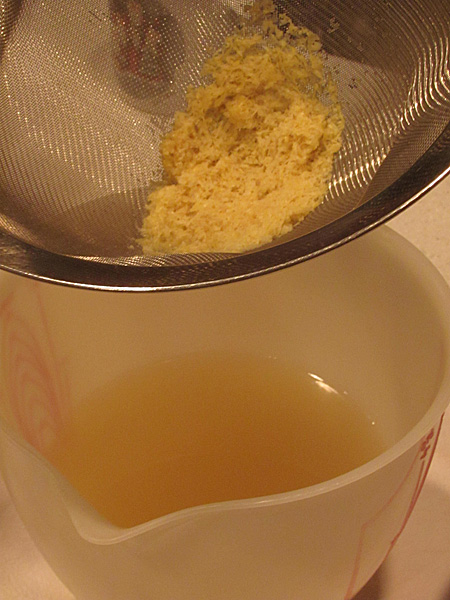 Discard the zest and set the flavored vodka aside. Rinse out your bottles to remove any remaining zest. 
©2012 Lisa M. Bond Photography
Now it is time to make the simple syrup. Put 6 cups of water in a pan over low heat and add the sugar listed in the single batch recipe. If you are doubling the recipe, put 12 cups of water in the pan with the appropriate amount of sugar. Heat until the sugar dissolves and the syrup is clear. Cool it to room temperature and mix it with the lemon vodka. This can be tricky depending on what kind of container you are using. I use a large pan. Here’s where the real work comes in: strain the sweetened vodka through coffee filters. You will need to change them often. Plan on using 10-20 coffee filters, at least. I put the coffee filter in a sieve which is put over a pitcher or bowl. You are almost done so hang in there. This will take 20 minutes and maybe up to an hour depending on your filters. I usually end up forcing the vodka through the filters by closing them up at the top and squeezing when it stops dripping through. Now, it is time to pour the vodka back into the bottles, recork them and put them in the refrigerator. You are ready to enjoy some limoncello. 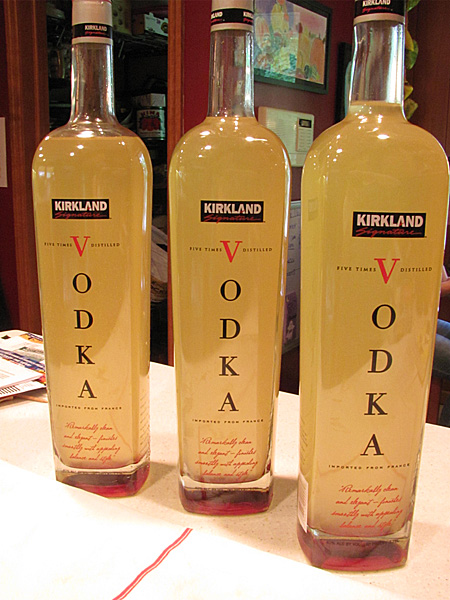 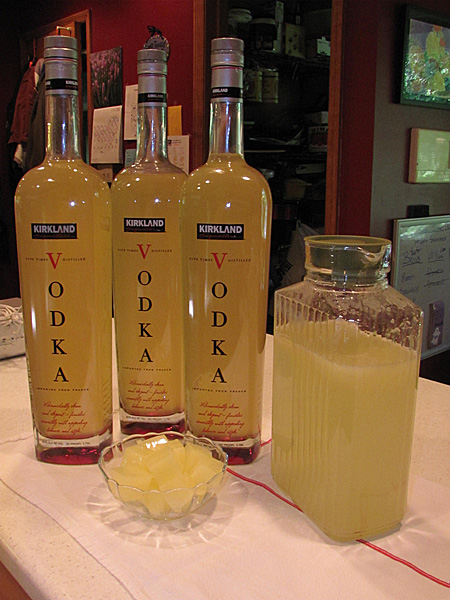 I recommend serving it over ice. Be careful, it is smooth and tasty but potent. Cheers!
Originally published June 16, 2012 A few years ago I came across a flower called Allium in a friend’s garden. I made a mental note of it because they were so unique and had an almost Dr. Seuss type quality to them. They remind me of the flower Horton is holding where the Whos live in Horton Hears A Who!. https://www.google.com/search?q=horton+hears+a+who&hl=en&client=firefox-a&hs=FzY&rls=org.mozilla:en-US:official&prmd=imvnsb&tbm=isch&tbo=u&source=univ&sa=X&ei=DYHcT6HDJOXg2AXD1rTVDQ&ved=0CIABELAE&biw=1440&bih=765 I knew I wanted some in my garden as well. Eventually I found the bulbs at the local Costco and planted a bag of them last Fall. Allium is Latin for garlic. There are hundreds of species of this plant. Bulb sizes are large varying from 2-3 mm to 8-10 cm. Apparently some people eat these and they taste like onions. I have a funny feeling a bowl of Allium heads would not go over well at the dinner table, besides the fact that the Whos live in there. I think I’ll stick to enjoying mine in the garden at least this year. They are exceptionally fun to photograph because of their long spikes. It is possible to find several different planes of focus within one flower head. And the extra bonus: I’ve read it blooms repeatedly throughout the summer, without the need to deadhead. I’ve seen one round of flowers and am currently awaiting the second bloom. 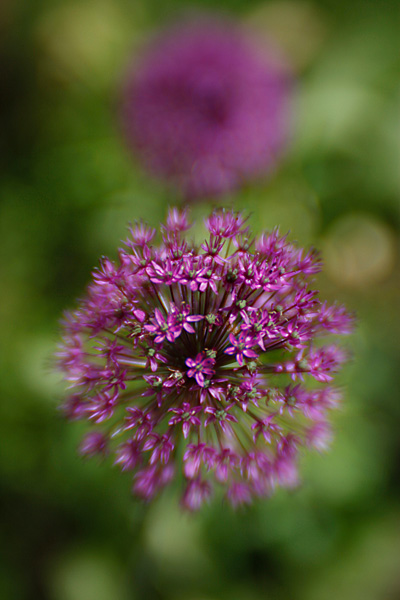 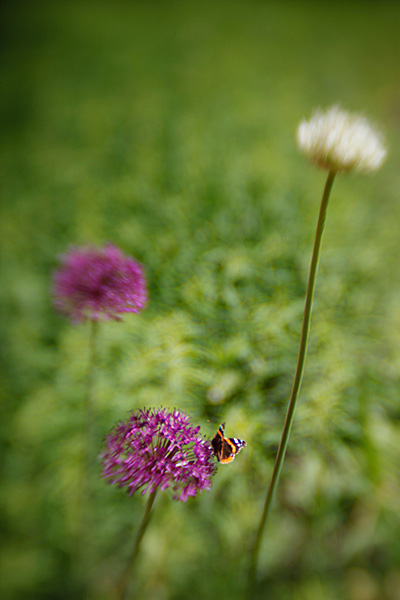 There’s also a neat picture of these all in a row at Wikipedia. I have no idea how you get them to grow exactly the same height like that but it looks very uniform and would make a nice background border.
http://en.wikipedia.org/wiki/File:Selection_of_cultivated_Alliums_.jpg Happy summer everyone! Originally published June 2, 2012 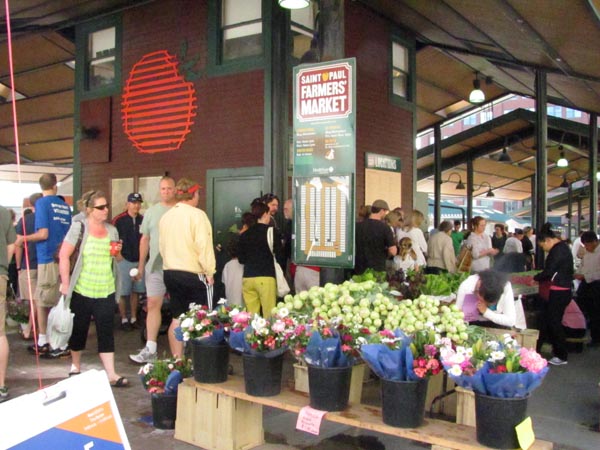 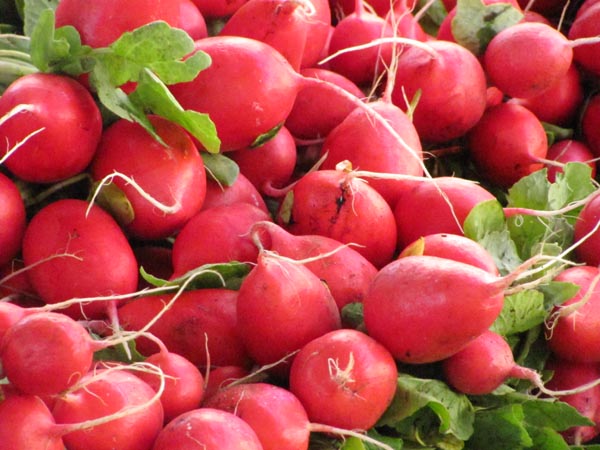 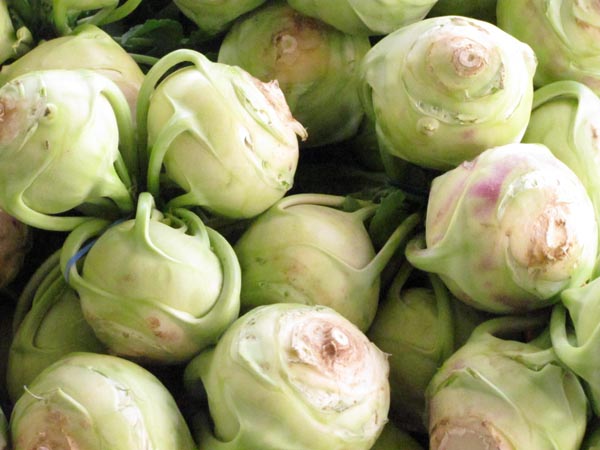 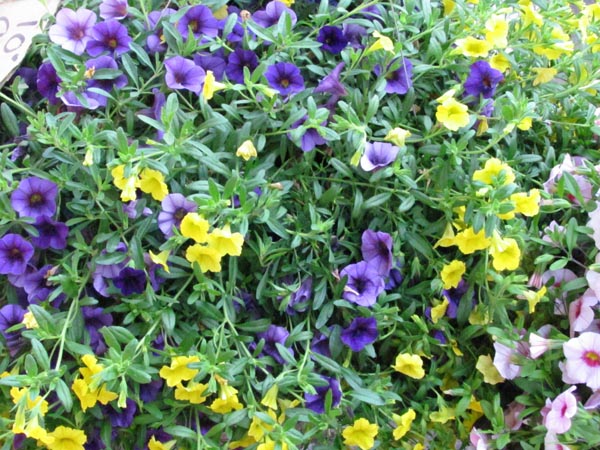 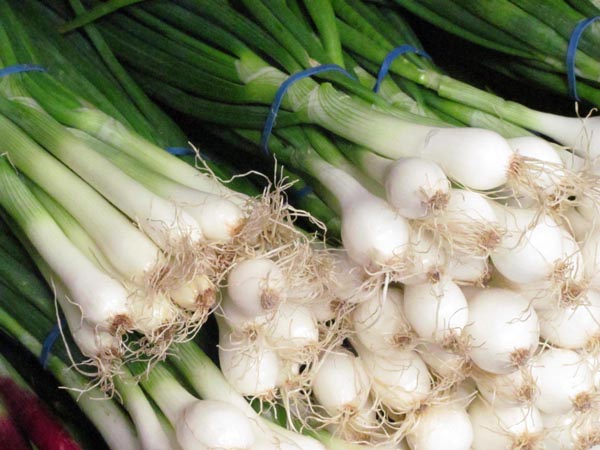 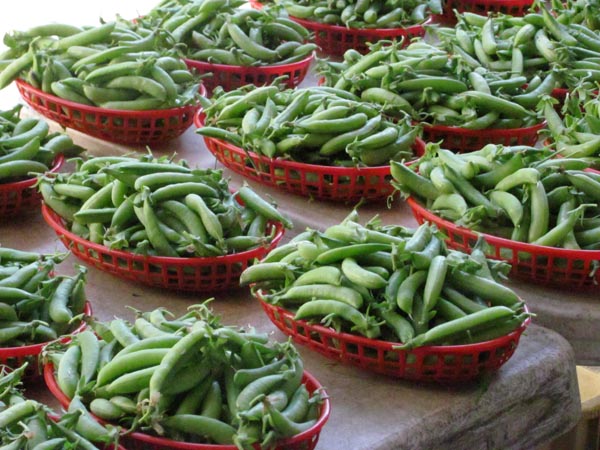   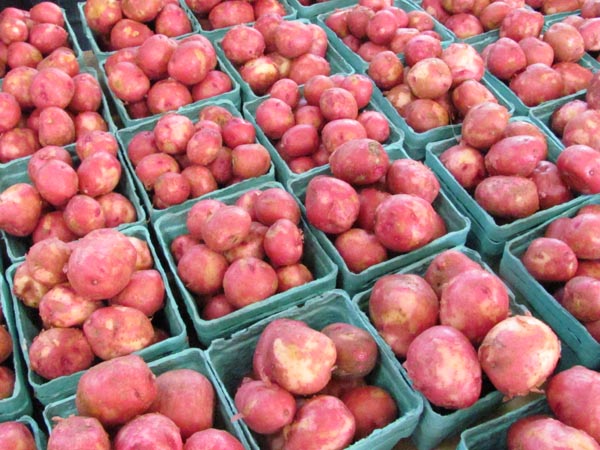 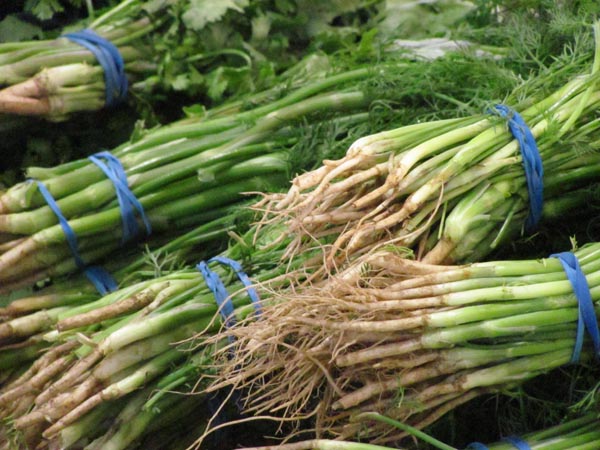 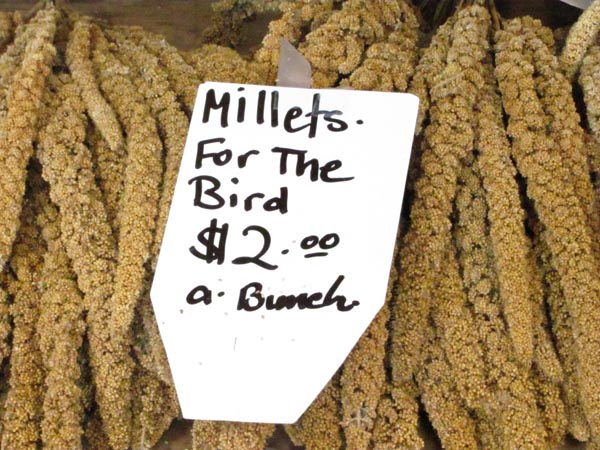 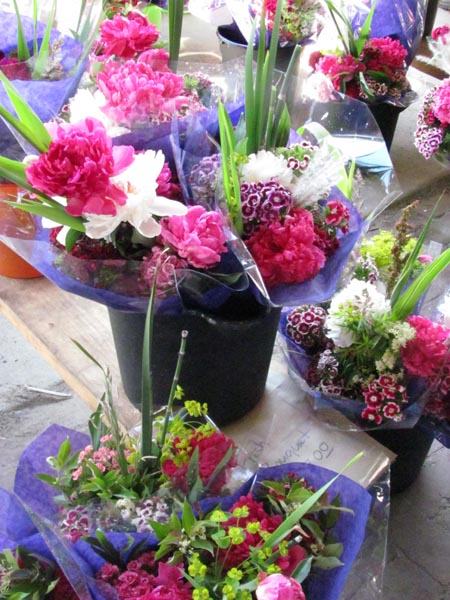 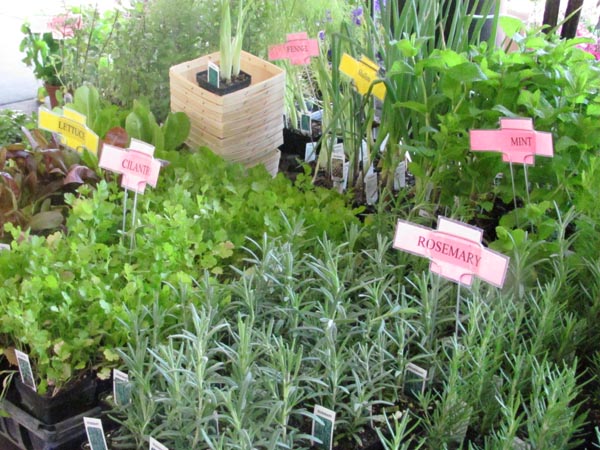 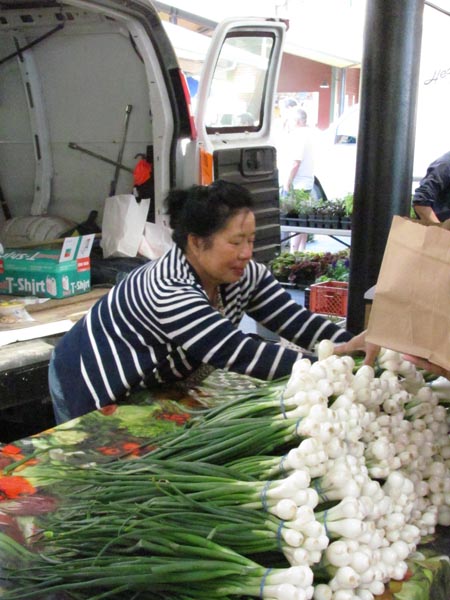 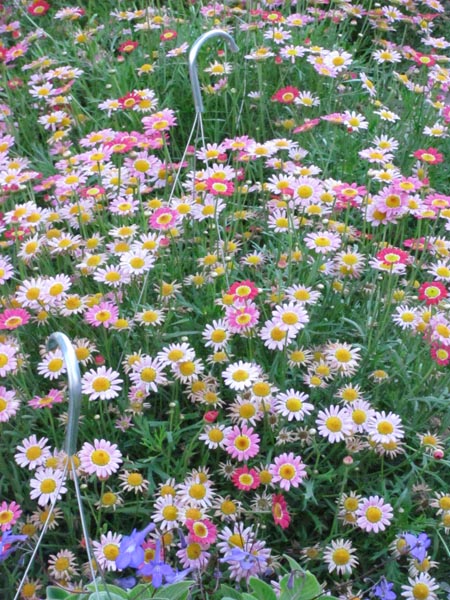 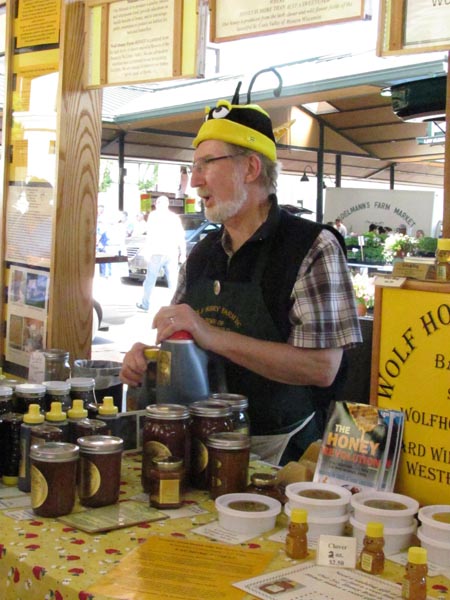 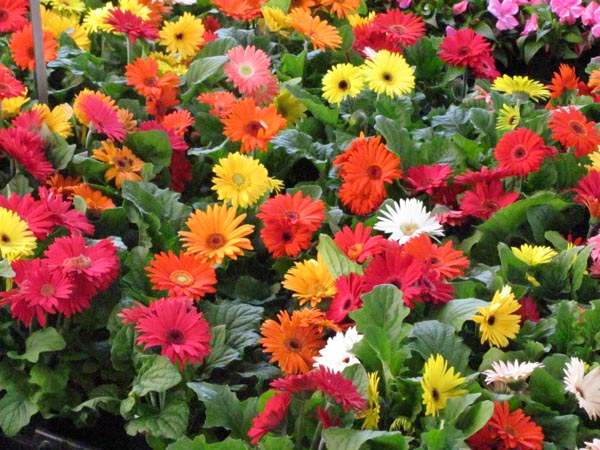 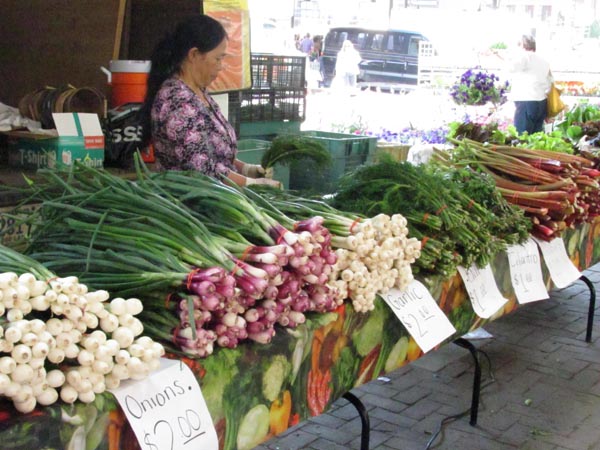 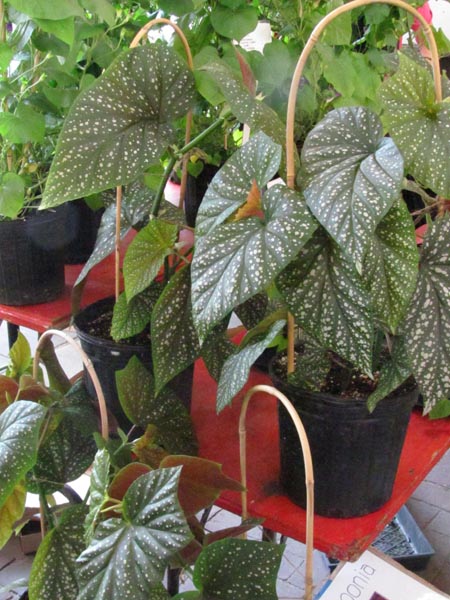 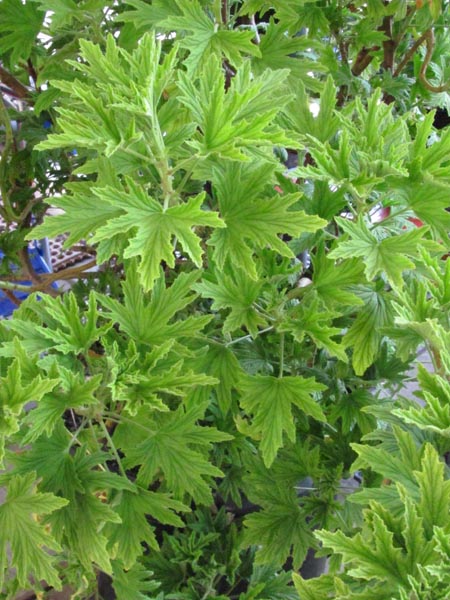  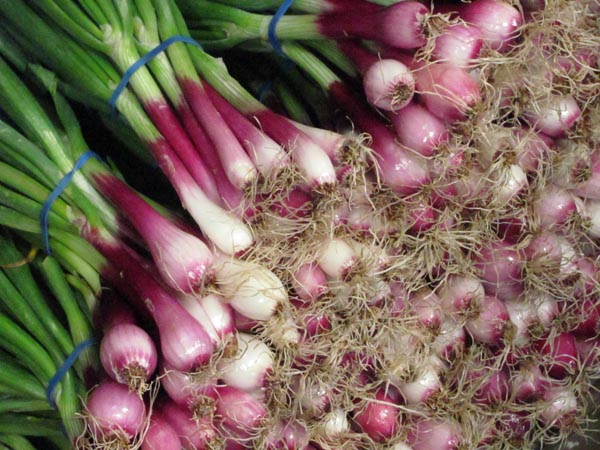 You just viewed images from the St. Paul Farmers’ Market in St. Paul, Minnesota made fresh this morning! I hope you are enjoying the beginning of summer too! |
AuthorI am a photographer who lives in Minnesota. I blog about Minnesota, photography, music, food and miscellaneous topics. Archives
November 2016
Categor
All
|


 RSS Feed