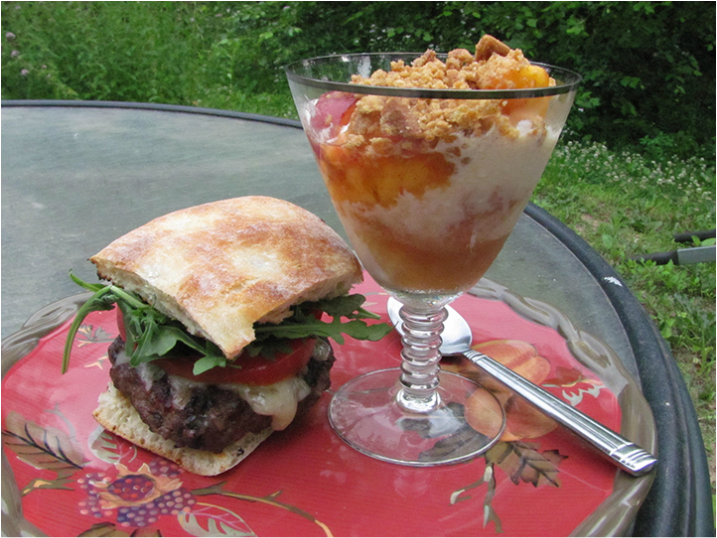
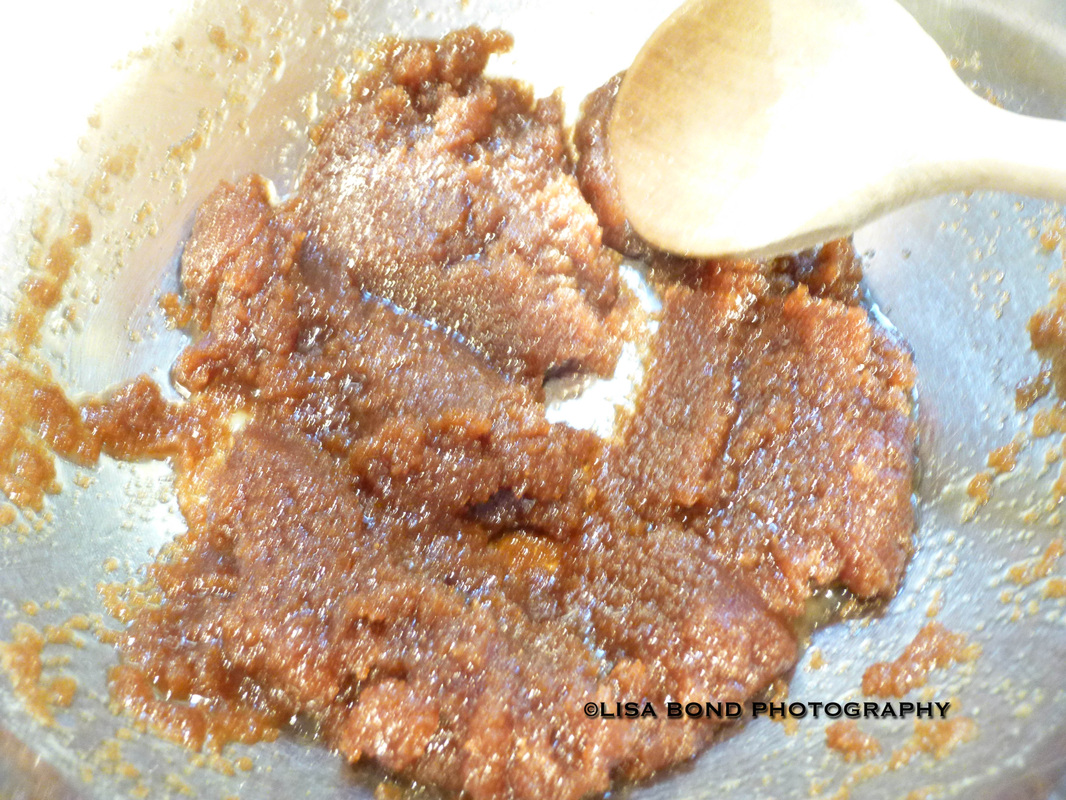
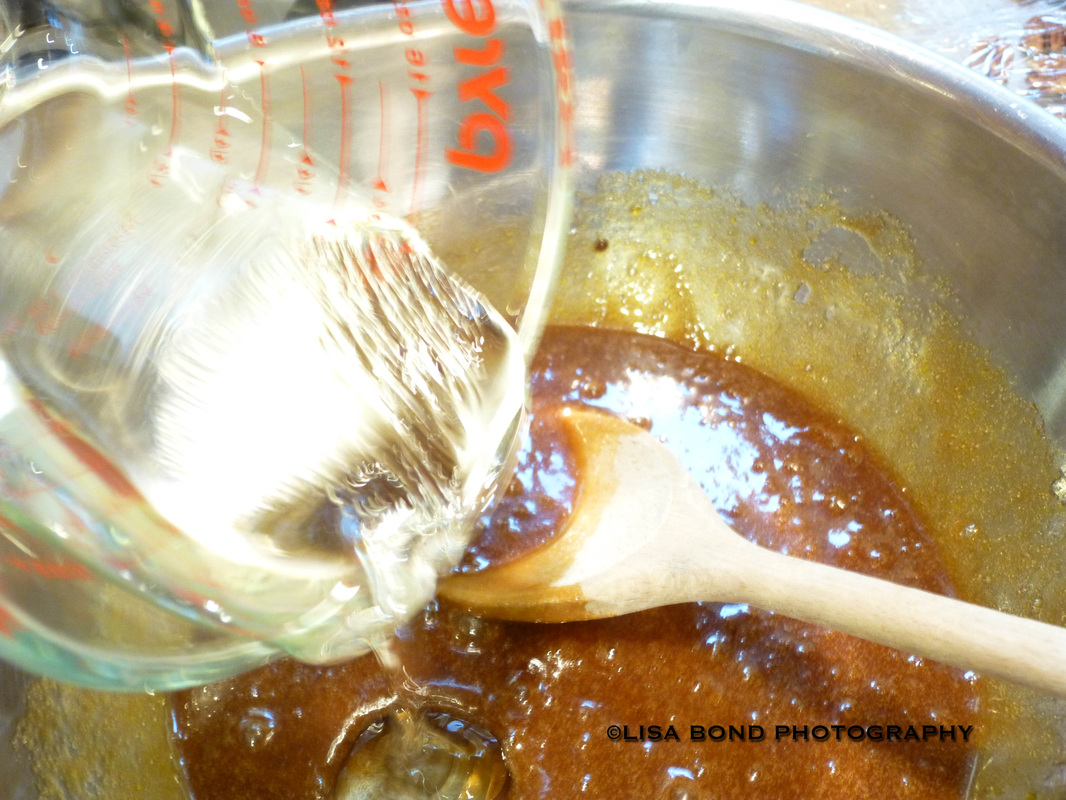
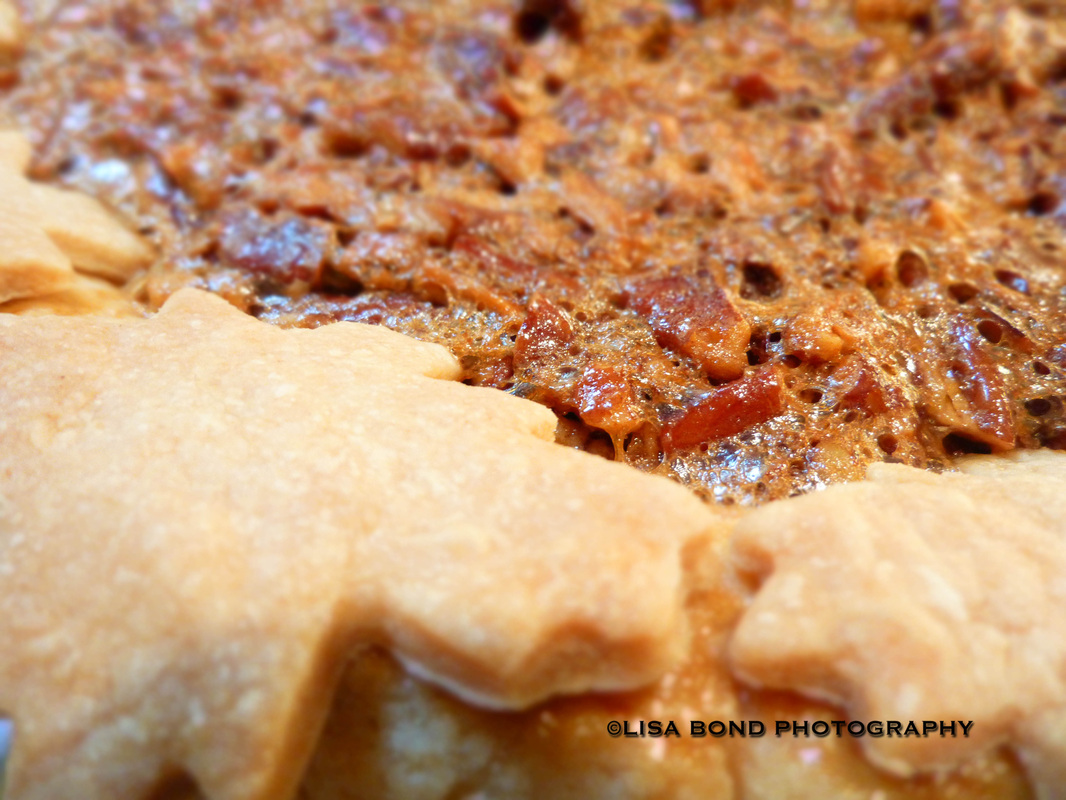
 ©2015 Lisa Bond Photography, All Rights Reserved July 'round here means it's time to make two recipes which reside in my July cookbook: Napa Valley Cabernet Burgers and Cinnamon Crunch Peach Sundaes. These are best made in small stages throughout the course of a day or two. I started in the morning to have everything easily done for dinner at night. Follow along while I make both specialties. Napa Valley Cabernet Burgers comes from a July 2003 issue of Bon Appetit and is James McNair's recipe. I usually double this recipe, but the following is for 4 servings. You can easily make twice the amount by 2x all the ingredients. Ingredients 1 750 ml bottle of Cabernet Sauvignon 1/4 c. minced shallots 9 T. unsalted butter at room temperature 2 t. golden brown sugar 1 T. minced fresh rosemary 1 1/2 lbs. ground beef (15% fat - I have used lean in the past however) 1 t. salt 1/2 t. black pepper 1 c. packed grated extra-sharp white cheddar cheese 4 4-1/2 inch squares focaccia, cut horizontally in half 8 large tomato slices 2 c. arugula Boil wine and shallots in medium saucepan until reduced to 3/4 cup, about 20 minutes. Add 1 T. butter and brown sugar, whisk until butter melts and sugar dissolves. Remove from heat. Mix remaining 8 T. butter and rosemary in small bowl. Set aside. Prepare barbeque (medium-high heat). Mix beef, salt, pepper and 1/4 cup wine-shallot mixture in bowl. Form meat into 4 5-inch squares or rounds. Brush grill rack with oil. Grill burgers until brown on bottom, about 3 minutes. Turn burgers and brush with wine-shallot mixture. Continue grilling burgers until cooked to desired doneness, turning and brushing occasionally with wine-shallot mixture, about 4 minutes longer for medium-rare. Sprinkle with cheese after last turn and grill until cheese melts. Spread cut sides of bread with rosemary butter. Grill, cut side down, until golden, about 2 minutes. Arrange bread, grilled side up, on plates. Top bottom halves with burgers, then tomatoes and arugula. Cover with top halves of bread. Now here is the recipe, step-by-step with my personal photos and commentary. 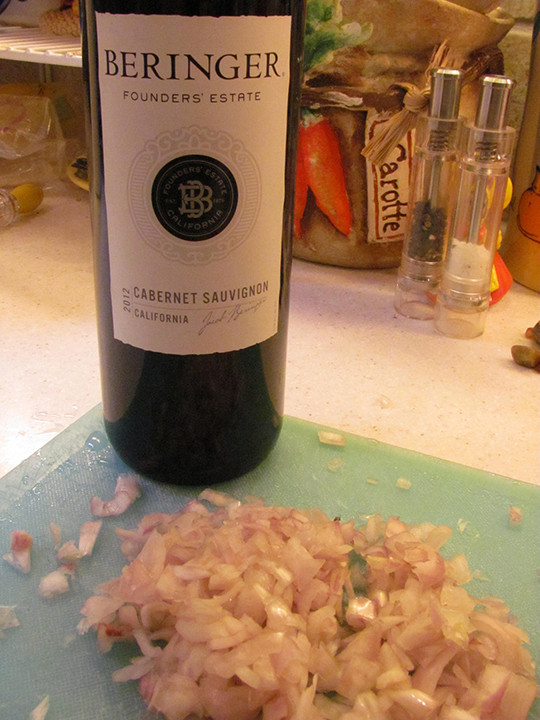 ©2015 Lisa Bond Photography, All Rights Reserved 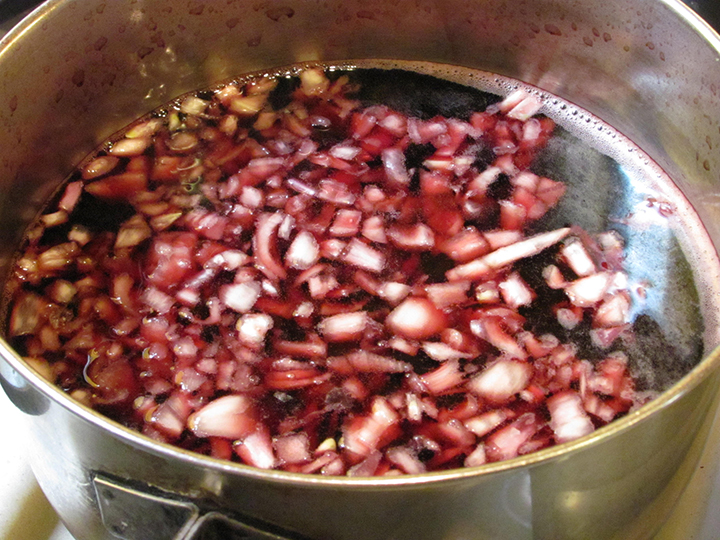 ©2015 Lisa Bond Photography, All Rights Reserved Boil wine and shallots in medium saucepan until reduced to 3/4 cup, about 20 minutes.  ©2015 Lisa Bond Photography, All Rights Reserved 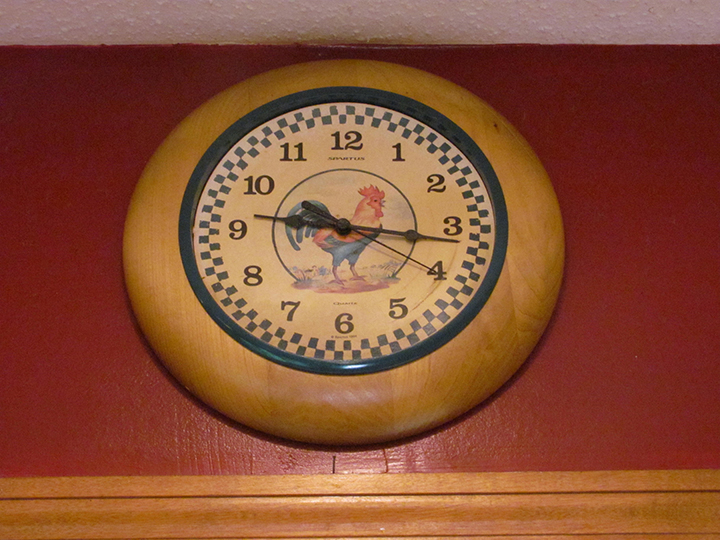 ©2015 Lisa Bond Photography, All Rights Reserved 20 minutes is up. I know from experience that this takes a lot longer than 20 minutes, but I am measuring it so you can see how much over 3/4 c. it still is. 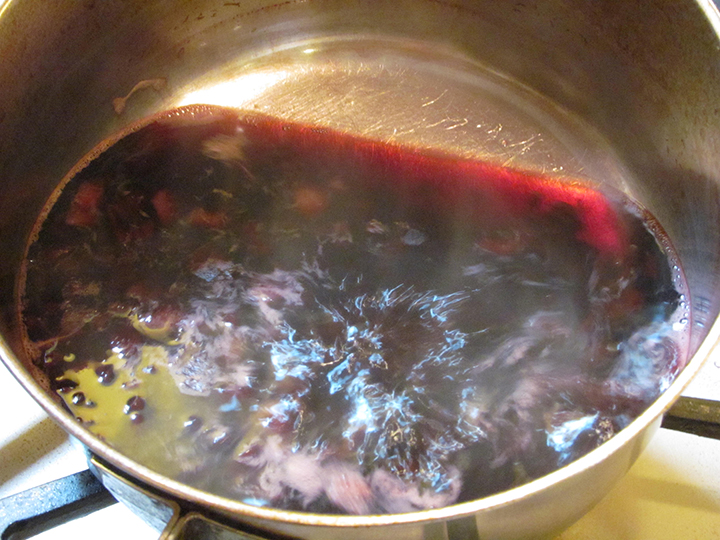 ©2015 Lisa Bond Photography, All Rights Reserved 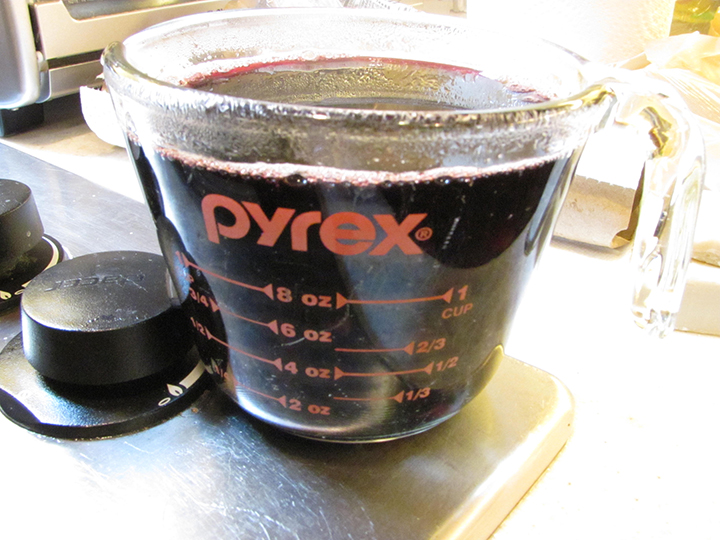 ©2015 Lisa Bond Photography, All Rights Reserved 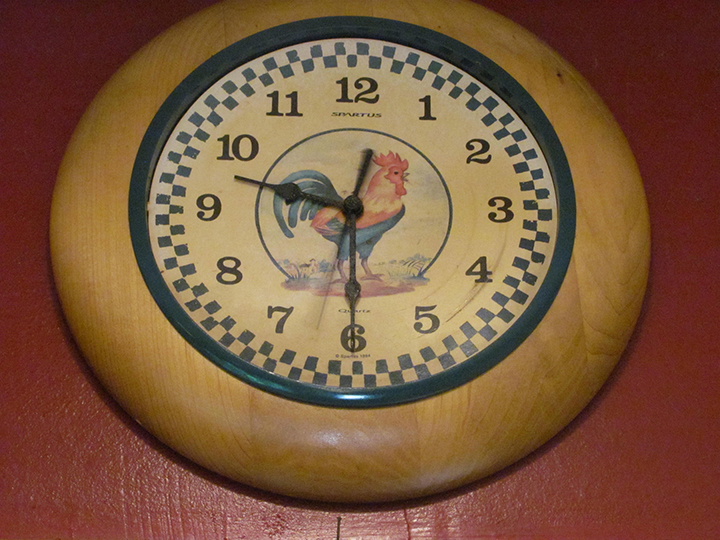 ©2015 Lisa Bond Photography, All Rights Reserved 15 minutes later, let's check it again. 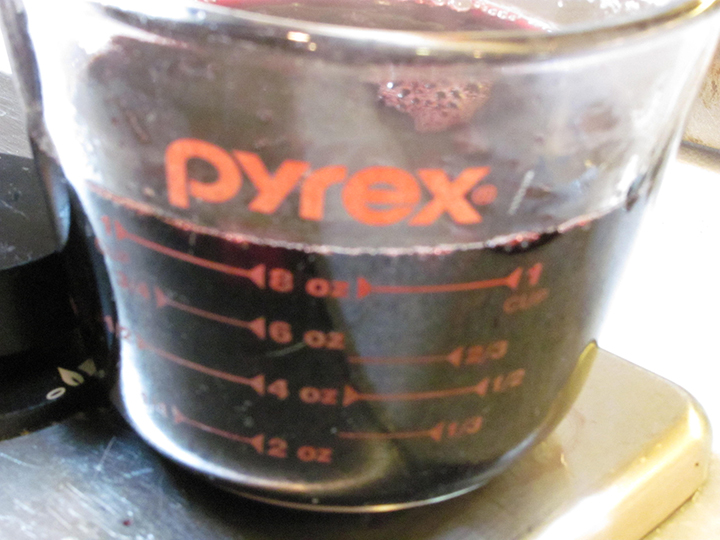 ©2015 Lisa Bond Photography, All Rights Reserved Hmmm, closer, but still over the limit.  ©2015 Lisa Bond Photography, All Rights Reserved This is better, still over, but good enough for me. 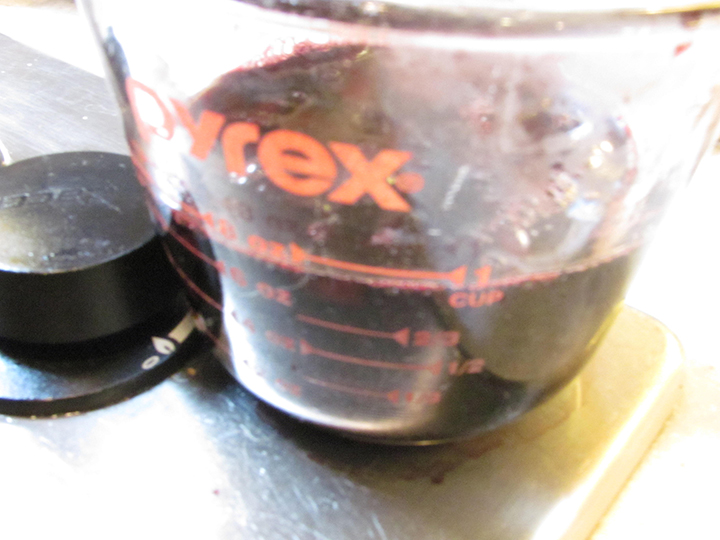 ©2015 Lisa Bond Photography, All Rights Reserved Add 1 T. butter and brown sugar, whisk until butter melts and sugar dissolves. Remove from heat. 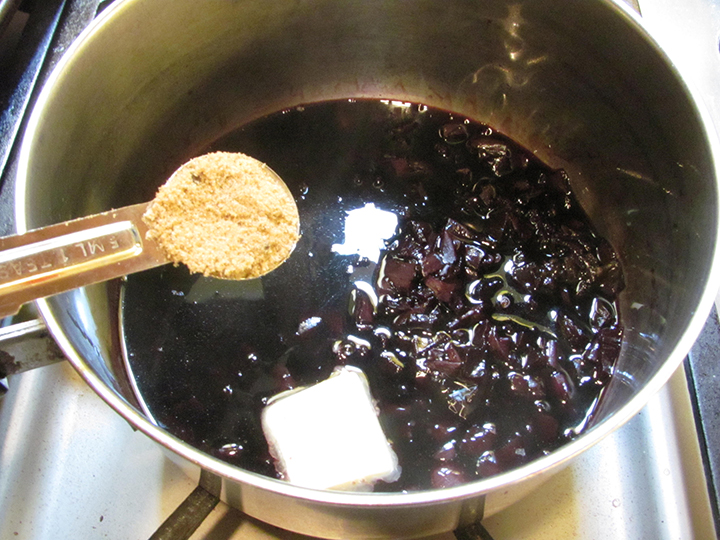 ©2015 Lisa Bond Photography, All Rights Reserved Mix remaining 8 T. butter and rosemary in small bowl. (I use a little less butter, as 2 T. per bun seems a bit much.) Set aside. 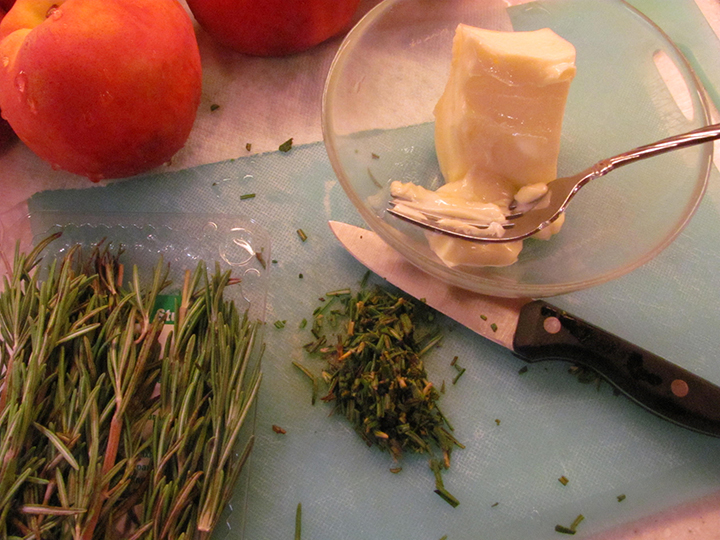 ©2015 Lisa Bond Photography, All Rights Reserved 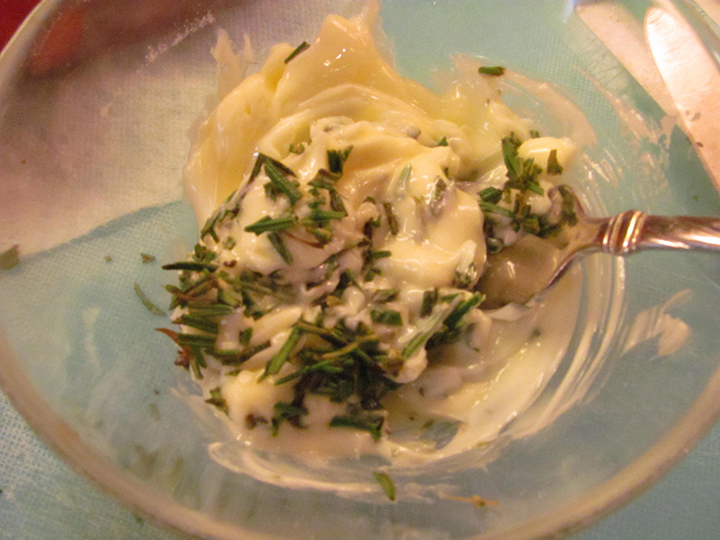 ©2015 Lisa Bond Photography, All Rights Reserved 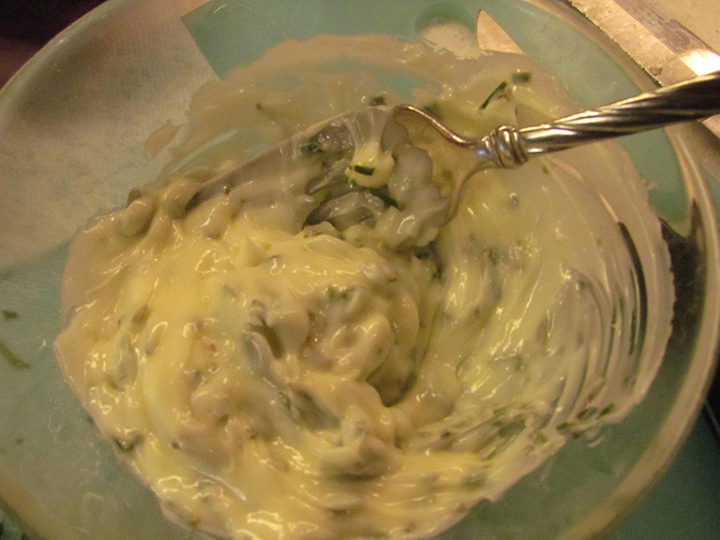 ©2015 Lisa Bond Photography, All Rights Reserved I like to get my focaccia at Trader Joe's because the price is right. This stuff can get pretty spendy. If you need 3 packages of it and it's 5 or 6 bucks a package, well you get the idea. But Trader Joe's didn't have it. I have a minimalist Trader Joe's by me, they are always out-of-stock on stuff. Anyways, I went to the local grocery store and settled on this because it was $1.99 a package. They are pretty small. I know I'm going to need 2 packages for sure. 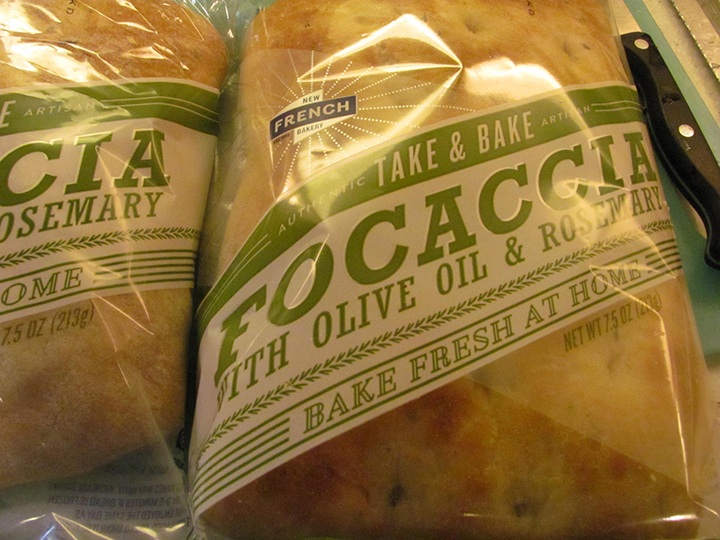 ©2015 Lisa Bond Photography, All Rights Reserved This bread needs to be trimmed to make the edges even. 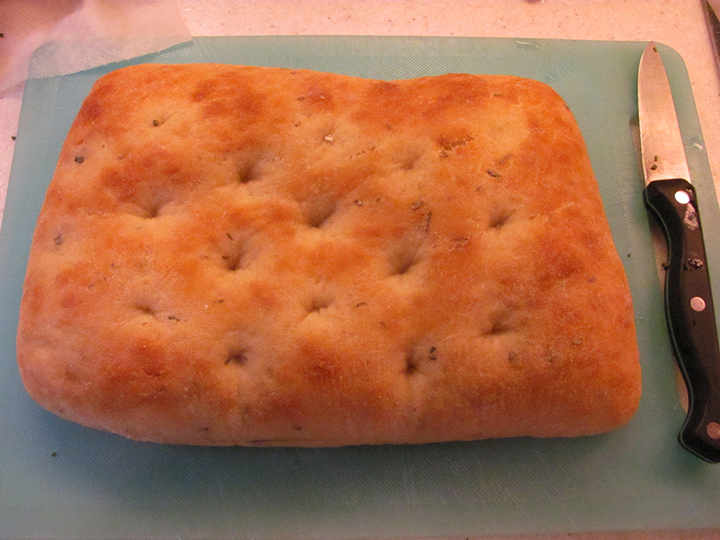 ©2015 Lisa Bond Photography, All Rights Reserved 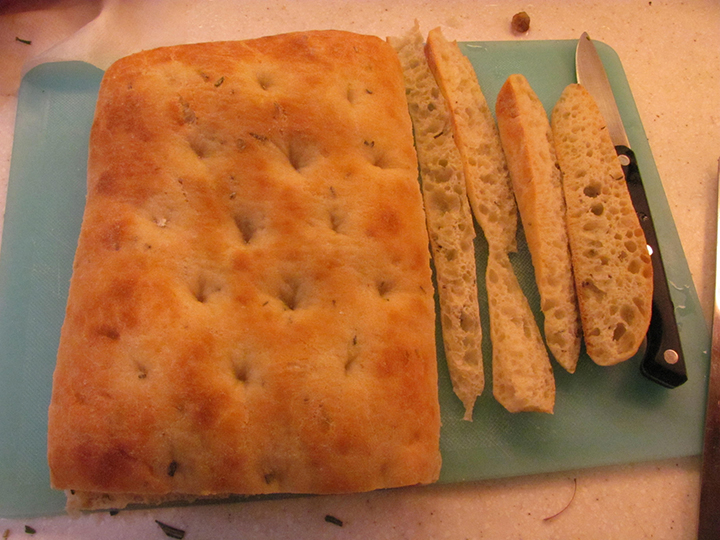 ©2015 Lisa Bond Photography, All Rights Reserved 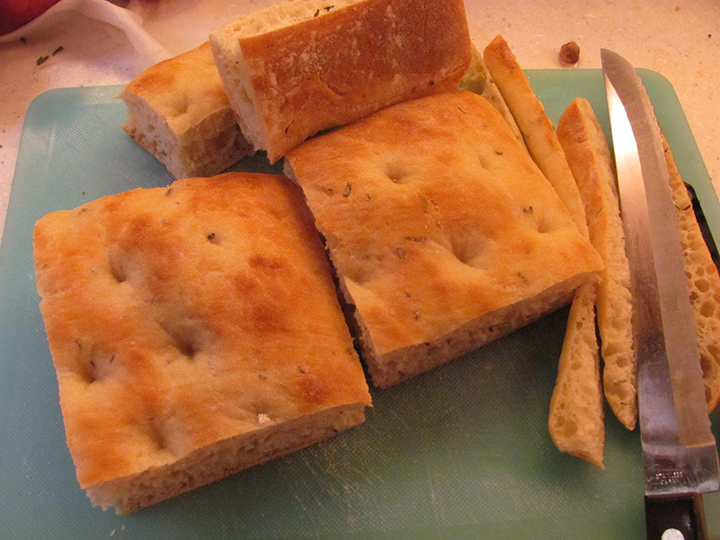 ©2015 Lisa Bond Photography, All Rights Reserved  ©2015 Lisa Bond Photography, All Rights Reserved Spread cut sides of bread with rosemary butter. Grill, cut side down, until golden, about 2 minutes. Arrange bread, grilled side up, on plates. 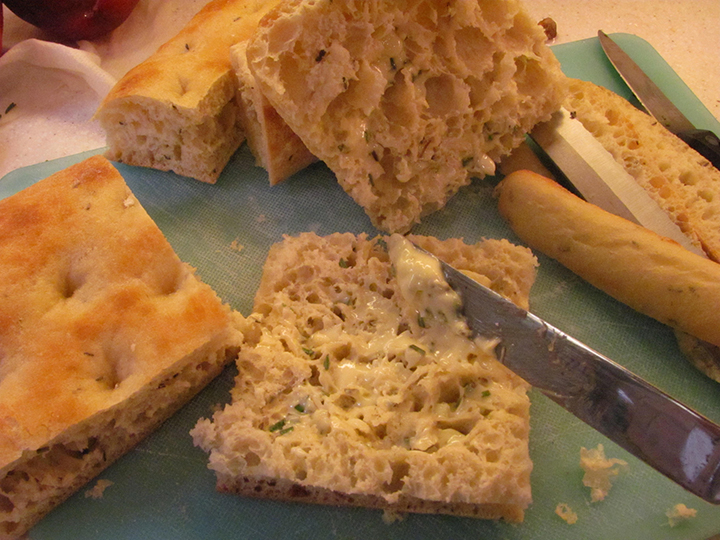 ©2015 Lisa Bond Photography, All Rights Reserved 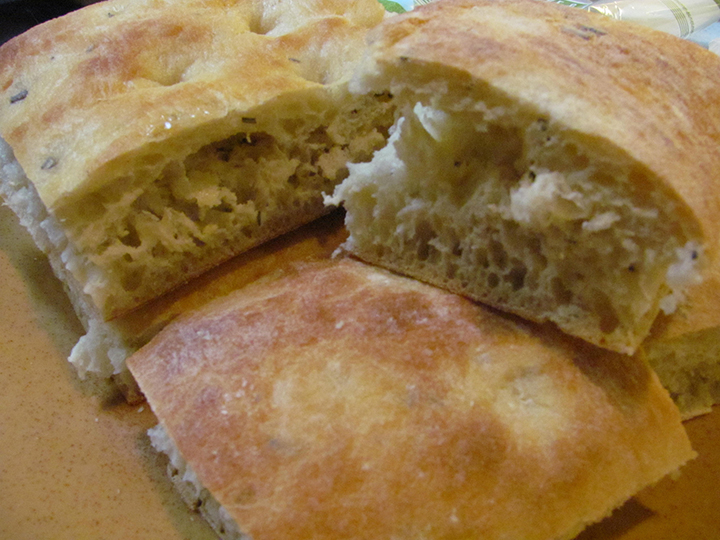 ©2015 Lisa Bond Photography, All Rights Reserved This is a good time to get the arugula ready as well as the cheese and tomatoes. The best price on arugula is again at Trader Joe's. This bag was $1.99. It will cost double that or more at a regular grocery store. This is a very bitter lettuce but it is a nice counter balance for the sharpness of the cheese and the sweetness of the burgers. 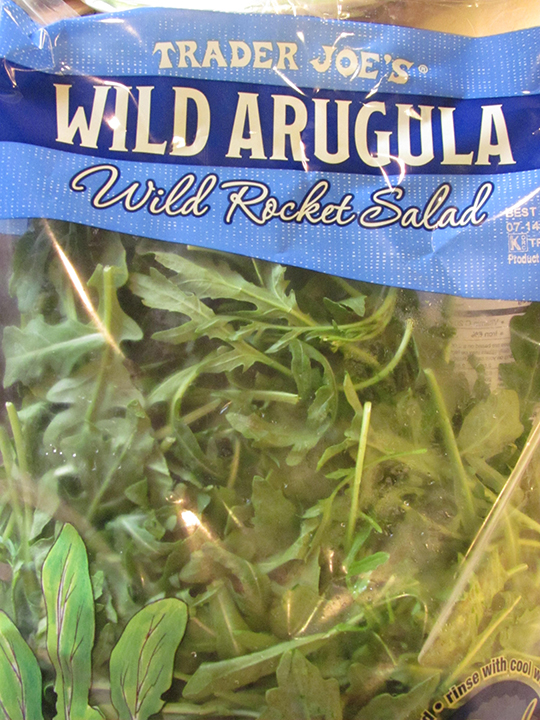 ©2015 Lisa Bond Photography, All Rights Reserved  ©2015 Lisa Bond Photography, All Rights Reserved 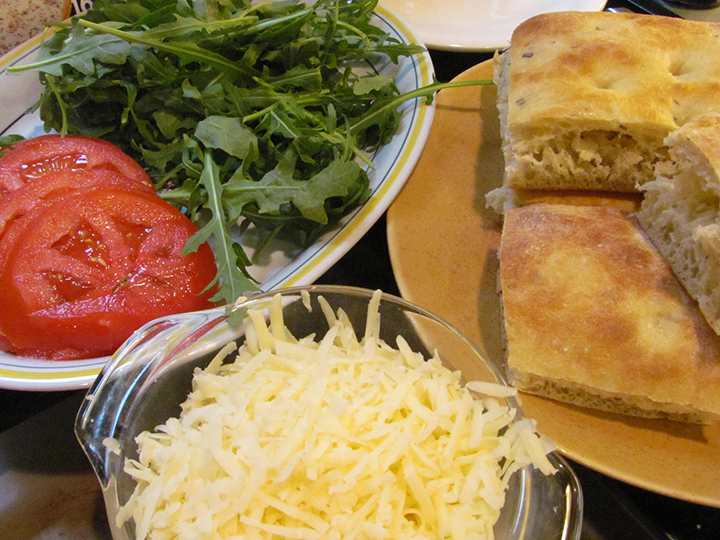 ©2015 Lisa Bond Photography, All Rights Reserved Prepare barbeque (medium-high heat). Mix beef, salt, pepper and 1/4 cup wine-shallot mixture in bowl. (Do not mix this until the last minute. If you mix it ahead of time, it will separate in the bowl or on the plate and there will be wine running everywhere.) Form meat into 4 5-inch squares or rounds. Brush grill rack with oil. Grill burgers until brown on bottom, about 3 minutes. Turn burgers and brush with wine-shallot mixture. 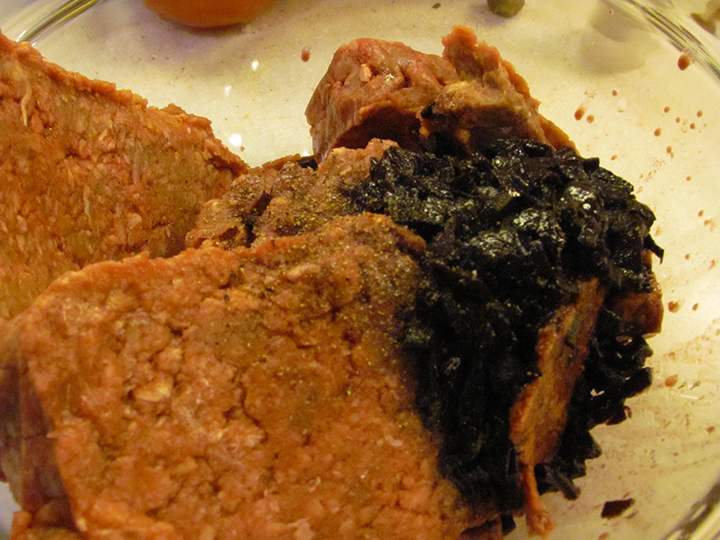 ©2015 Lisa Bond Photography, All Rights Reserved Anyone counting? You are correct, I used extra beef and made this into 6 burgers instead of 4. Some are also a little smaller for people or kids who want a smaller burger. 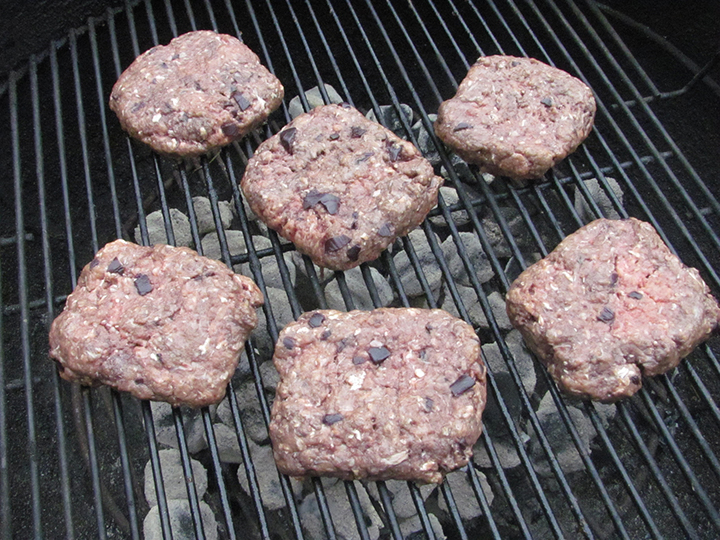 ©2015 Lisa Bond Photography, All Rights Reserved Continue grilling burgers until cooked to desired doneness, turning and brushing occasionally with wine-shallot mixture, about 4 minutes longer for medium-rare. Sprinkle with cheese after last turn and 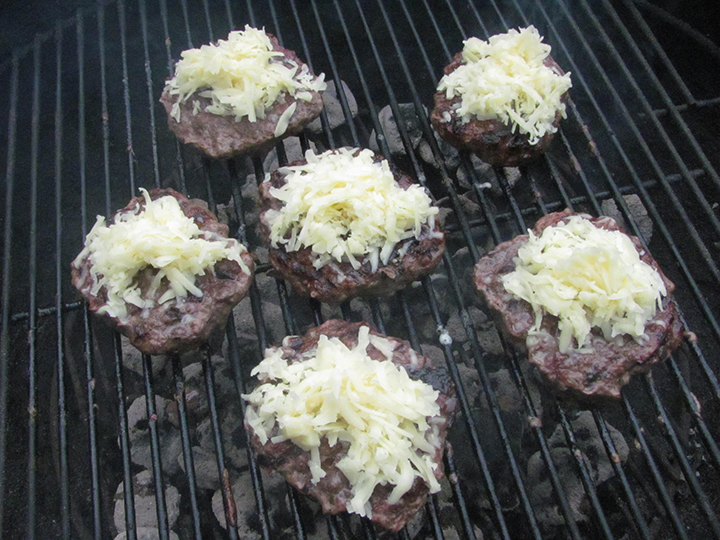 ©2015 Lisa Bond Photography, All Rights Reserved grill until cheese melts. 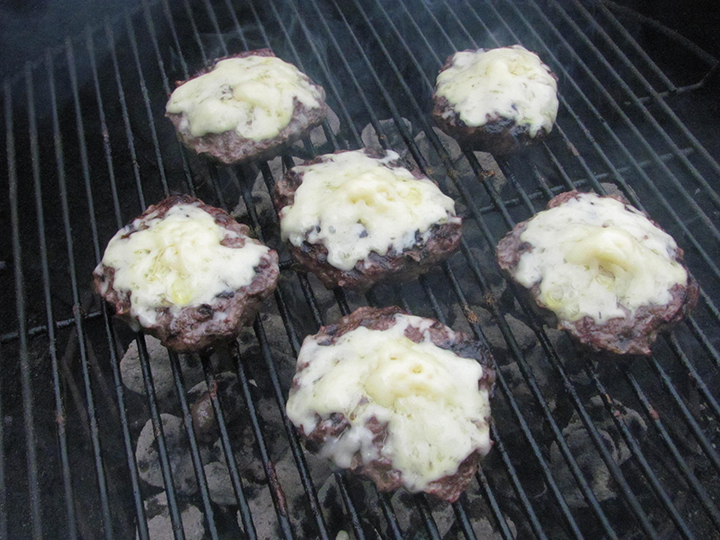 ©2015 Lisa Bond Photography, All Rights Reserved Top bottom halves with burgers, then tomatoes and arugula. Cover with top halves of bread. 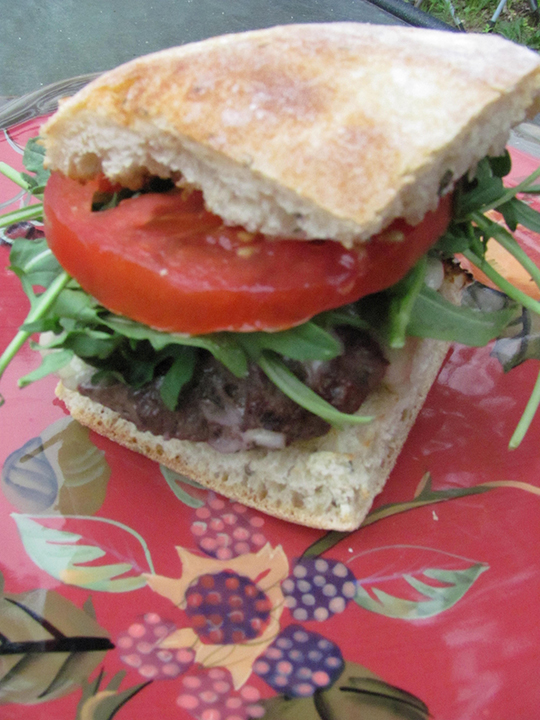 ©2015 Lisa Bond Photography, All Rights Reserved Cinnamon Crunch Peach Sundaes is from an issue of Bon Appetit, not sure of the date. I think this is Barbara Frenzl's recipe. 1 c. plus 6 1/2 T. sugar 3/4 c. water 6 T. dark corn syrup 3 cinnamon sticks, broken in half 6 whole cinnamon graham crackers, crushed to coarse crumbs 4 1/2 T. unsalted butter, melted 6 medium peaches, pitted, sliced into wedges 1 1/2 T. fresh lemon juice 3/4 t. ground cinnamon French vanilla ice cream (or I used vanilla frozen yogurt, just as good IMHO) 6 cinnamon sticks (optional) Stir 1 C. plus 2 T. sugar, 3/4 c. water, corn syrup and halved cinnamon sticks in heavy medium saucepan over medium heat until sugar dissolves; bring to boil. Reduce heat to low; simmer until syrup is reduced to 1 1/2 c., about 20 minutes. Cool, remove cinnamon sticks. (Can be made 1 week ahead. Cover; refrigerate.) Preheat oven to 350 F. Combine cracker crumbs, butter and 1 1/2 T. sugar in small bowl; toss to coat evenly. Spread mixture out on small baking sheet. Bake until golden, stirring occasionally, about 5 minutes. Cool. Mix peaches, 3 T. sugar, lemon juice and ground cinnamon in medium bowl. Let stand until juices form, at least 15 minutes and up to 1hour. Place 2 scoops of ice cream in each of 6 bowls. Spoon peaches and juices over ice cream. Drizzle with syrup and sprinkle with crunch topping. Garnish with cinnamon sticks, if desired, and serve. Again, here is the recipe broken down into steps, with my photos and comments. 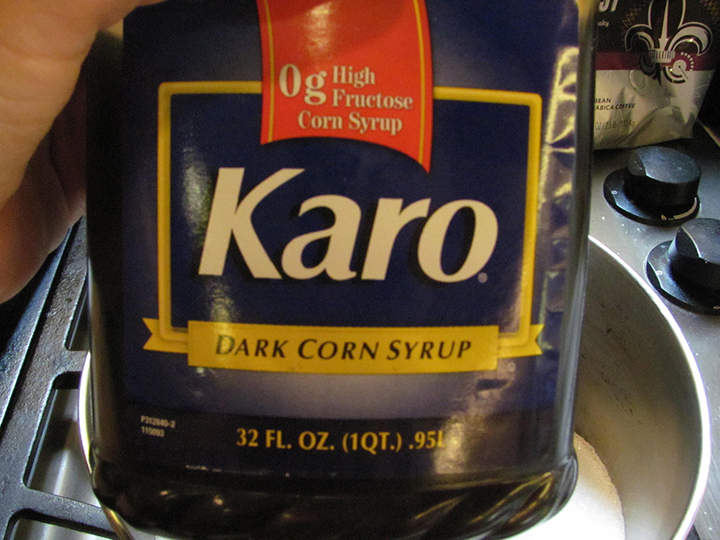 ©2015 Lisa Bond Photography, All Rights Reserved 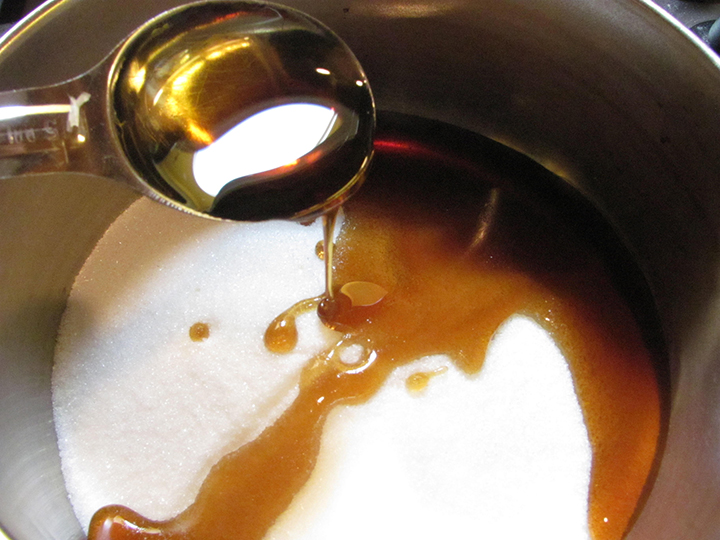 ©2015 Lisa Bond Photography, All Rights Reserved Stir 1 C. plus 2 T. sugar, 3/4 c. water, corn syrup and halved cinnamon sticks in heavy medium saucepan over medium heat until sugar dissolves;  ©2015 Lisa Bond Photography, All Rights Reserved 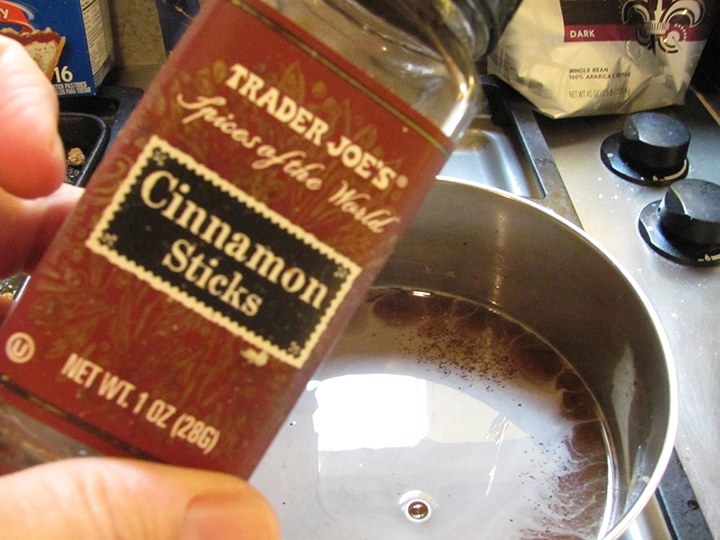 ©2015 Lisa Bond Photography, All Rights Reserved 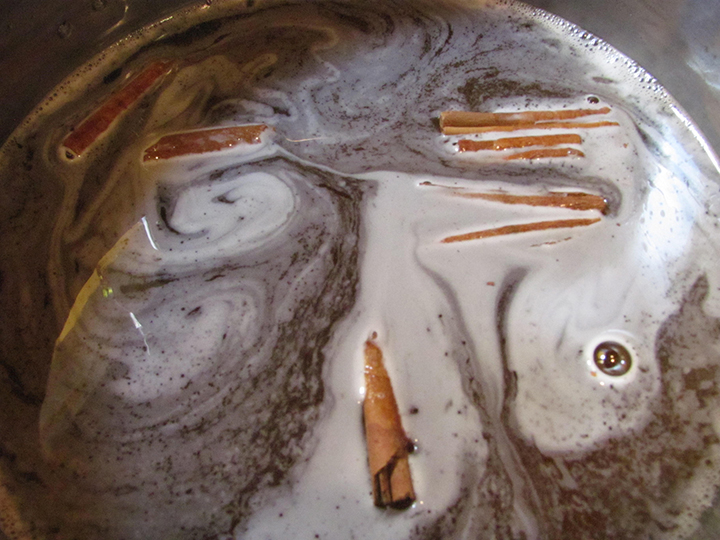 ©2015 Lisa Bond Photography, All Rights Reserved bring to boil. Reduce heat to low; simmer until syrup is reduced to 1 1/2 c., about 20 minutes. 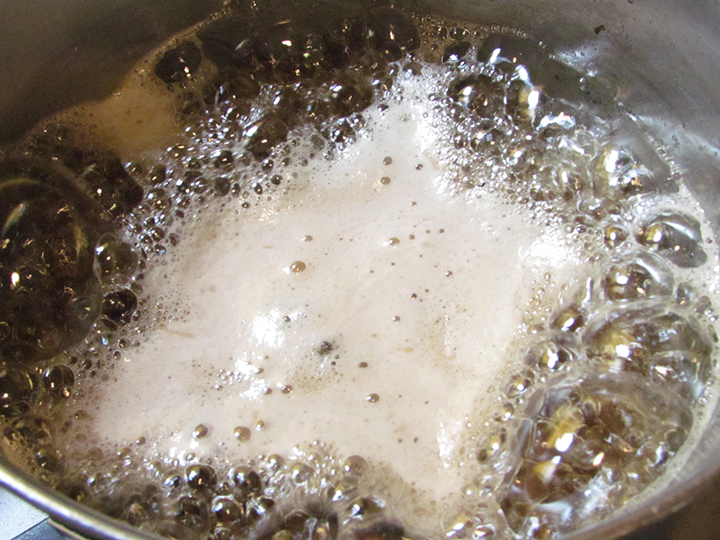 ©2015 Lisa Bond Photography, All Rights Reserved 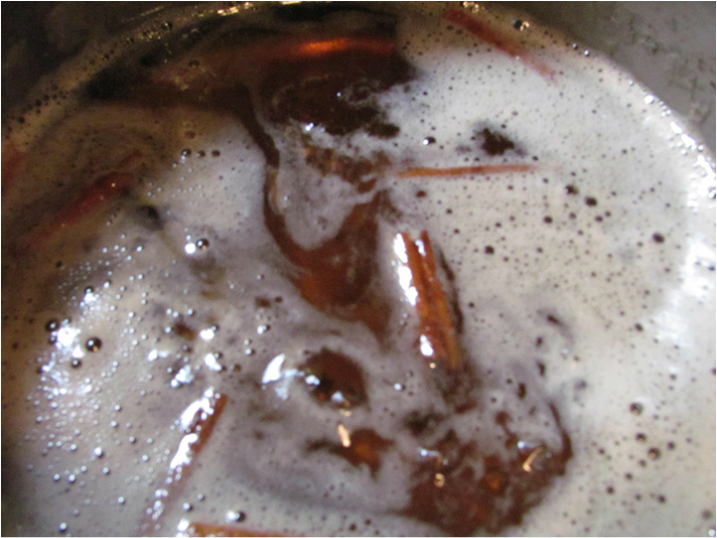 ©2015 Lisa Bond Photography, All Rights Reserved Cool,  ©2015 Lisa Bond Photography, All Rights Reserved remove cinnamon sticks. (Can be made 1 week ahead. Cover; refrigerate.) 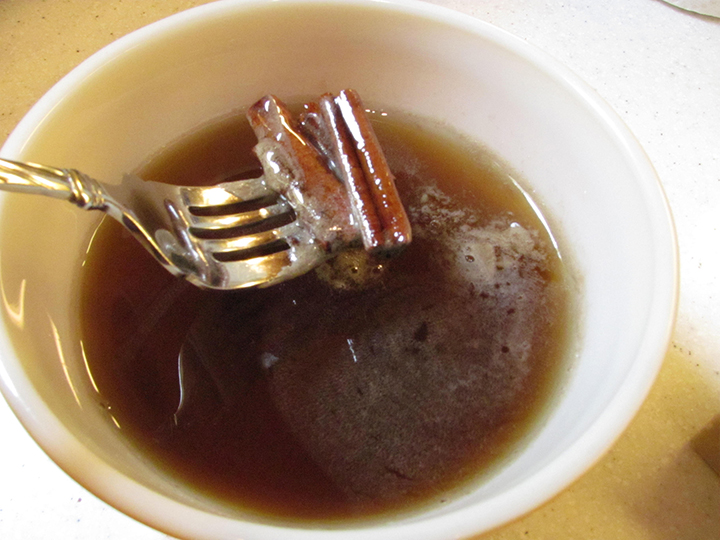 ©2015 Lisa Bond Photography, All Rights Reserved The cinnamon syrup is done. Now let's move on to the cinnamon crunch. Preheat oven to 350 F. Combine cracker crumbs, butter and 1 1/2 T. sugar in small bowl; 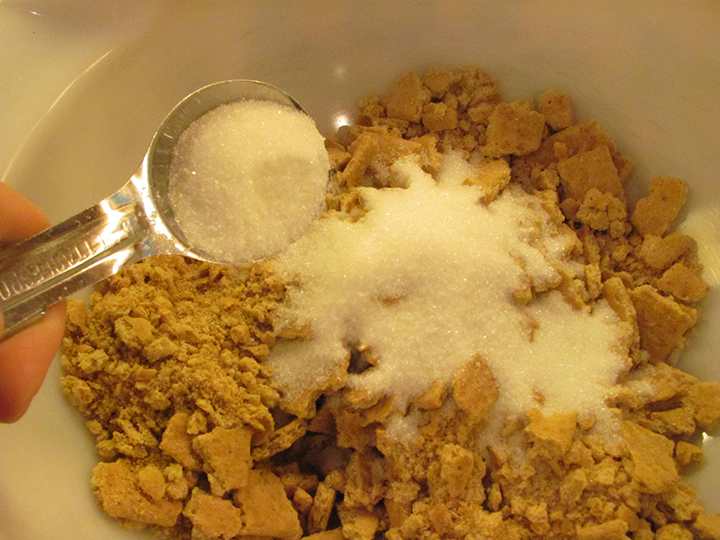 ©2015 Lisa Bond Photography, All Rights Reserved 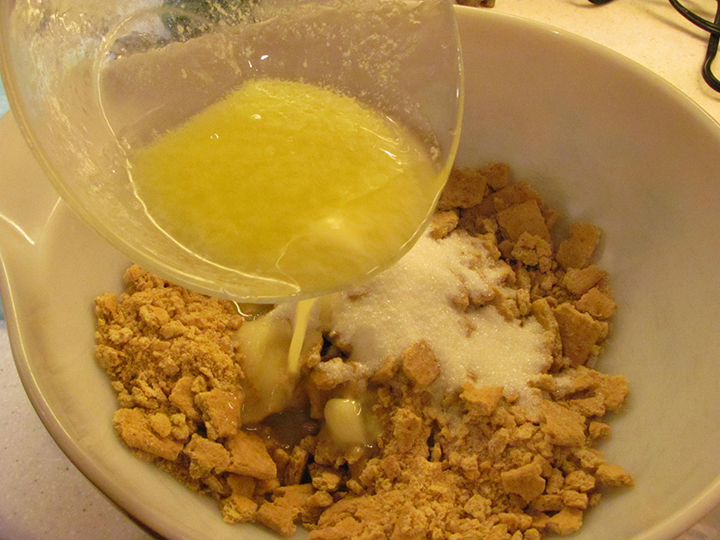 ©2015 Lisa Bond Photography, All Rights Reserved 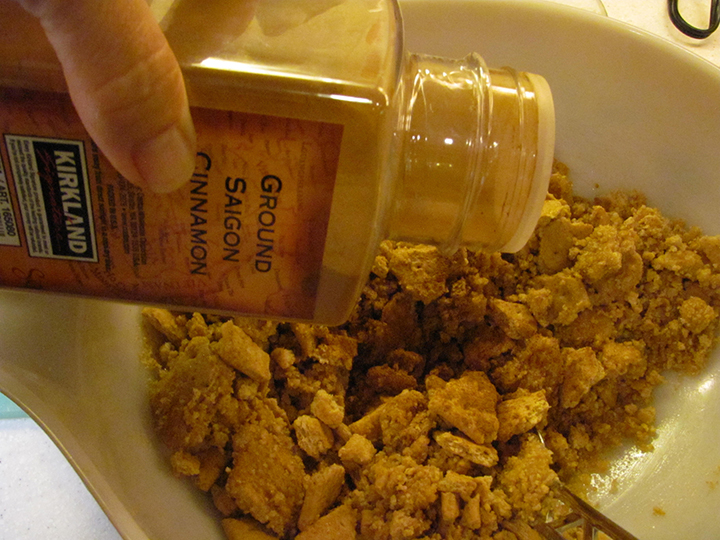 ©2015 Lisa Bond Photography, All Rights Reserved Why am I adding cinnamon? Because I only had regular graham crackers, so I'm turning them into cinnamon graham crackers. toss to coat evenly. 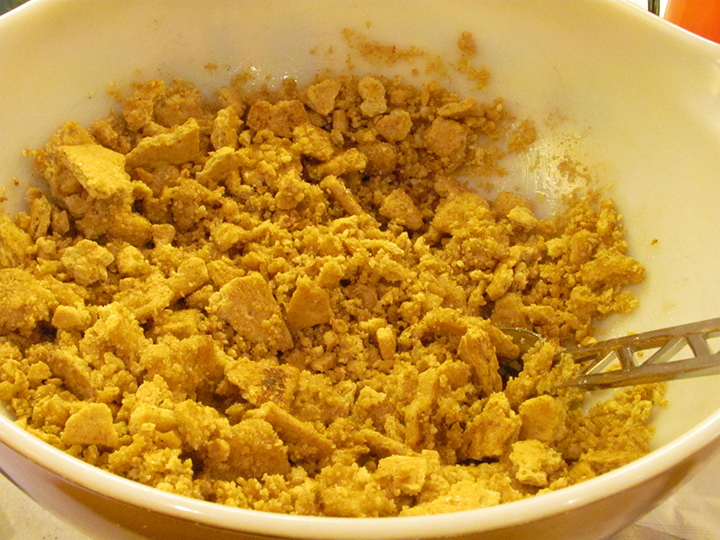 ©2015 Lisa Bond Photography, All Rights Reserved Spread mixture out on small baking sheet. Bake until golden, stirring occasionally, about 5 minutes. Cool. Did I mention that you'll want to double this part of the recipe? Why? Because it's so good you or your kids will be snacking on it and then there won't be enough for the sundaes later. 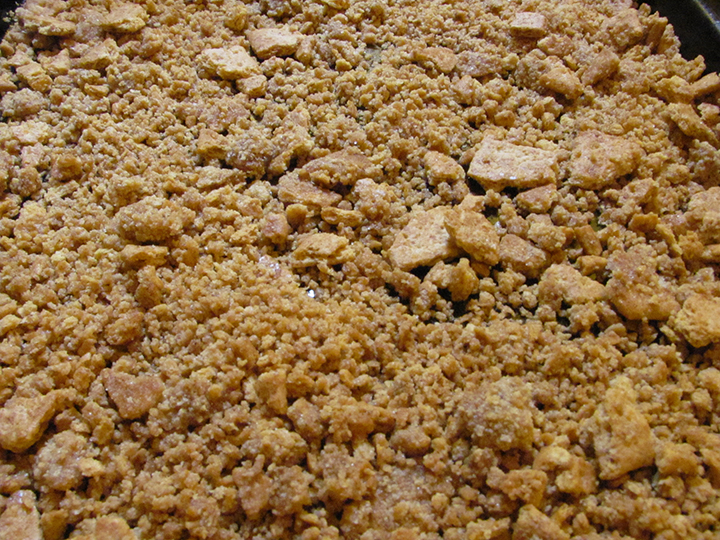 ©2015 Lisa Bond Photography, All Rights Reserved The cinnamon crunch is done. Now for the peach part of the recipe. Mix peaches, 3 T. sugar, lemon juice and ground cinnamon in medium bowl. 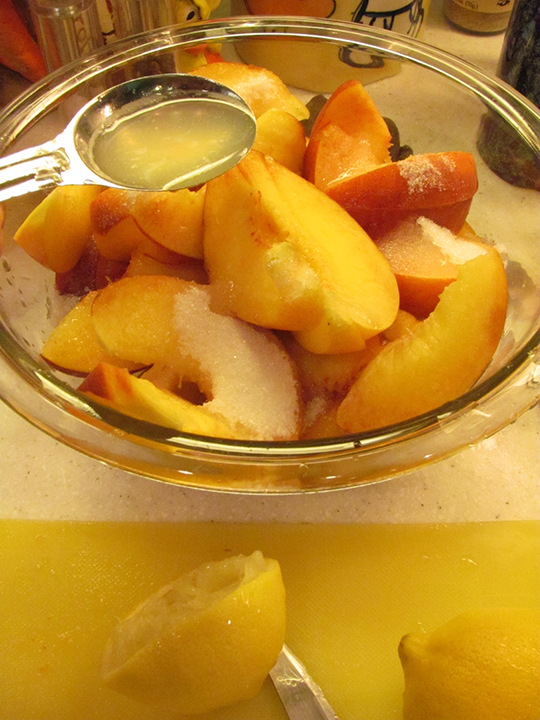 ©2015 Lisa Bond Photography, All Rights Reserved 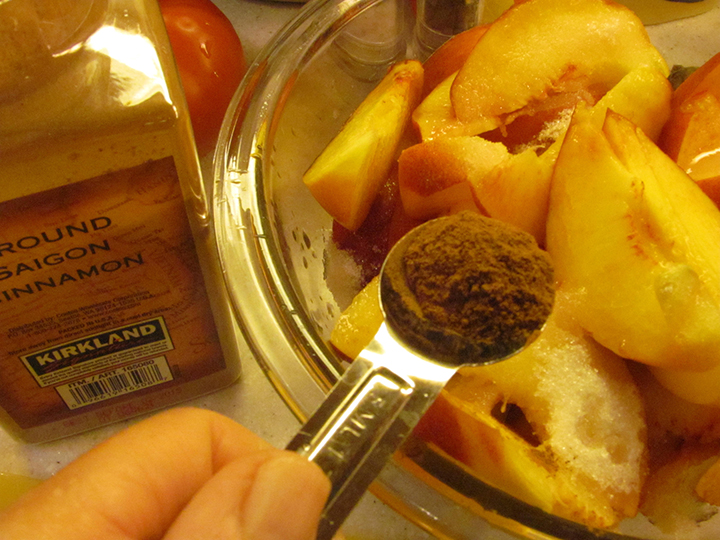 ©2015 Lisa Bond Photography, All Rights Reserved Let stand until juices form, at least 15 minutes and up to 1hour. 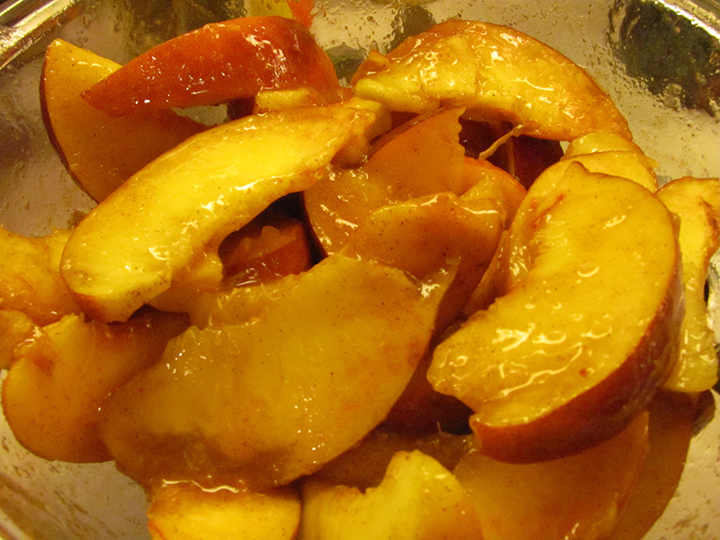 ©2015 Lisa Bond Photography, All Rights Reserved Place 2 scoops of ice cream in each of 6 bowls. Spoon peaches and juices over ice cream. Drizzle with syrup and sprinkle with crunch topping. Garnish with cinnamon sticks, if desired, and serve. 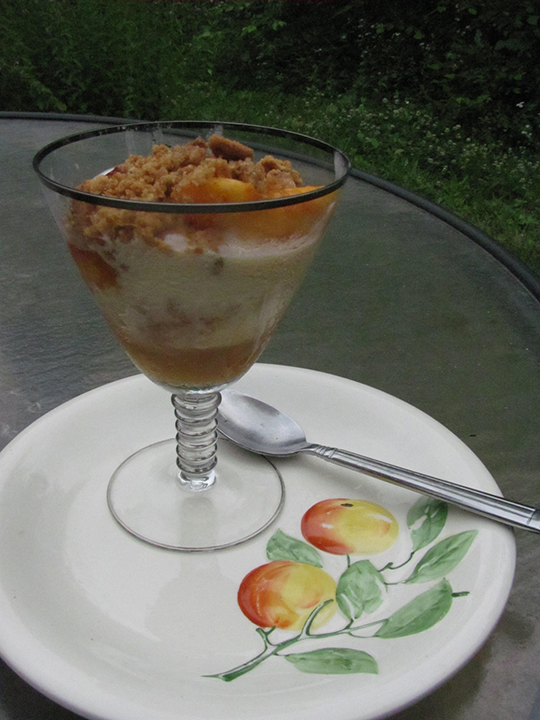 ©2015 Lisa Bond Photography, All Rights Reserved And here is the grand finale. As always, thank you for stopping by and I hope you are enjoying a fabulous summer! 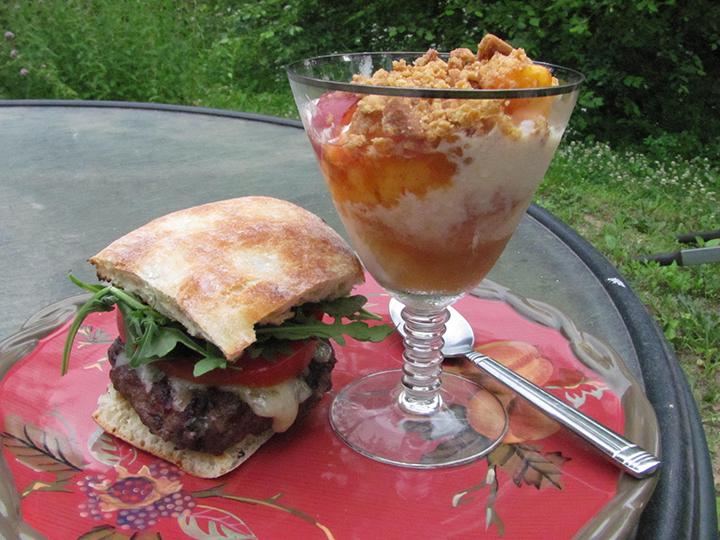 ©2015 Lisa Bond Photography, All Rights Reserved These old cars have a lot of character and the dashboards are where their interior personality really shines through. One thing many human beings have in common in this world are challenges to live up to other people's expectations. Sometimes we are willing participants in creating those expectations and sometimes we are not. Consider celebrities or political figures or being born into a family, whether they are poor or royalty, or marrying into one, for better or worse. Maybe it's a job that appeared to be something it was not. On the contrary, perhaps the employee appeared to be someone he or she was not. Could it be that many of the world's problems are caused by people not being able to be themselves? When someone can't be themselves or feels they need to behave a certain way to appease someone, it can lead to deceit and trickery, hiding and lying and contribute to copious amounts of unnecessary drama in the world. It doesn't have to be handled that way, but oftentimes it is. 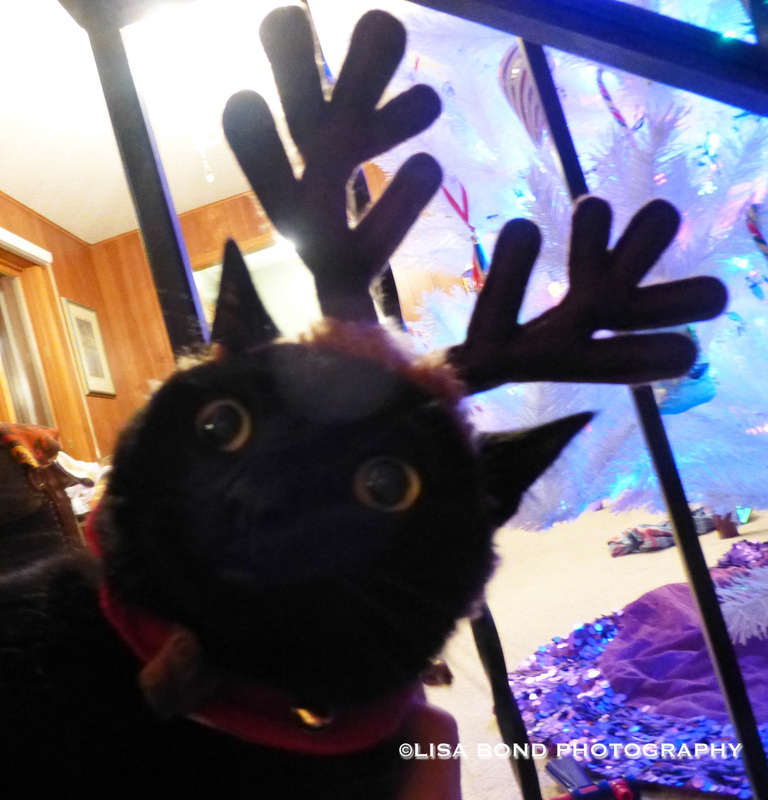 If you don't want to wear deer antlers, don't do it. I am wishing all of you a year of being comfortable in your own skin and being happy to be who you are!  Here is the photo of a slice of Perfect Pecan Pie, as promised. 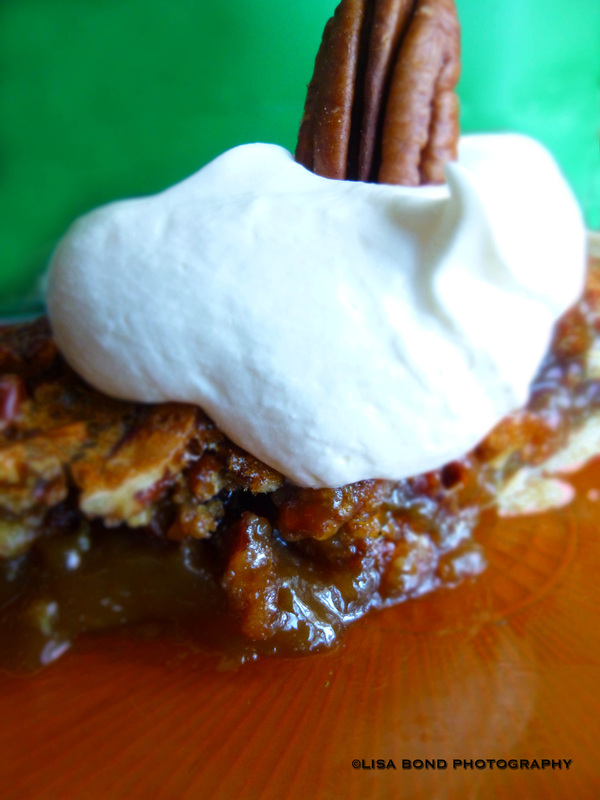
The above photo shows it with one of the extra toasted pecans I talked about in the initial post. 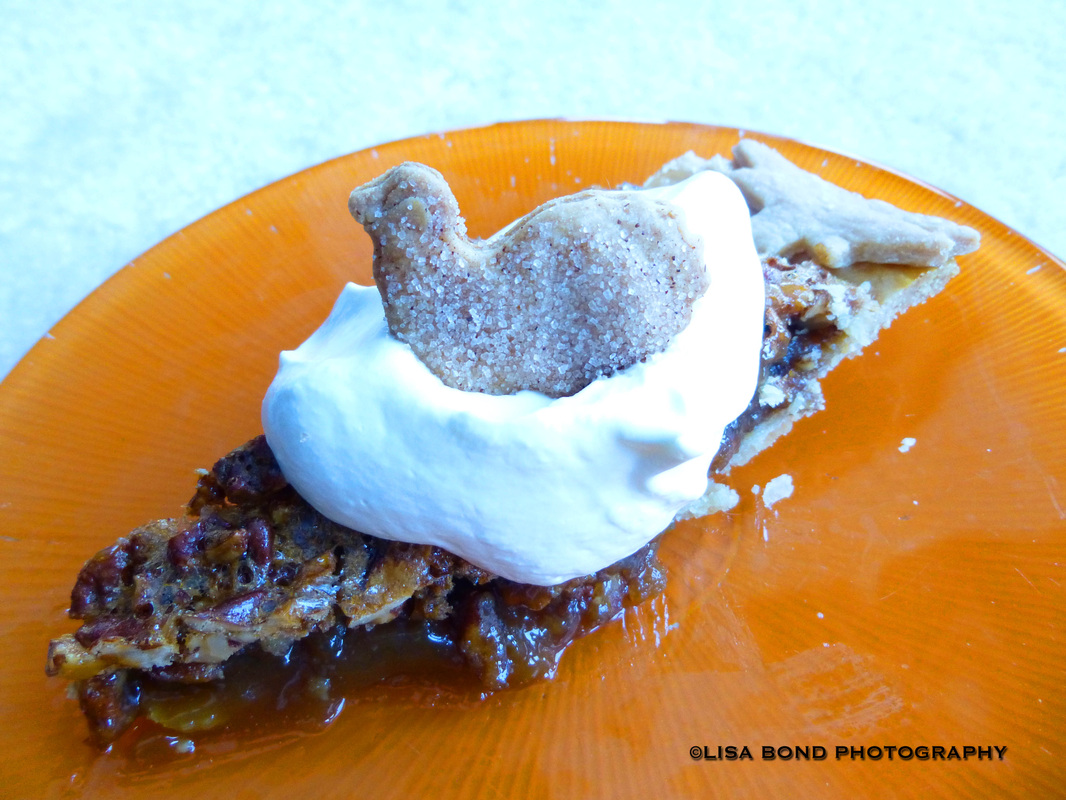
This photo shows it with one of the little pie crust cookies I made, in this case, a turkey. I had no idea it was going to look like a chicken on a nest when I perched it in the cloud of whipped cream, but oh well!
For the record, this is homemade whipped cream, the only kind that will properly do this pie justice. Messing around with Cool Whip or canned whipped cream would be inappropriate with a pie of this caliber. It is worth pointing out that the texture of this pie is a crucial element to its overall success. It is slightly soft but not runny. It is not so firm as to come across as gelatinous which is critical. The filling is opaque and not cloudy as some other pies may appear. The top is crunchy and perfectly balances/counteracts with the softer interior. It is a real winner across all fronts: appearance, texture, and taste. I hope you will give it a try sometime. Thank you for visiting this blog! As promised last week, here is the best Pecan Pie recipe I've ever made. First of all, you need to toast the pecans. I like the Kirkland (Costco) Pecan halves because a 2 lb. bag is only $12.99 and they are nice solid pieces. 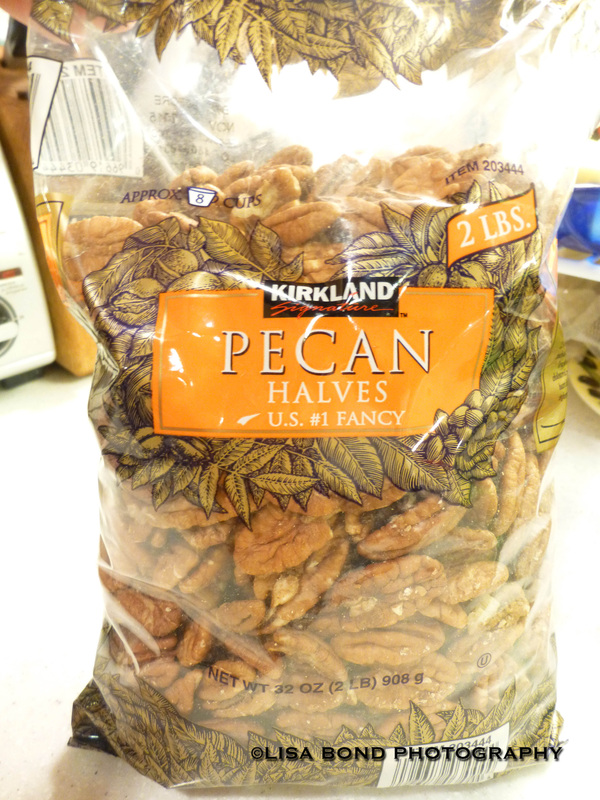
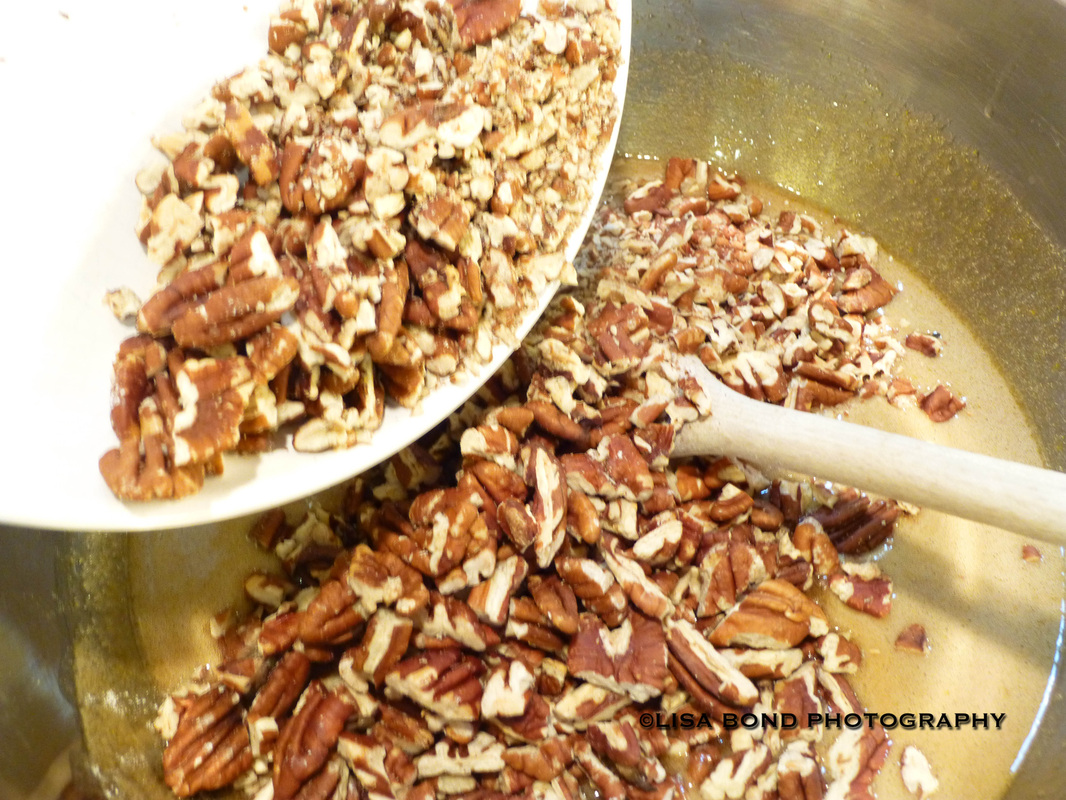
Take the 2 cups of pecans needed for the recipe and spread them on a baking sheet. I added another cup because I always end up eating some and it's nice to have a few extra for decorations, so I'd say I've got 3 cups here. Heat the oven to 350 degrees and bake them for about 12 minutes. Avoid the temptation to leave the kitchen and do something else. I've burned my fair share of pecans because I got distracted elsewhere. Nuts burn fast and there is no bringing them back once they've gone too far. By the 10 minute mark, it's good to be paying close attention to what's going on and give them a stir. Generally speaking, once you can smell the nuts, they are done. 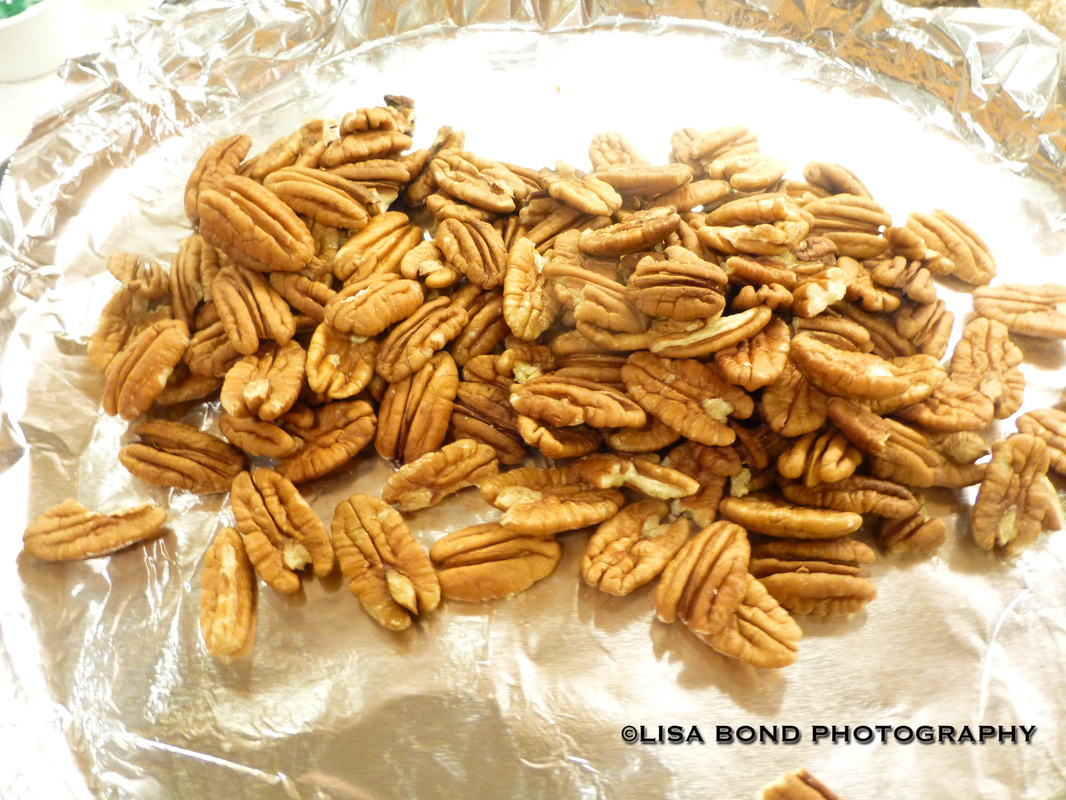
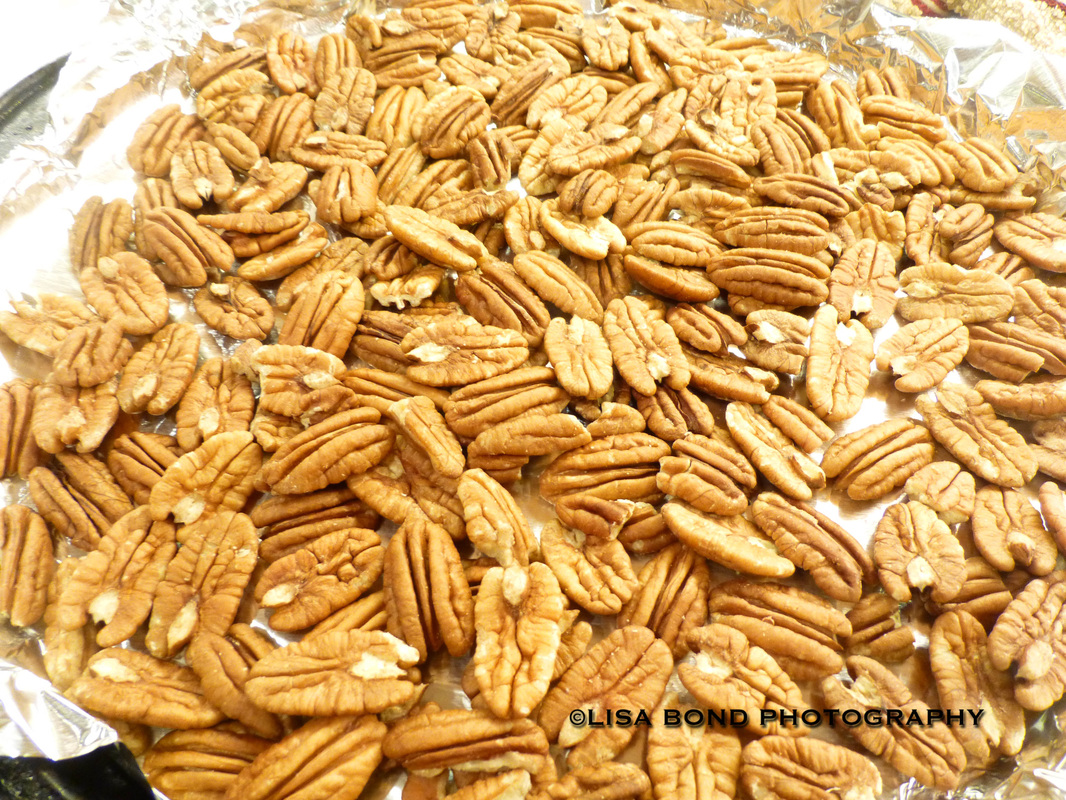
Here are the nuts after they are roasted. 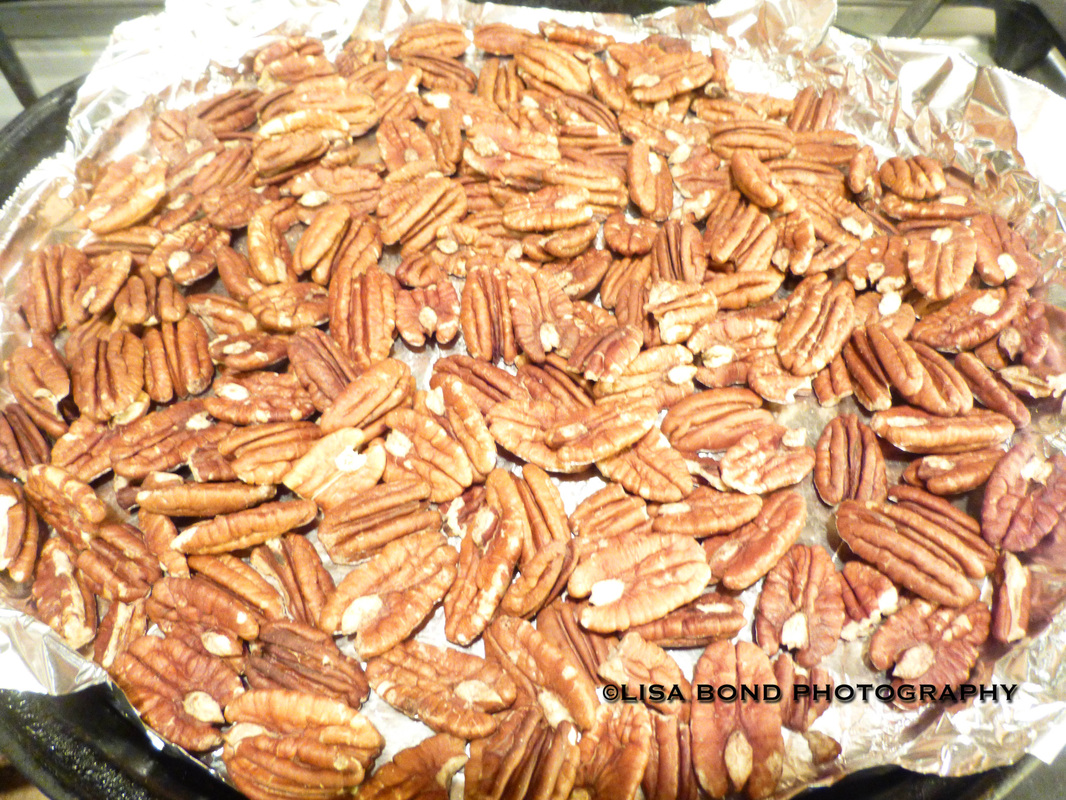
These roasted for exactly 12 minutes and they look good. Only one or two look a bit dark. The nut circled below is too dark. You want to throw out any that are this color. 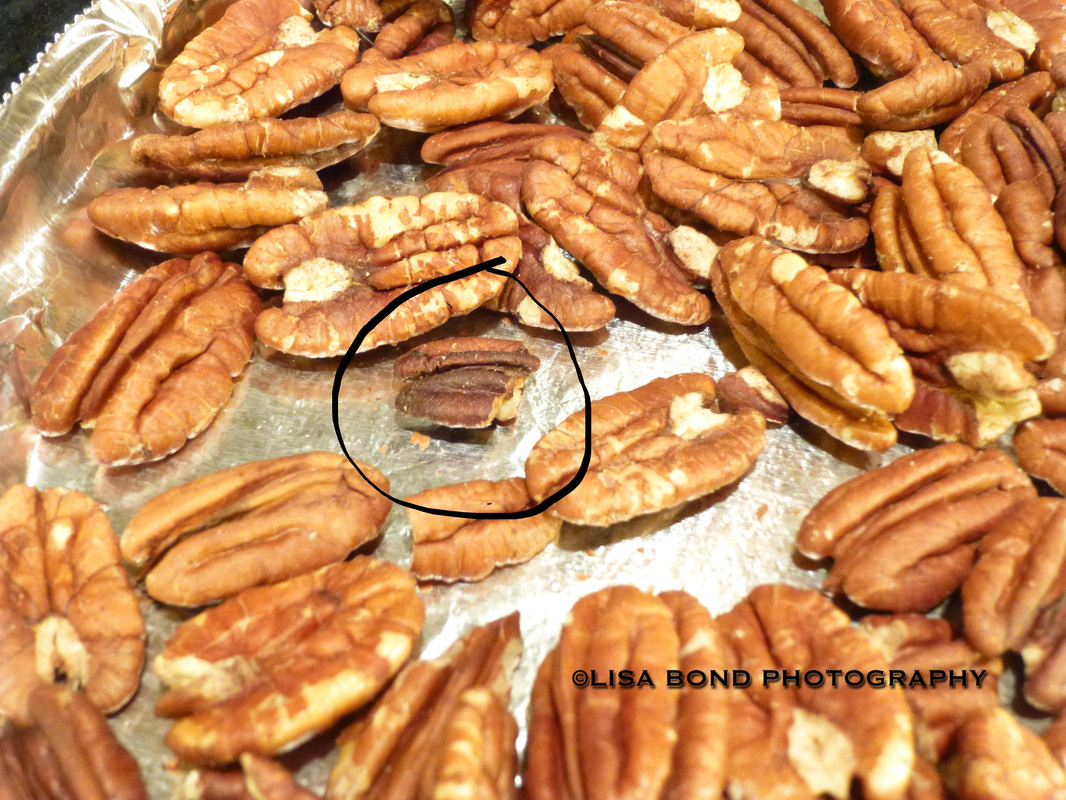
I turn on the exhaust fan to get the smell out of the house quick because of my child with nut allergies. Some years I have put them in the patio if it's not too cold or I try to do it when he isn't in the house. Next, you want to chop them up. I chop mine rather gingerly to avoid having nut fragments flying all over the place on account of my child with allergies. Also, I think the larger pieces are more toothsome than if they were chopped too small. The next thing I do is prepare the pie crust. Use any recipe you like, here is the one I used today: Flaky Pie Crust Bon Appétit | 2000 by Elinor Klivans Makes one 9-inch crust A terrific all-purpose pie crust from Elinor Klivans. Use it during the holiday season and all year long. ingredients
preparationMix flour, sugar and salt in processor. Add butter and shortening. Using on/off turns, process until mixture resembles coarse meal. Drizzle 3 tablespoons ice water over mixture. Process just until moist clumps form, adding more ice water by teaspoonfuls if dough is dry. Gather dough into ball; flatten into disk. Wrap in plastic; chill until dough is firm enough to roll out, about 30 minutes. Roll out dough on lightly floured work surface to 12-inch round. Transfer dough to 9-inch-diameter glass pie dish. Fold overhang under. Crimp edges decoratively. (Can be prepared 2 days ahead. Cover and refrigerate.) Here is the pie crust after it is rolled out. 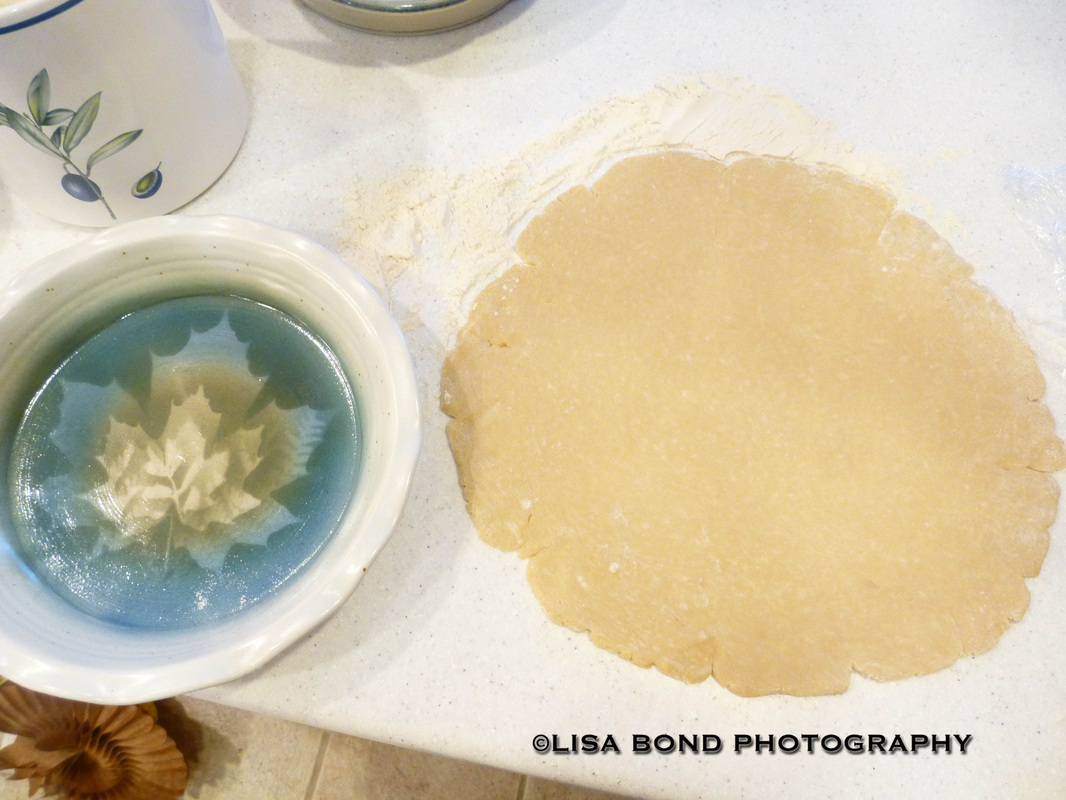
I also like to use festive cookie cutters to cut out little shapes for decoration later. I actually made an extra pie crust to do this. I sprinkle cinnamon sugar on them and bake them for 10 or 15 minutes on a separate cookie sheet. This comes from my Grandma, who used to do exactly that with the pie crust scraps. The kids loved them. 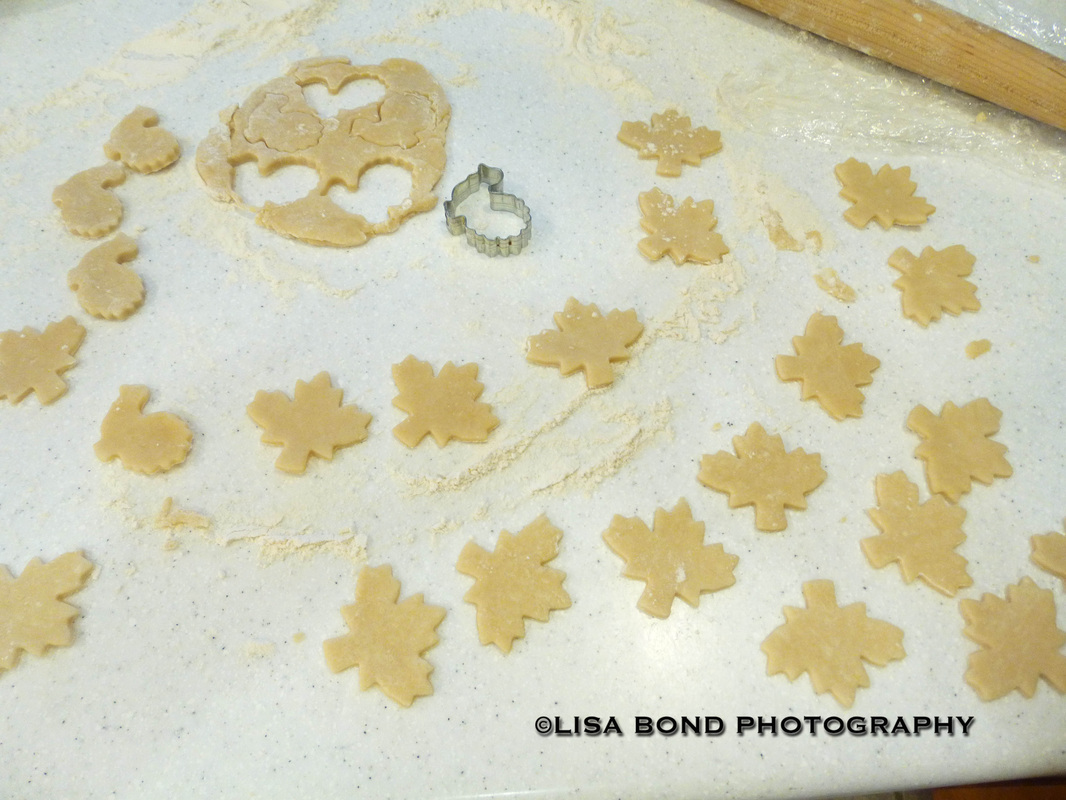
This pie crust needs to be blind baked, so bake it in the oven and use whatever you prefer to keep the crust flat: beans, pie weights, another pie pan, etc. Bake it for 15 minutes at 400 degrees. I am using aluminum foil to keep it flat. I also used a fork to poke holes in through the foil to avoid air bubbles forming. 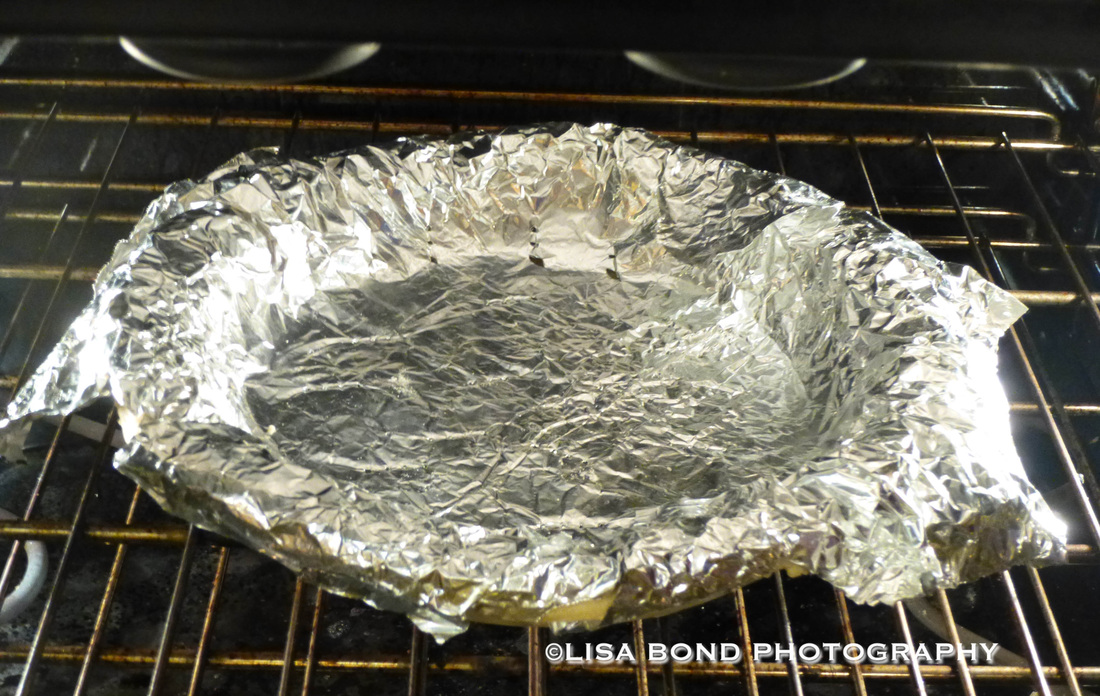
Take off the foil and brush an egg yolk wash in the crust. This should consist of one egg yolk with a tiny bit of water, about 1/8 teaspoon. Bake it for one more minute. I am never happy with how my pie crusts look, but here it is for the record. 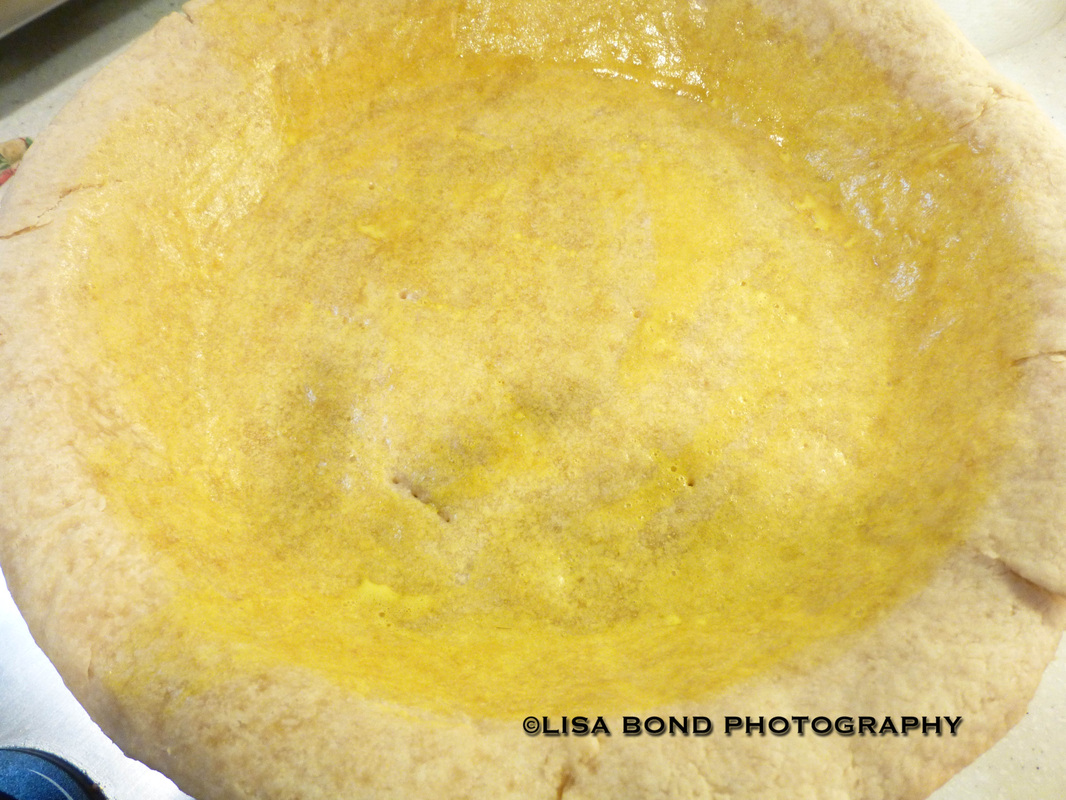
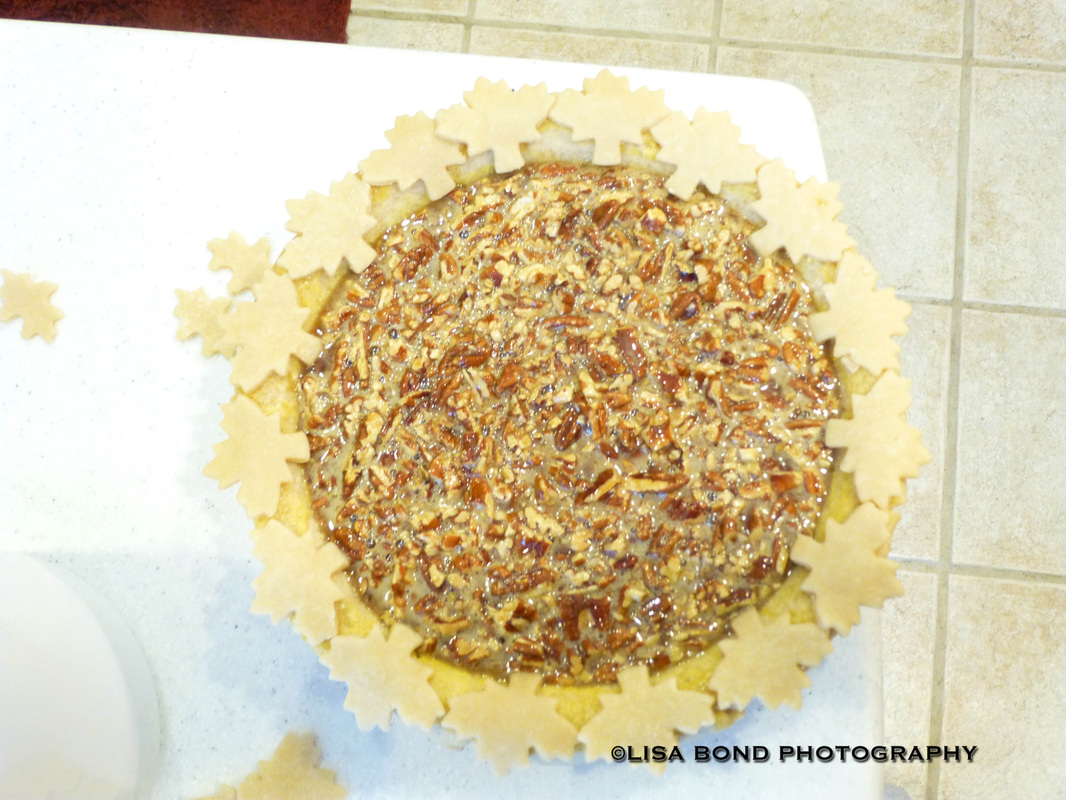
Now I am going to decorate the edges with some of those cookie pie crust leaves I made earlier. 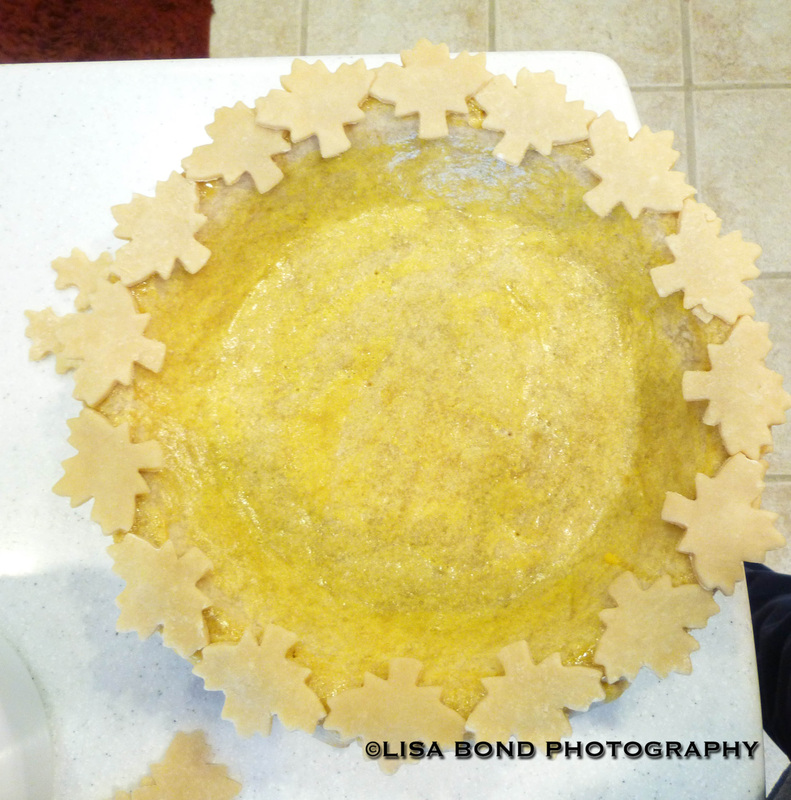
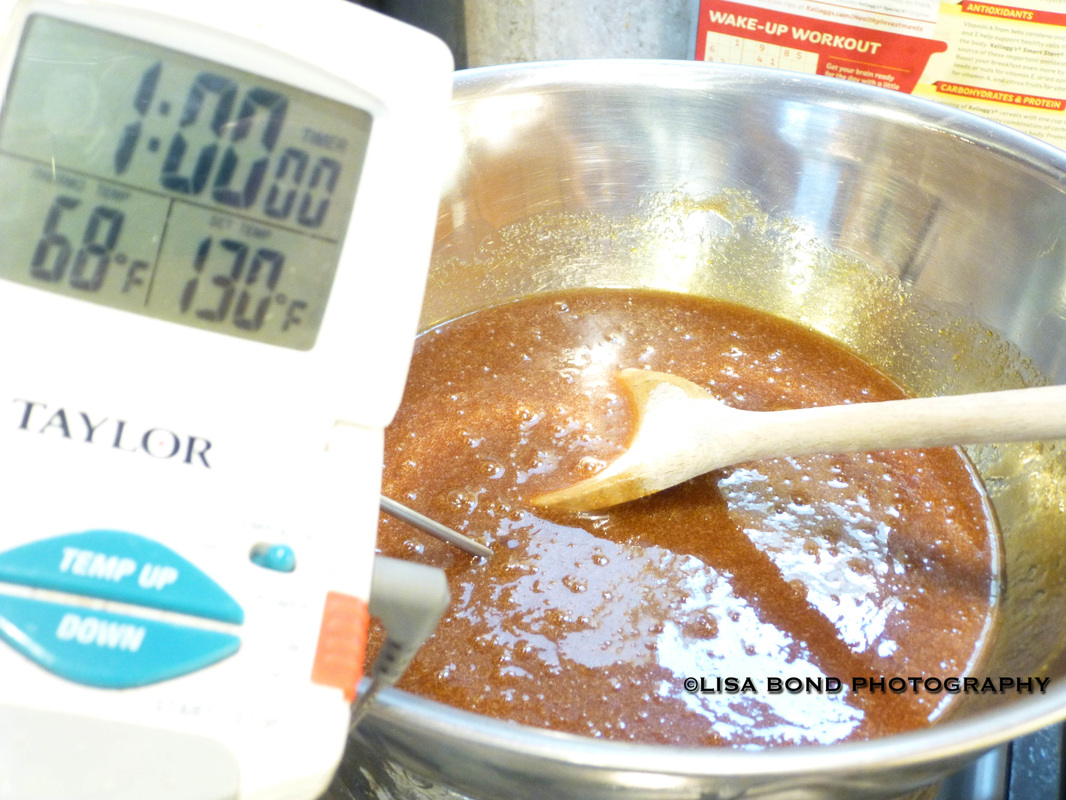
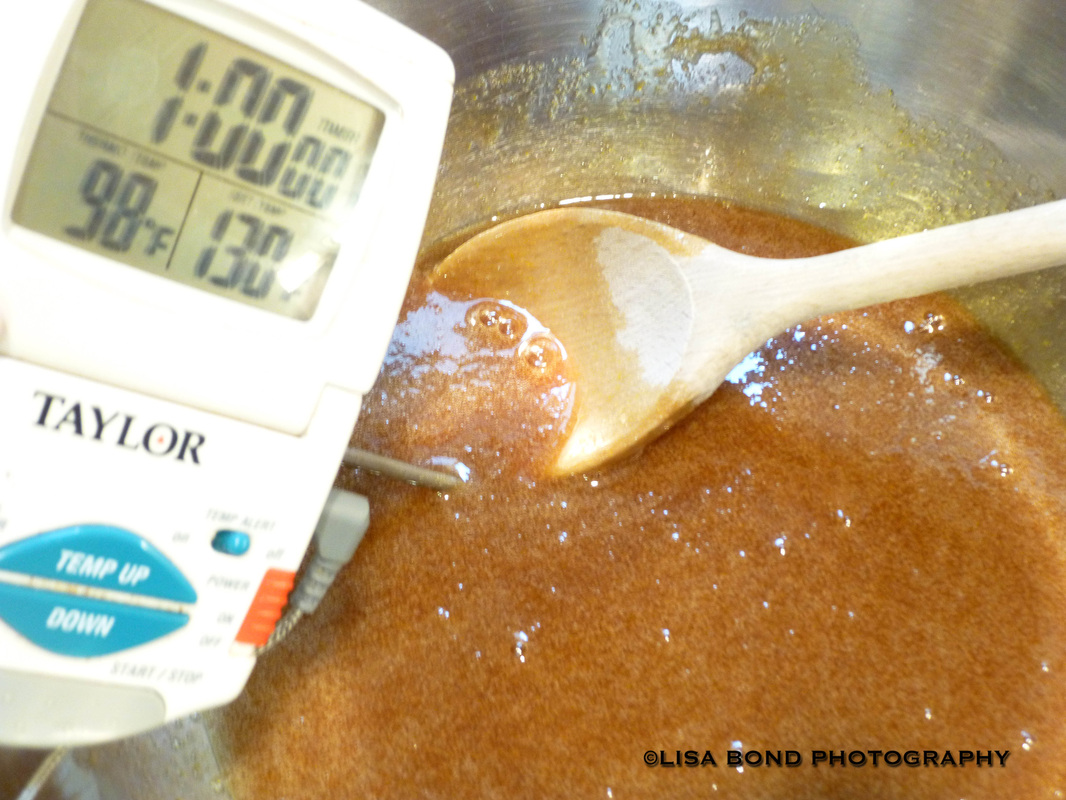
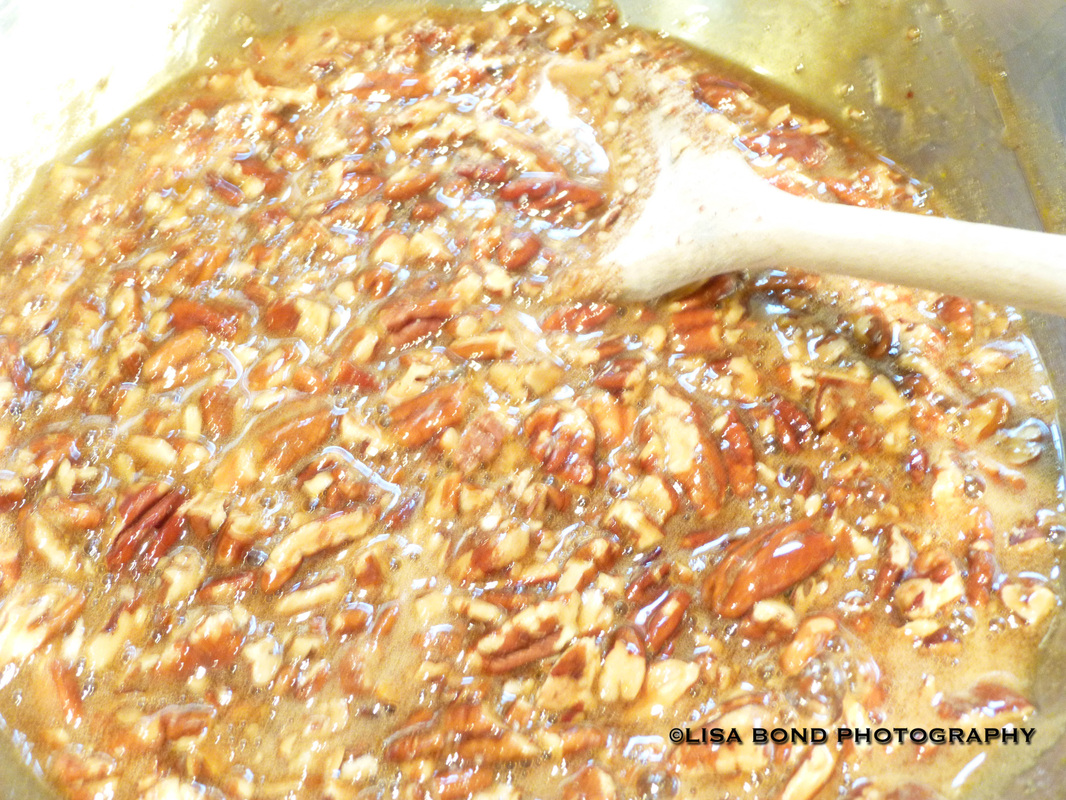
Finally, it is time to make the pie filling. Here is the recipe: Perfect Pecan Pie Serves 8 If you want warm pie, cool the pie thoroughly, then cut and warm it in a 250-degree oven for about 20 minutes. 1 9-inch baked pie shell 6 T. unsalted butter, cut into 1 inch pieces 1 cup packed dark brown sugar 1/2 teaspoon salt 3 large eggs 3/4 cup light corn syrup 1 T. vanilla extract 2 C. pecans (8 ounces), toasted and chopped into small pieces 1. Adjust oven rack to center position, and heat oven to 275 degrees. Place pie shell in oven if not already warm. 2. Melt butter in medium heatproof bowl set in skillet of water maintained at just below simmer. Remove bowl from skillet; mix in sugar and salt with wooden spoon until butter is absorbed. Beat in eggs, then corn syrup and vanilla. Return bowl to hot water; stir until mixture is shiny and warm to the touch, about 130 degrees. Remove from heat; stir in pecans. 3. Pour mixture into warm shell; bake until center feels set yet soft, like gelatin, when gently pressed, 50 to 60 minutes. Transfer pie to rack; let cool completely, at least 4 hours. Serve pie at room temperature or warm, with lightly sweetened whipped cream or vanilla ice cream. Cook's Illustrated, November/December 1995 Here is the recipe, step-by-step, with photos. First of all, mise en place. Assembling the ingredients now will help with baking later. 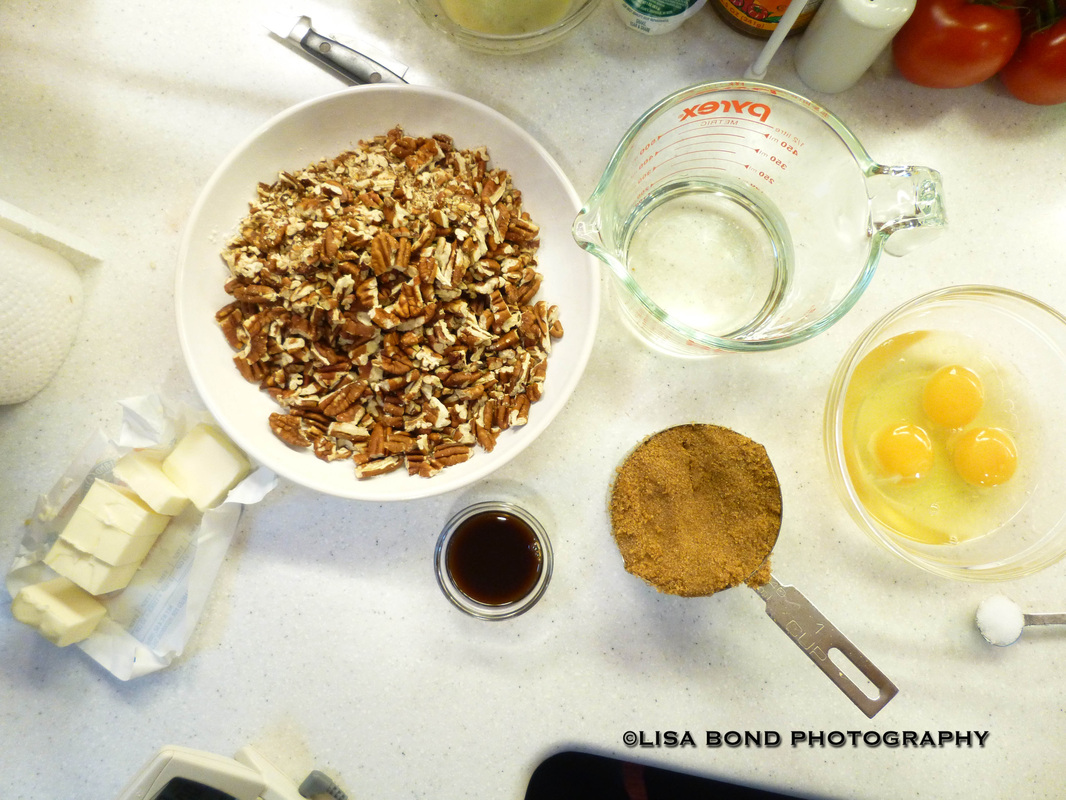
Melt butter in medium heatproof bowl set in skillet of water maintained at just below simmer. 
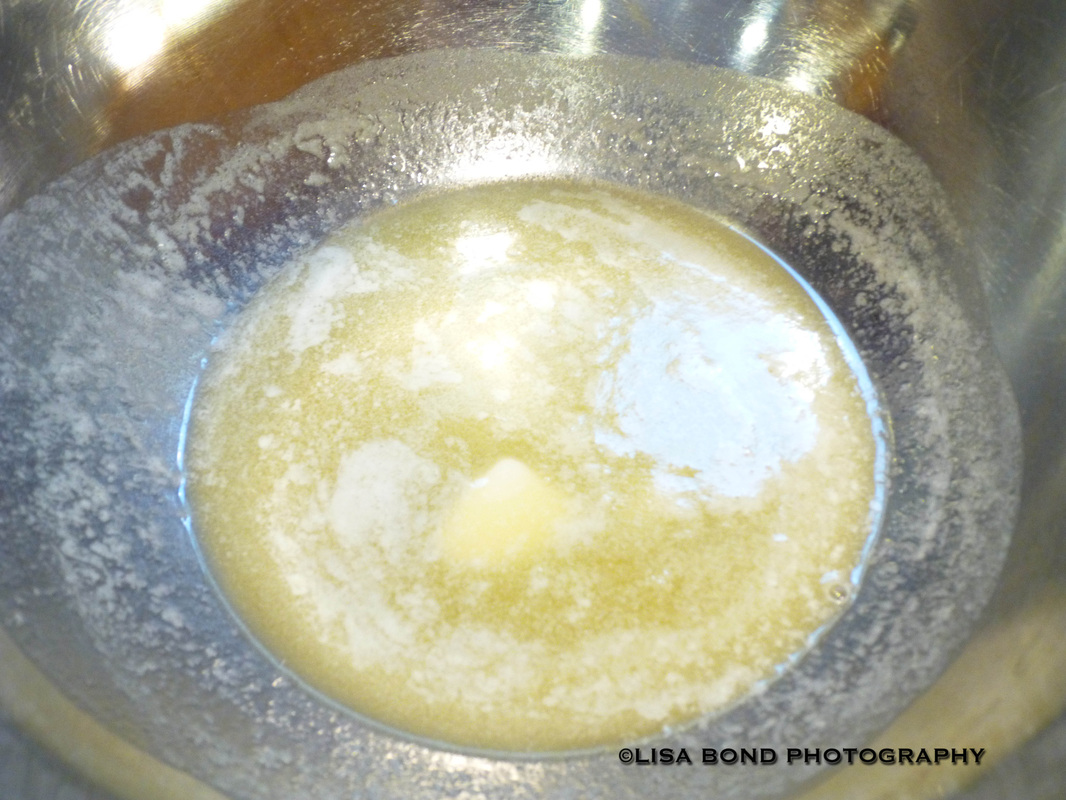
Remove bowl from skillet; mix in sugar and salt with wooden spoon until butter is absorbed. 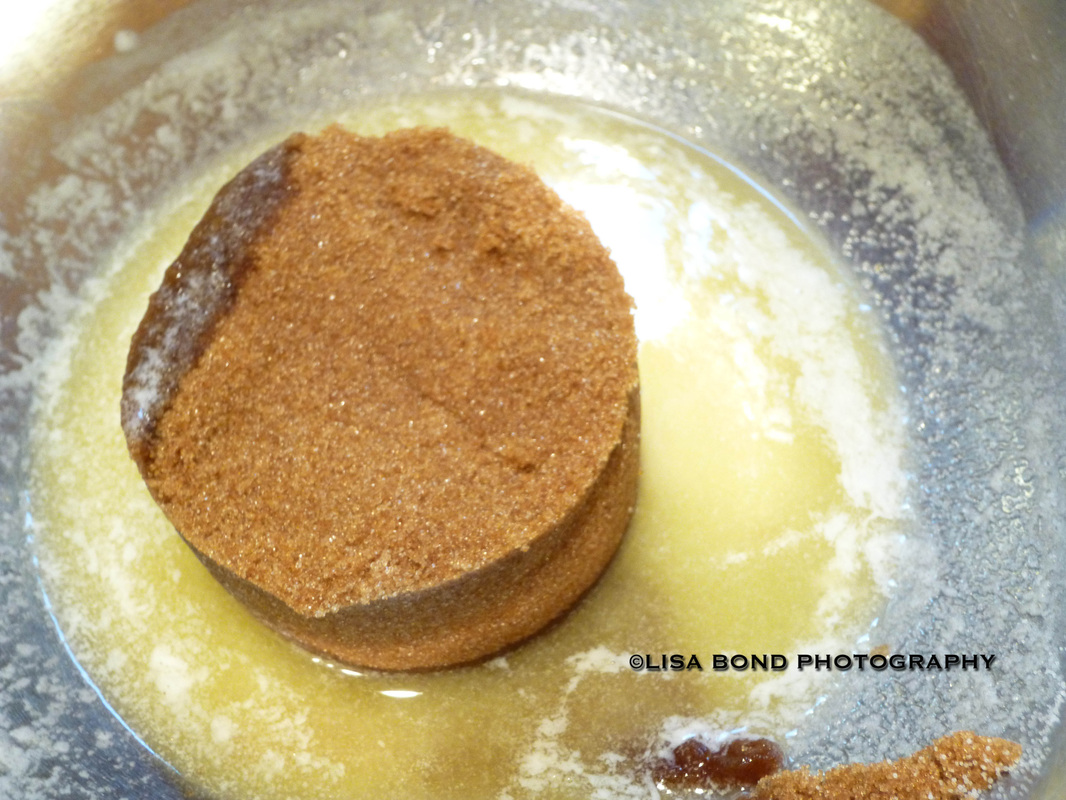
Beat in eggs, then corn syrup and vanilla. 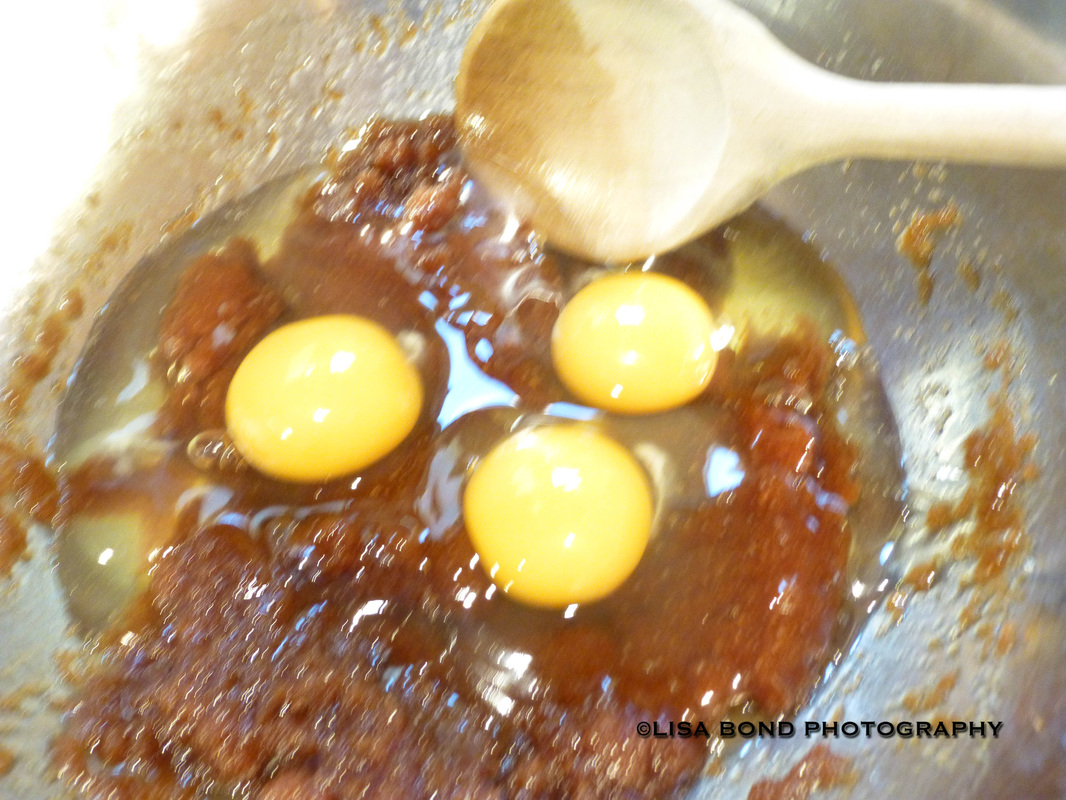
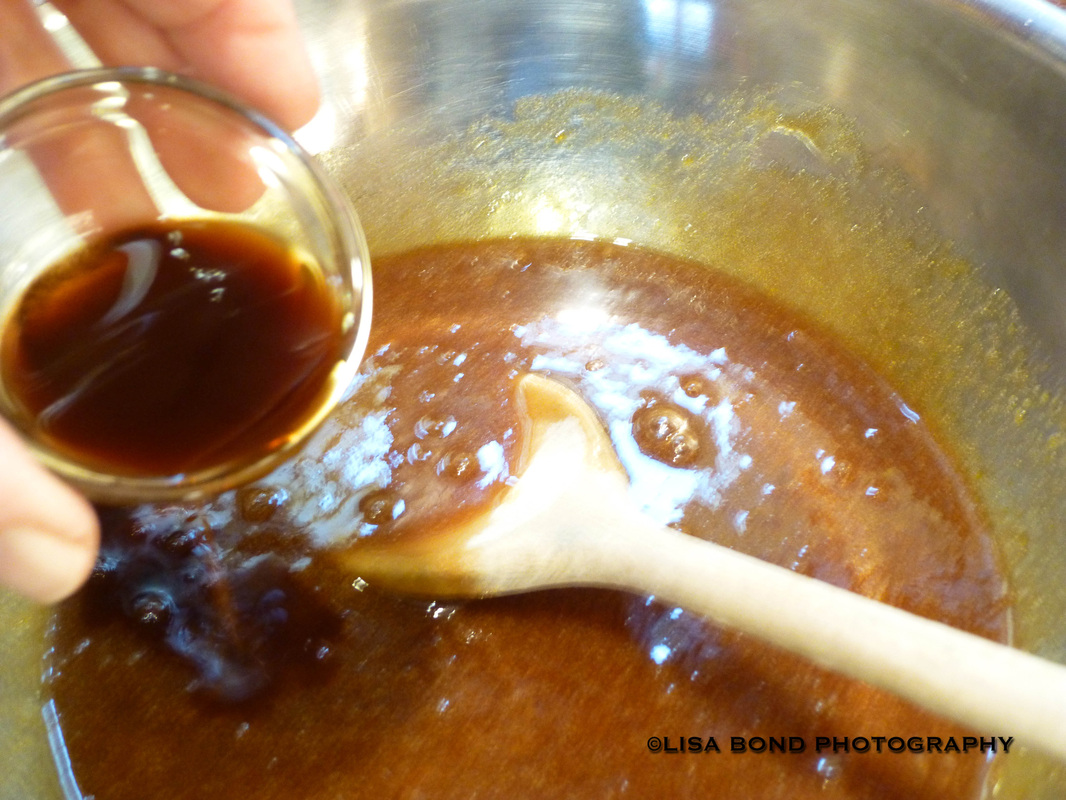
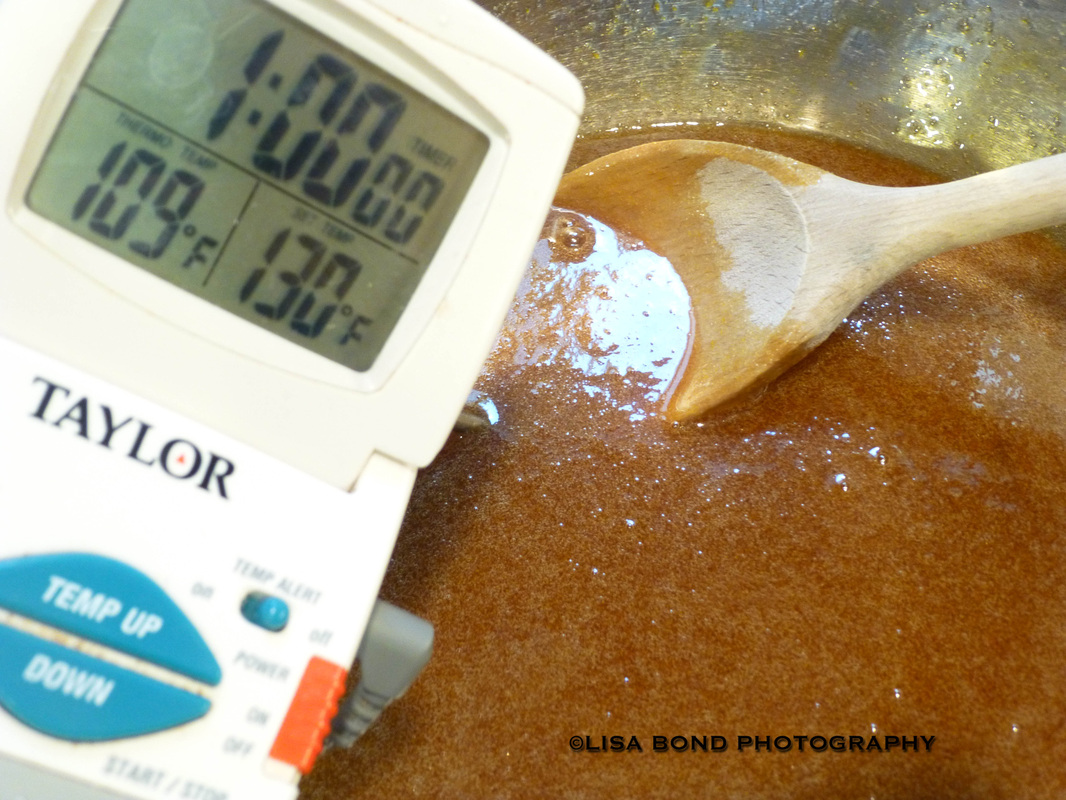
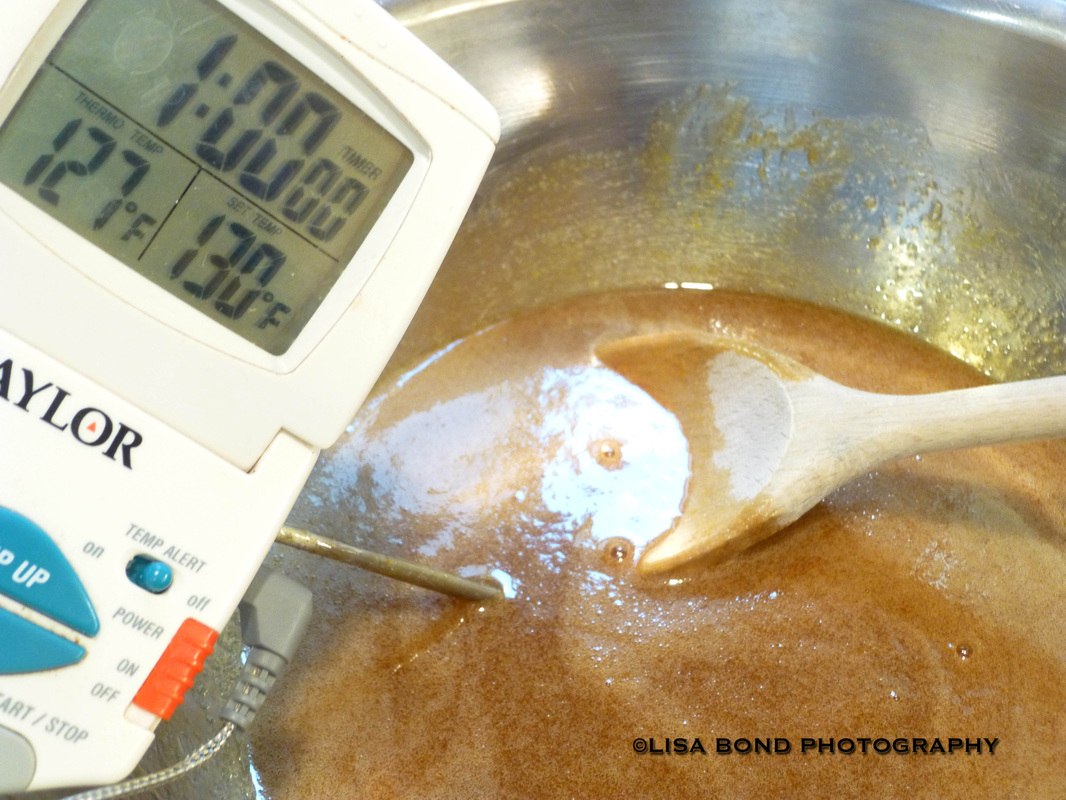
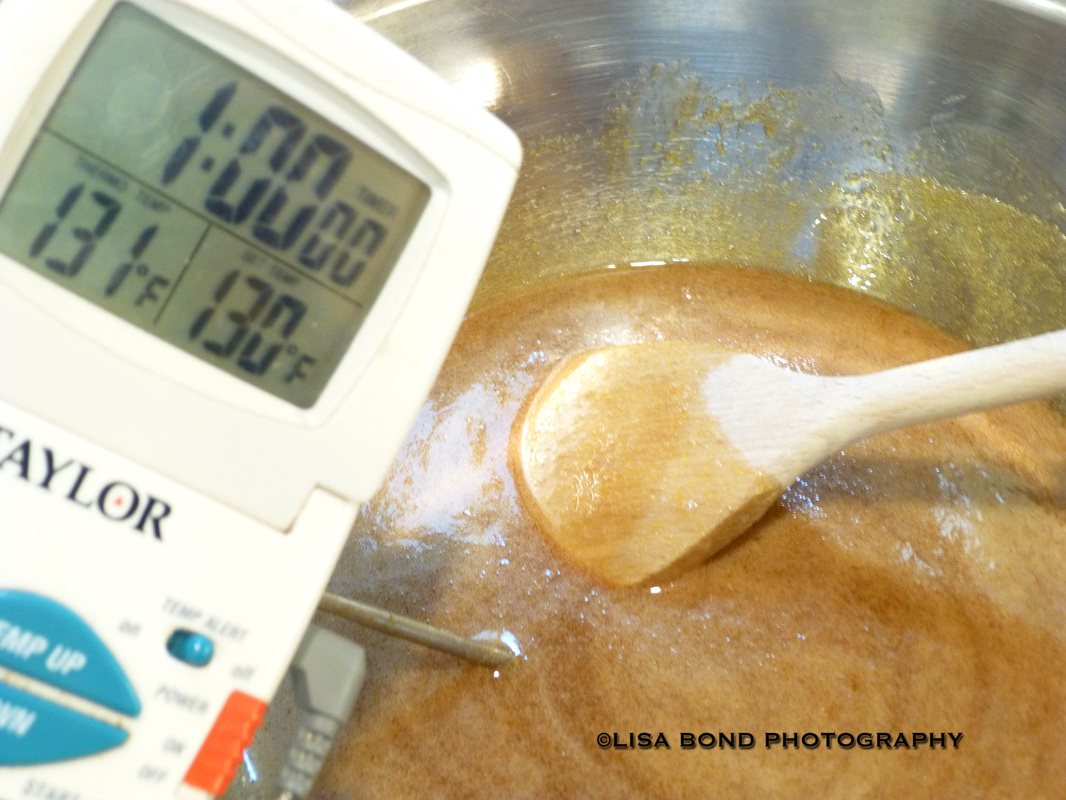
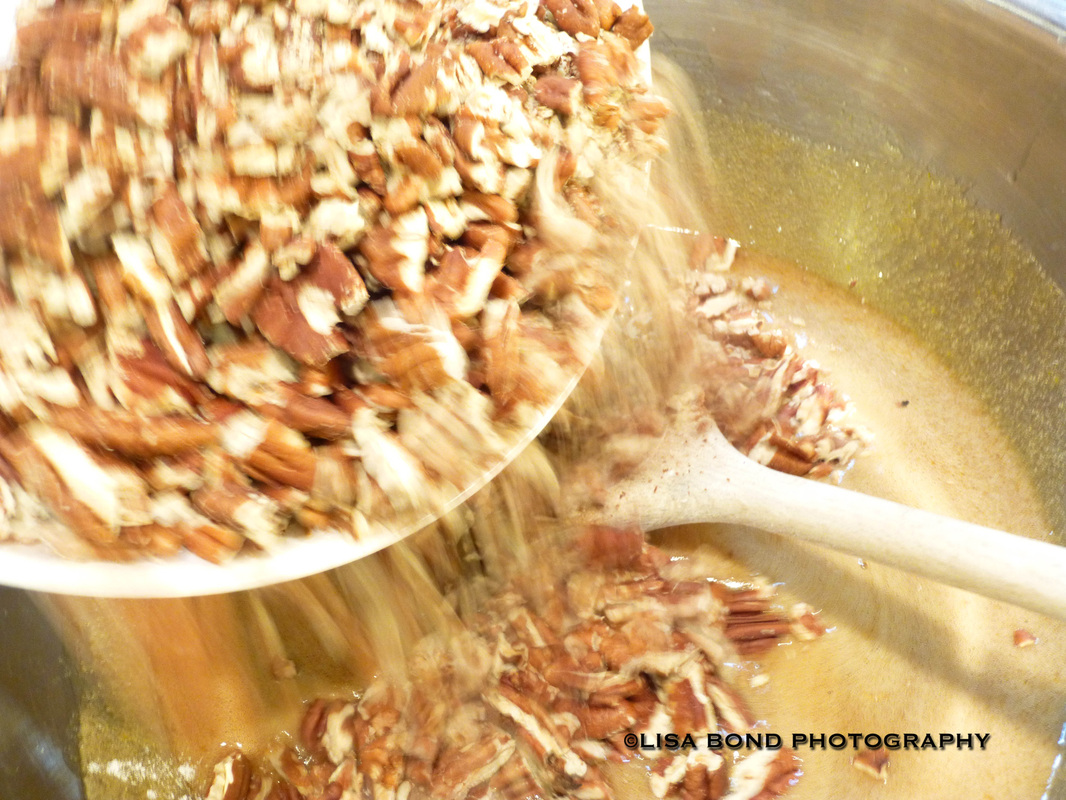
Return bowl to hot water; stir until mixture is shiny and warm to the touch, about 130 degrees. Remove from heat; stir in pecans. Pour mixture into warm shell; bake until center feels set yet soft, like gelatin, when gently pressed, 50 to 60 minutes. 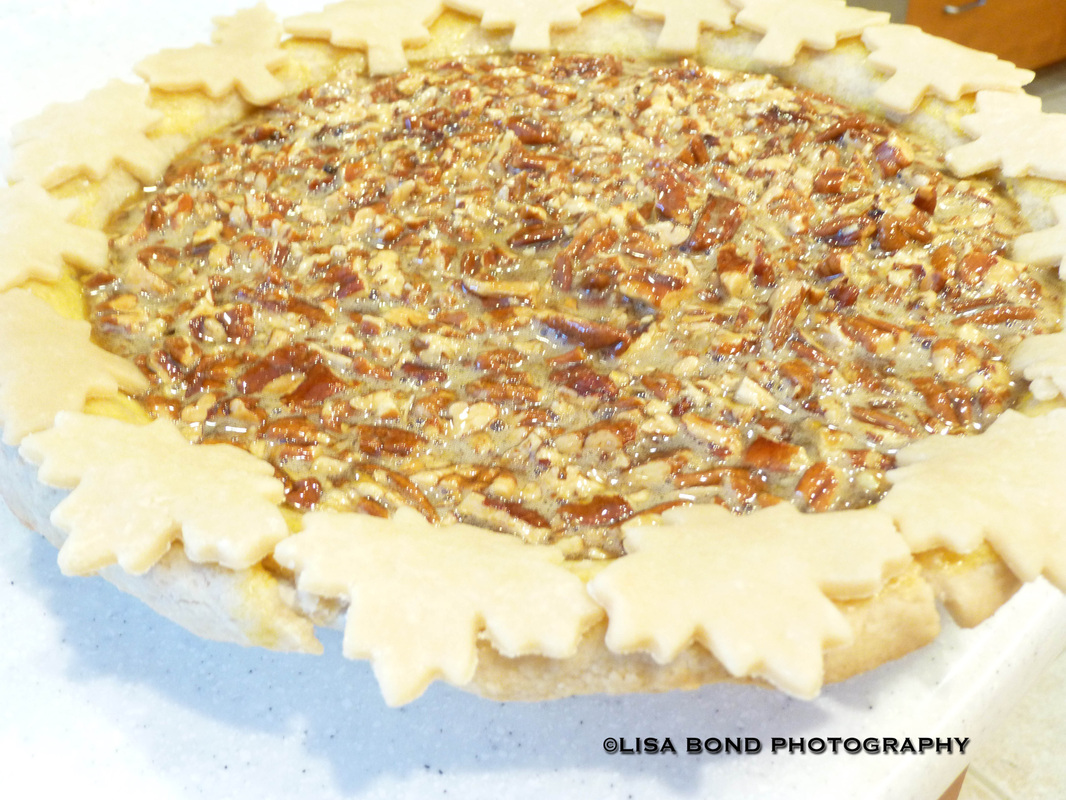
I had to bake this pie a bit longer for some reason. I don't remember doing it in year's past, but go with the appearance and make sure the filling isn't sloshing around when the time is up. If it is, bake a little longer. Here is the finished pie. I will take a picture of it tomorrow after I cut a piece and post it for you. 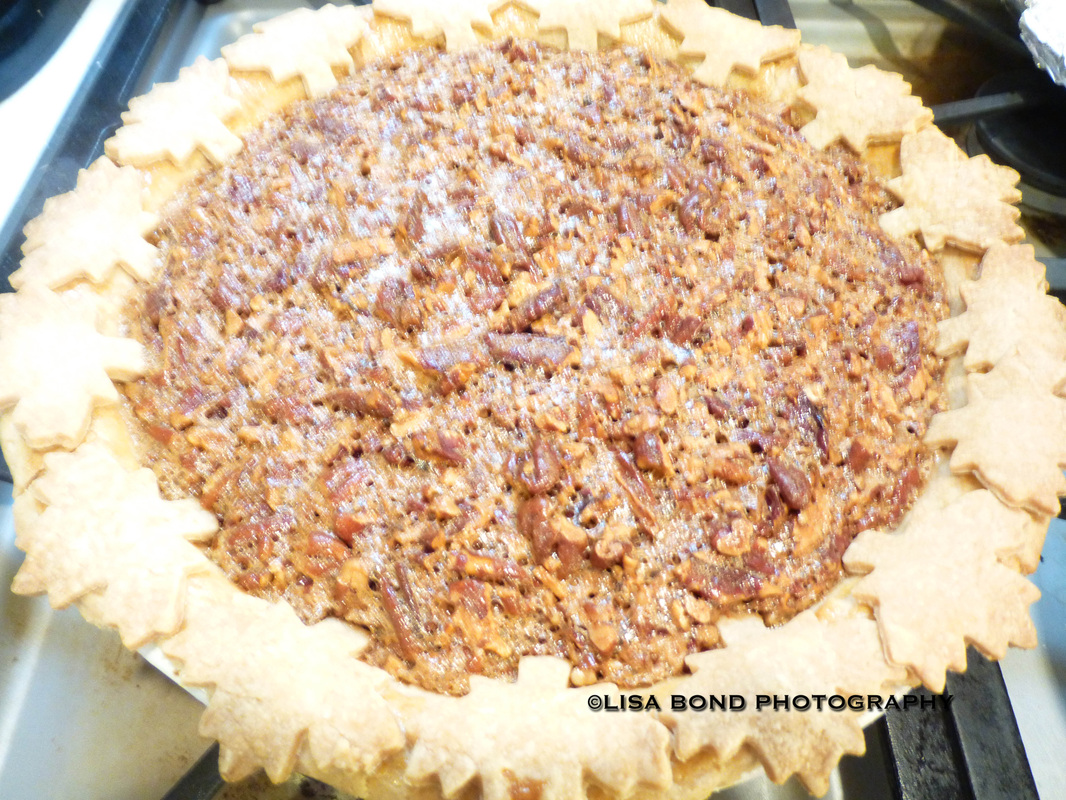
Happy Thanksgiving to you all and thank you for stopping by!
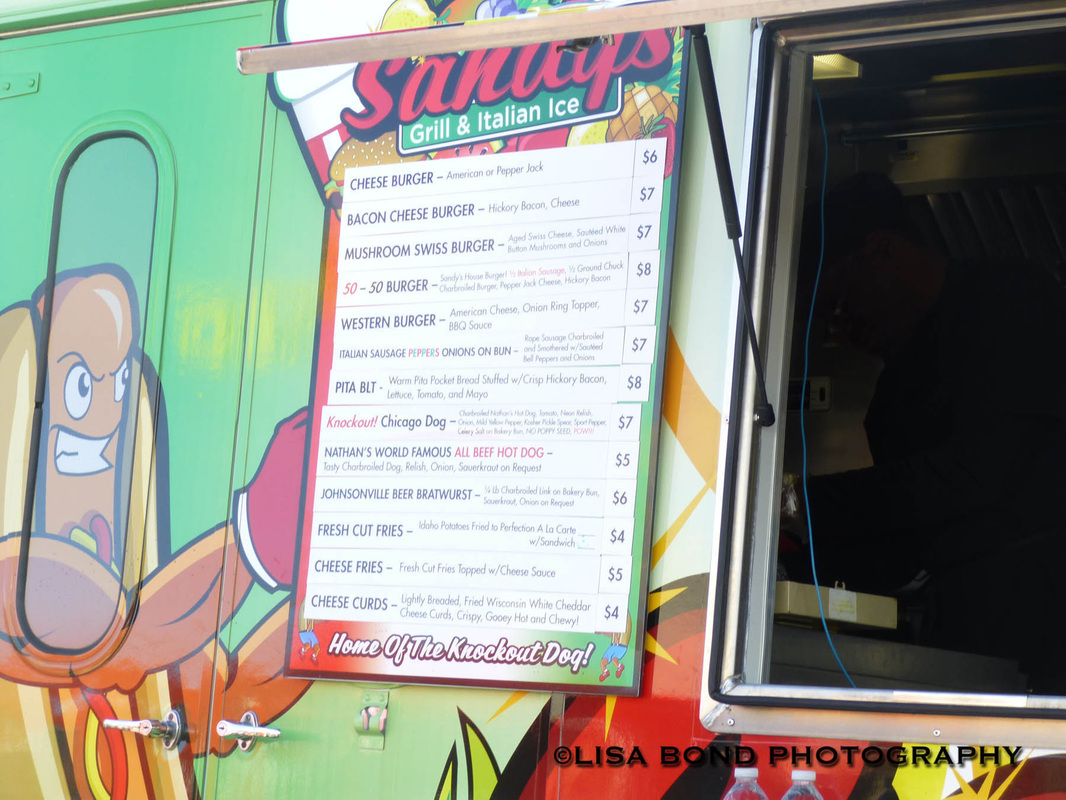
In this part of the country, food trucks have become all the rage. They are mobile dining experiences and travel around to different locations throughout the week. I've tried them twice before. The first time was when I read about a Lobster Roll truck, and trying/hoping to recreate a Lobster Roll experience I had at Red's in Maine, I went down there. It wasn't bad, but it wasn't Red's. Well, this is Minnesota after all and while we do have a lot of lakes, there aren't any lobsters in them. Perhaps my expectations were a bit high. The second time I tried one was at my favorite outdoor market, the Mill City Farmer's Market. This truck was run by Chef Shack. They create a lot of great food and one of their menu staples is the mini donut. It'll set you back $7, but they truly were some of the best and most memorable mini donuts I've ever had. 
I've heard about purported mass gatherings of food trucks here and there, but always forget to go...until last weekend. I made it to an event that had 18 trucks in one spot. 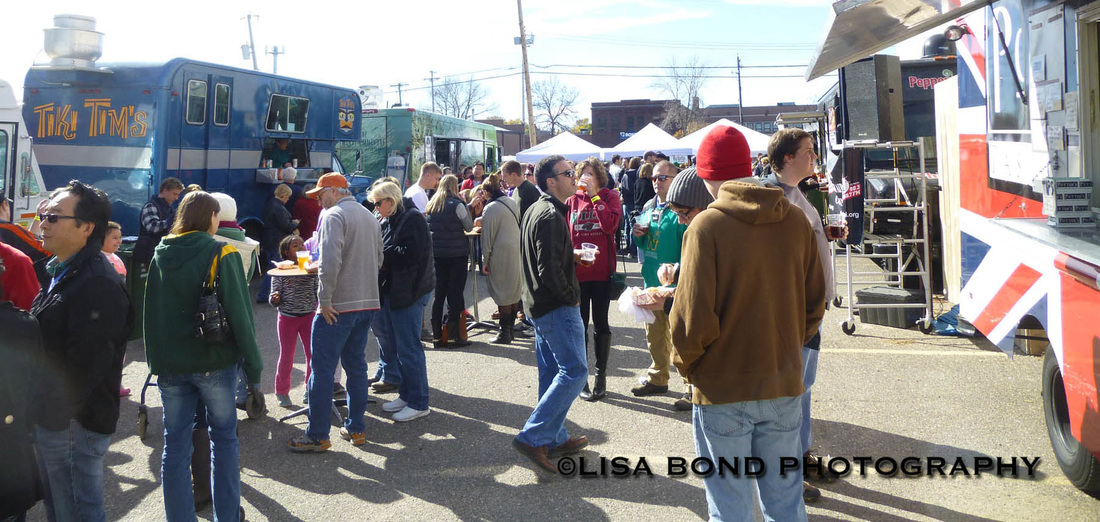
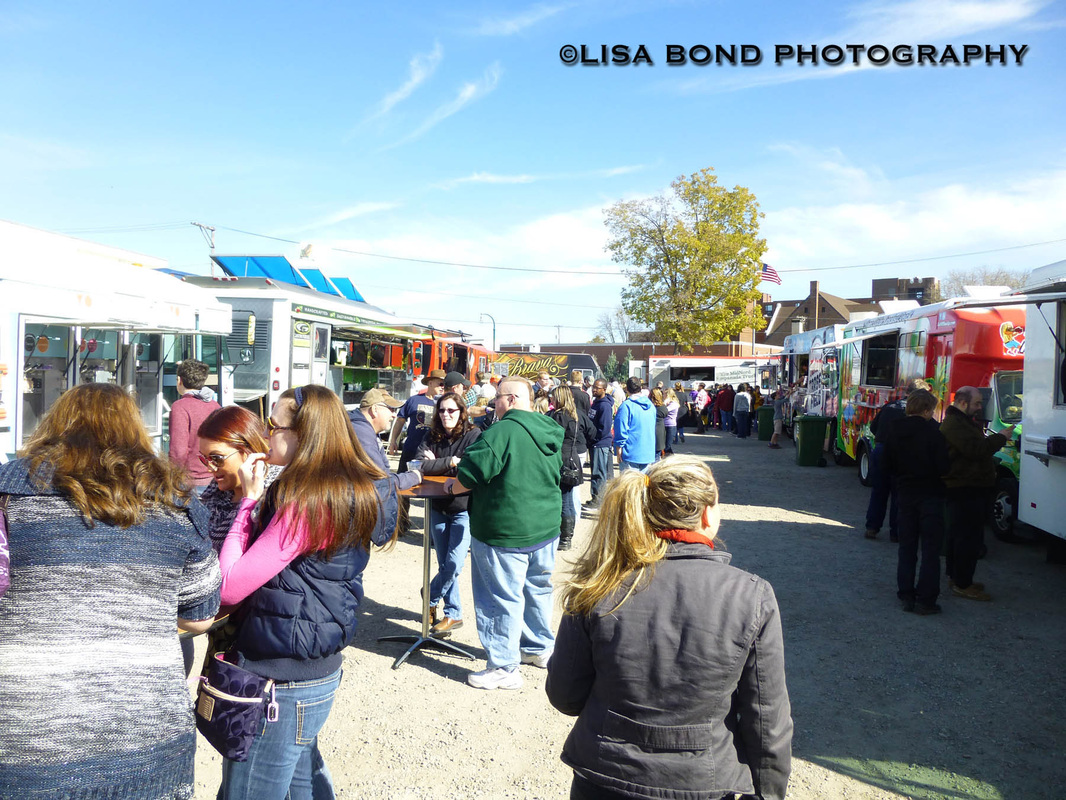

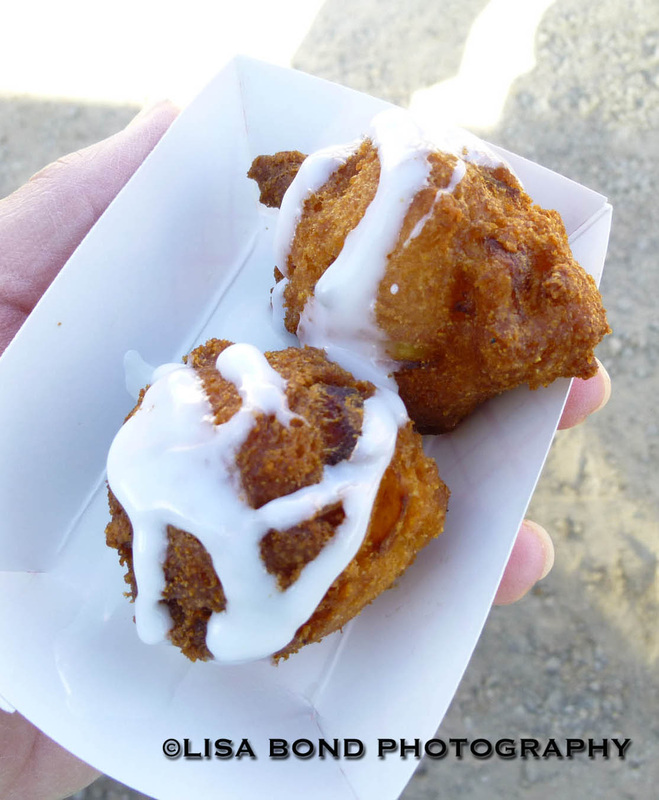
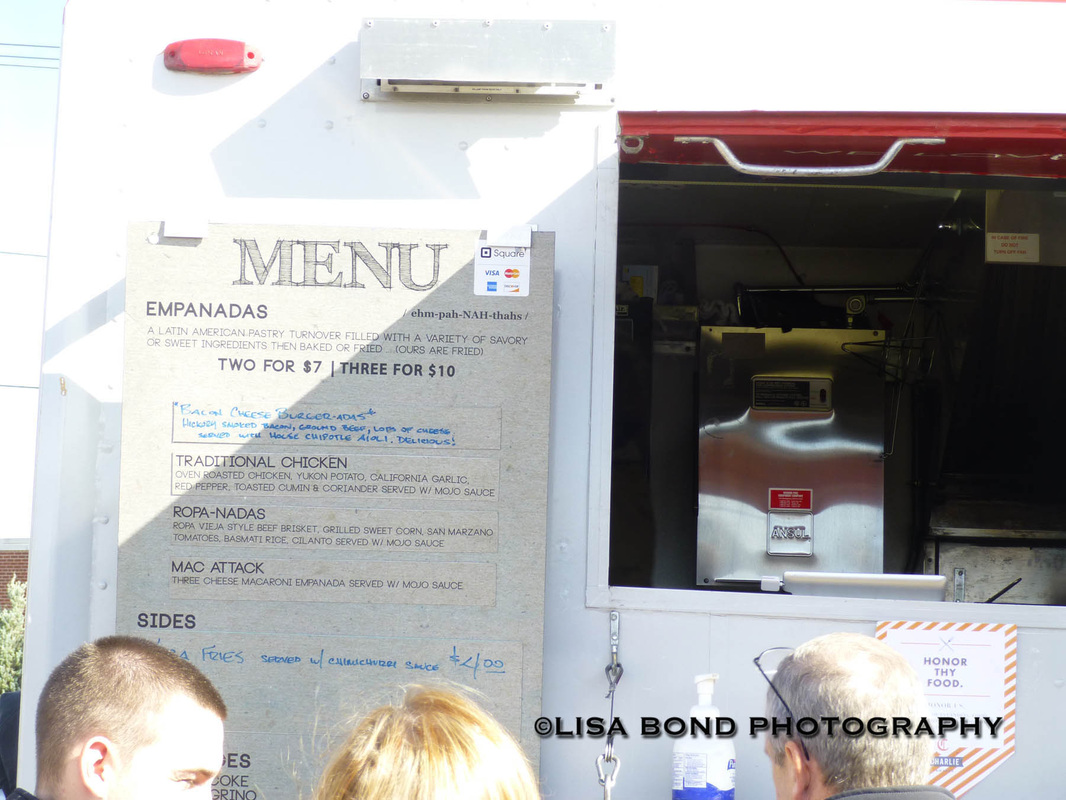
The approach I took was to survey first, review their menus, then go back to whatever I had to try. Well, that was the plan anyway. Until I got to this truck, offering a Mango Fritter for $2. That was how it began. We had dessert first. 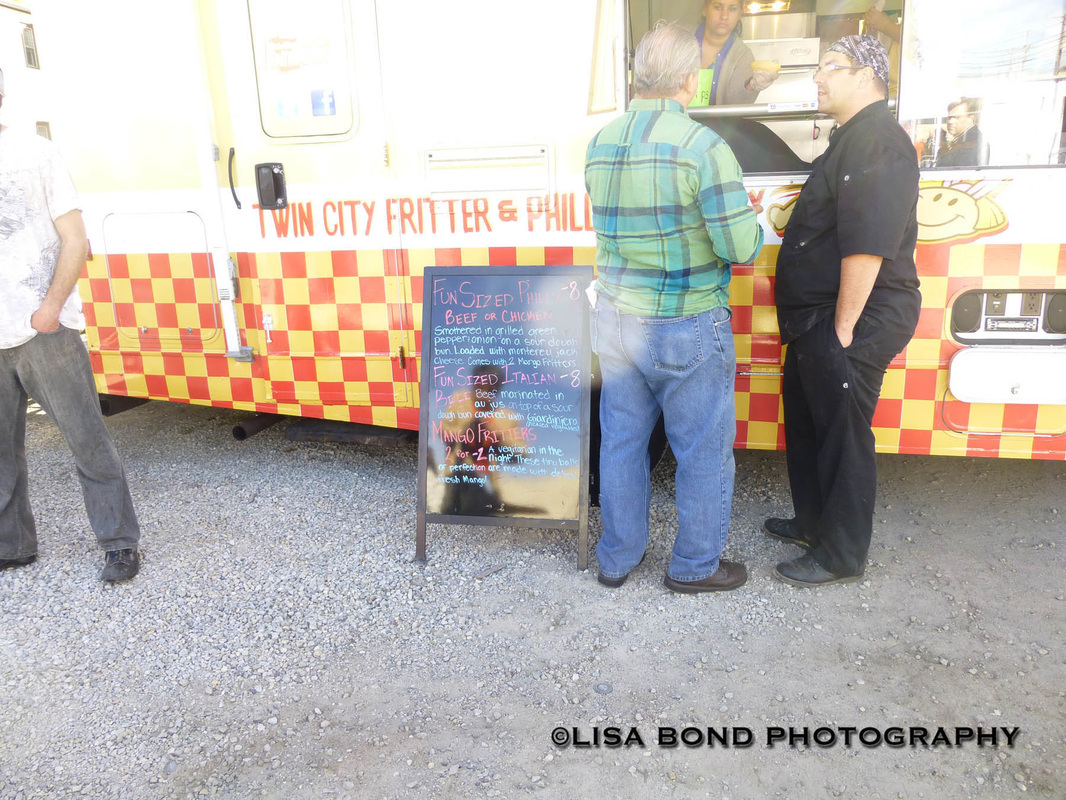
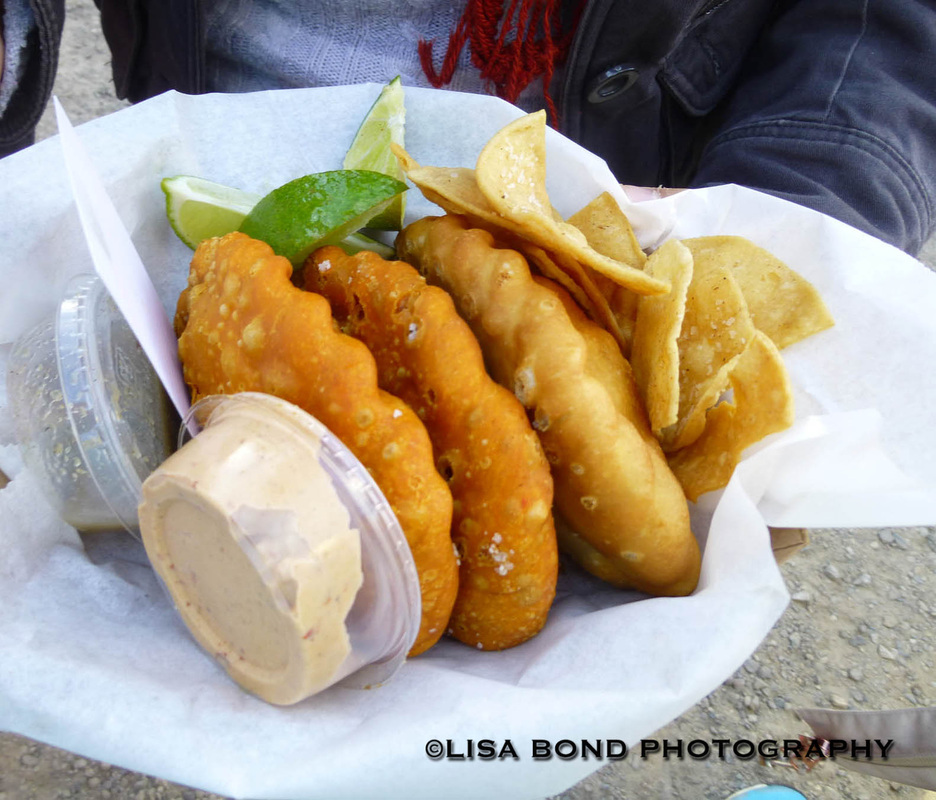
Next was my daughter's pick, the Empanada truck. They had food that sounded safe for her (aka not spicy) to try: the Mac-N-Cheese and the Cheeseburger Empanadas. They were good, but pretty bland for my taste. 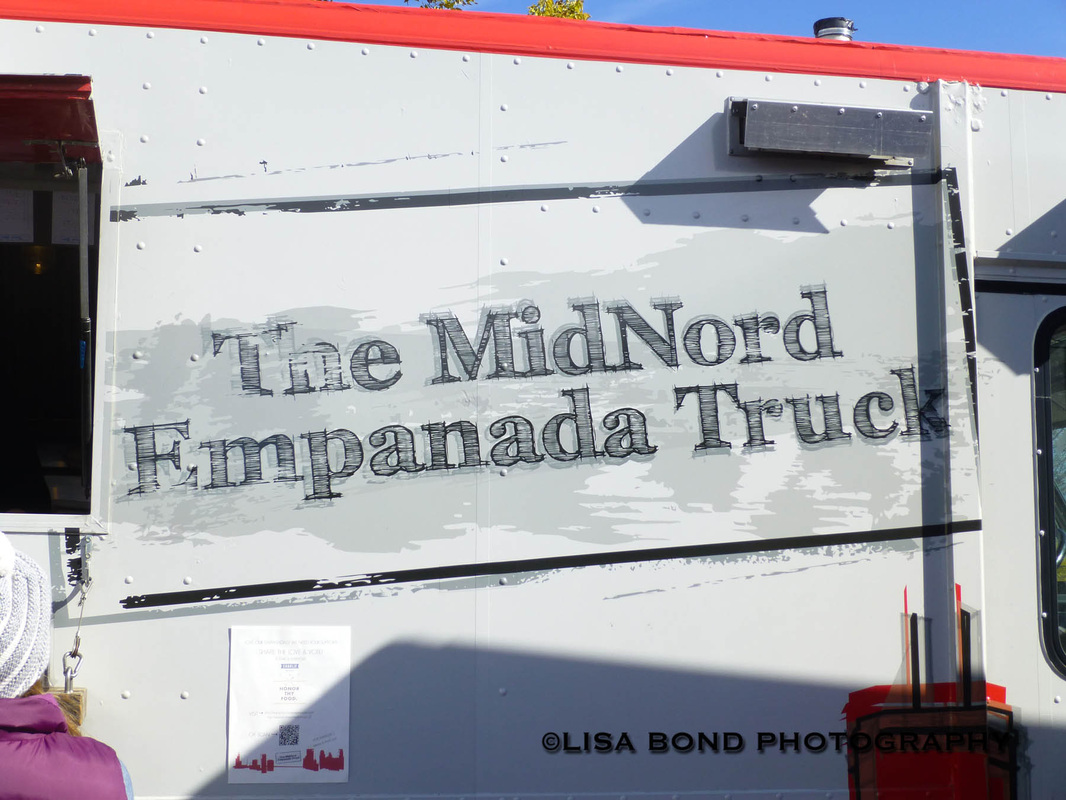

The place I wanted to go back was to Andrew Zimmern's truck for the smashed potato running at $3. A lot of these trucks will set you back $9 or $10, but I wanted to sample a few different things. I was looking for some smaller portions so I wouldn't get filled up on one dish. 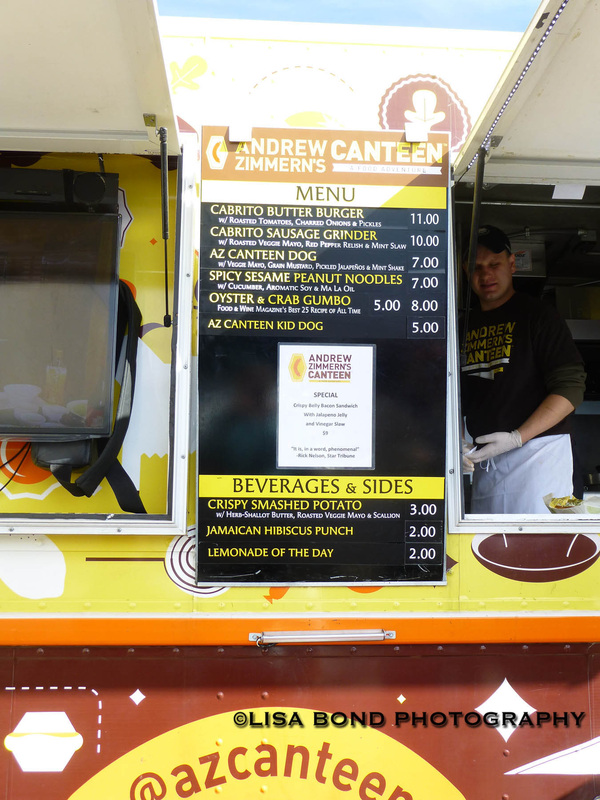
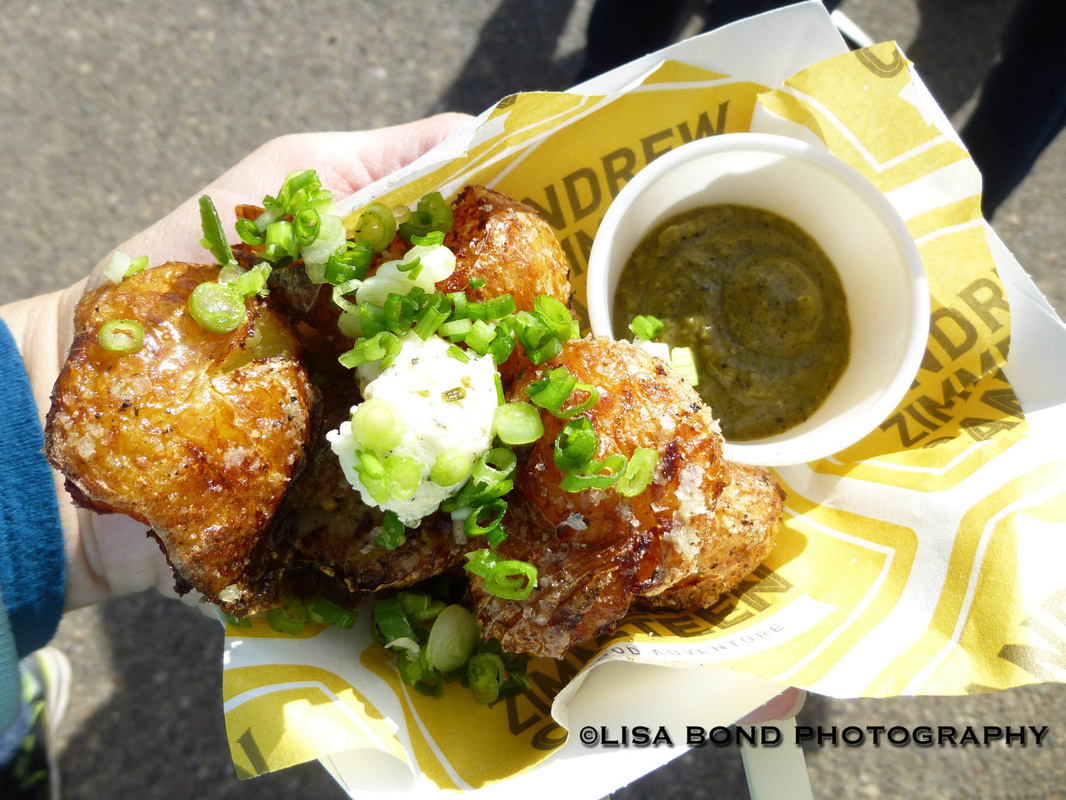
I could tell by their appearance these were gonna be good. In fact, I am pretty sure they were the most amazing potatoes I've ever had in my life. They were creamy inside, crunchy skins, salty, garlicky, OMG can-I-get-another-order-of-these good. I thought about going back, but I wanted to have room to try something else. What I decided on was the Moral Omnivore truck. Their menu had some very interesting things on it. 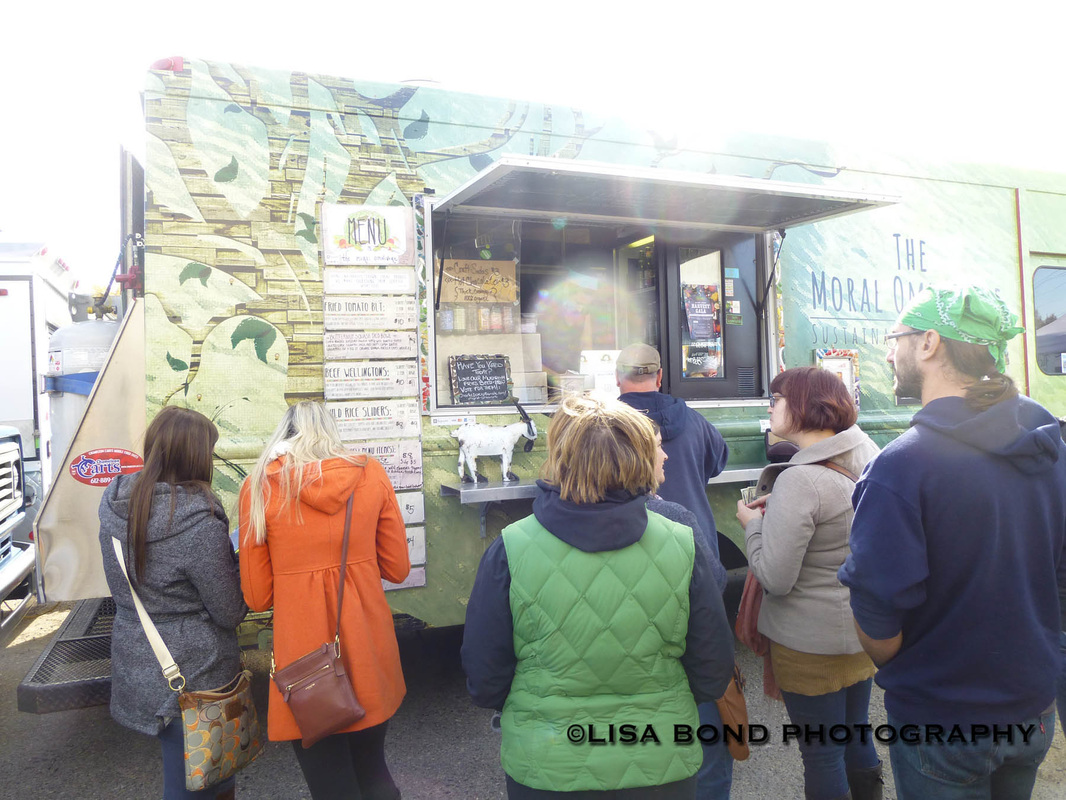
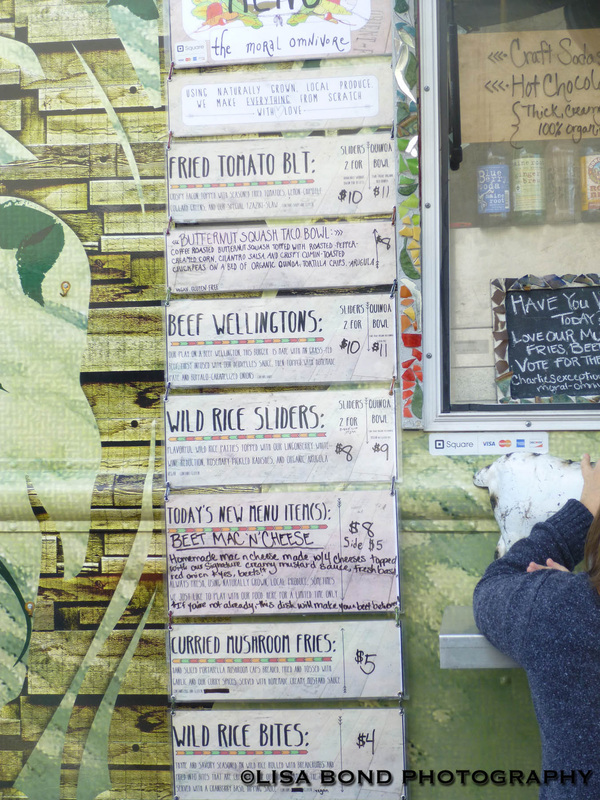
I decided to go with the Curried Mushroom Fries since they won an award for something and I love anything with curry in it. 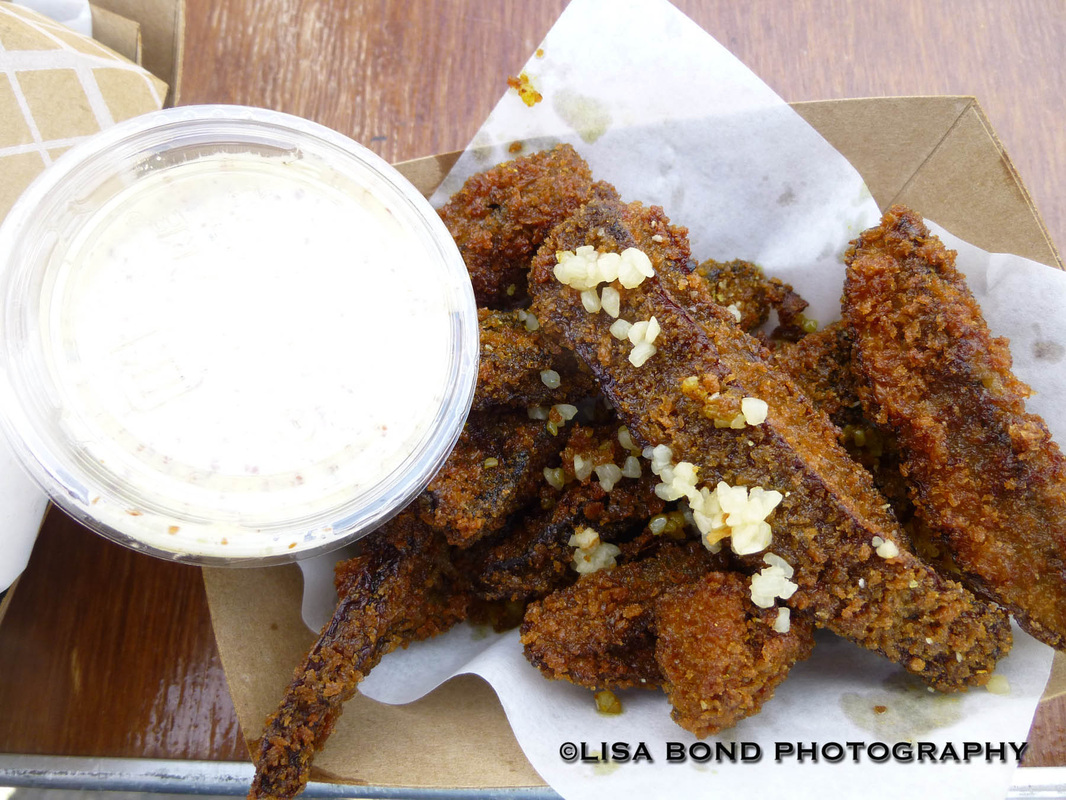
They were good and unique. Very fried and very mushroomy. I don't know if I'd buy them again, but if someone else did, I would probably sneak one or two of theirs. I also decided to get the Beet Mac-n-cheese to bring home for one of my other kids who happens to like beets. I sampled a few bites of it after they were done (they didn't eat it all). It was very interesting and good. The red onions were a bit overpowering. I liked the crunch they offered but I would have opted for a milder, maybe a green onion so it didn't become the dominant flavor. 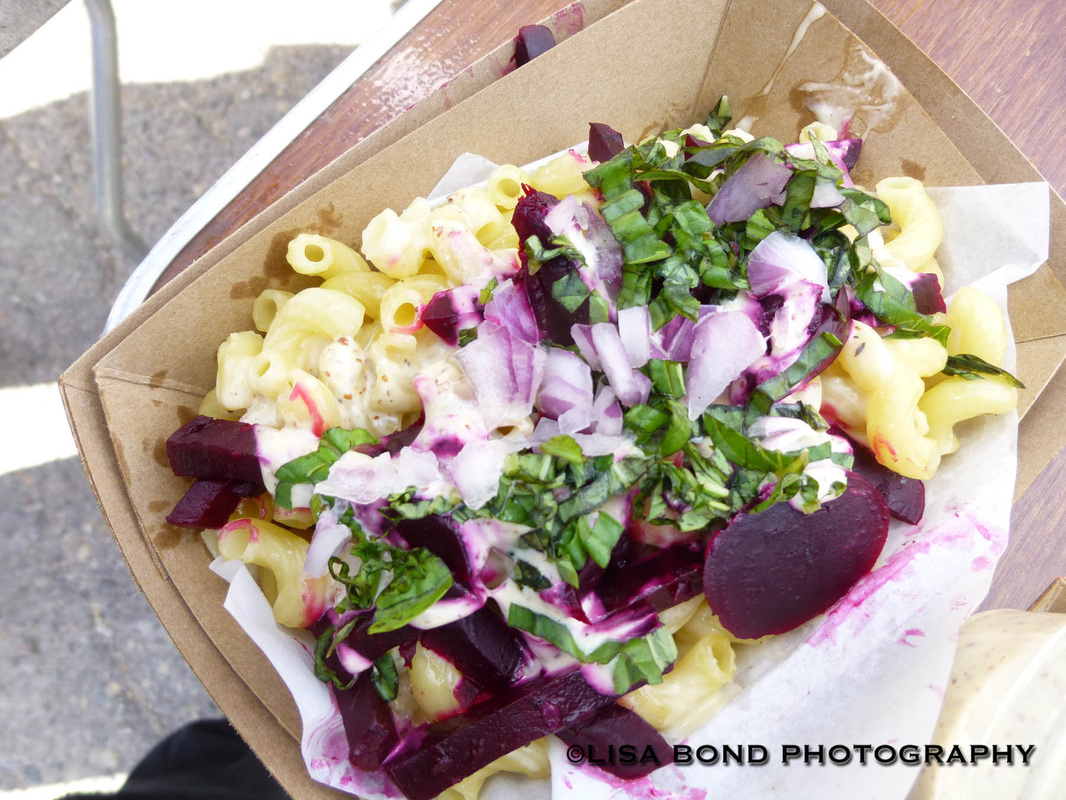
What happened next can best be described as a post-Thanksgiving-dinner-like induced coma. I felt intoxicated from eating too much and there was only going to be one cure: sleep. I do not know how people sat in a beer tent and drank after, before or during that event, but they did. Maybe it's a timing thing that I haven't yet figured out. Something like: beer, food, break, beer, food, beer, food, sleep. Too bad I live so far away and had to drive. For those who live in the area and had the afternoon/evening off and could walk, it was a great plan for the day.
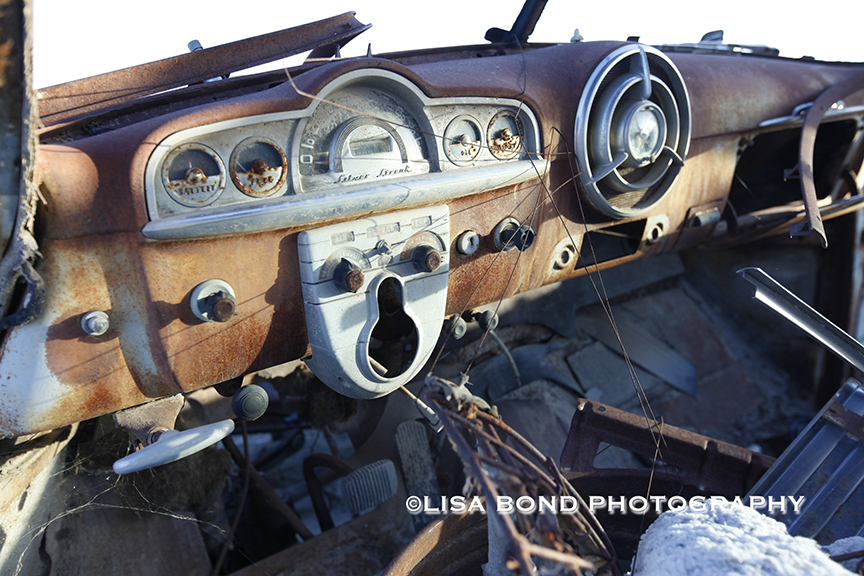
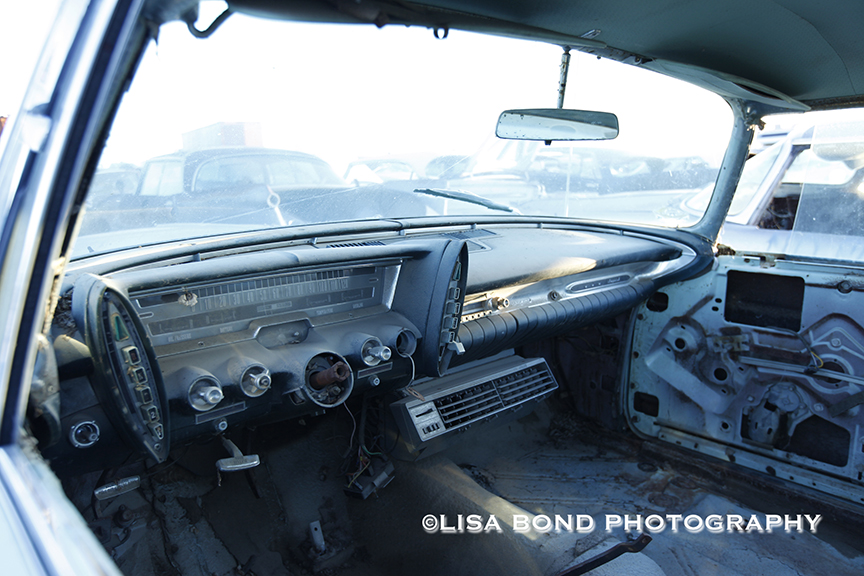
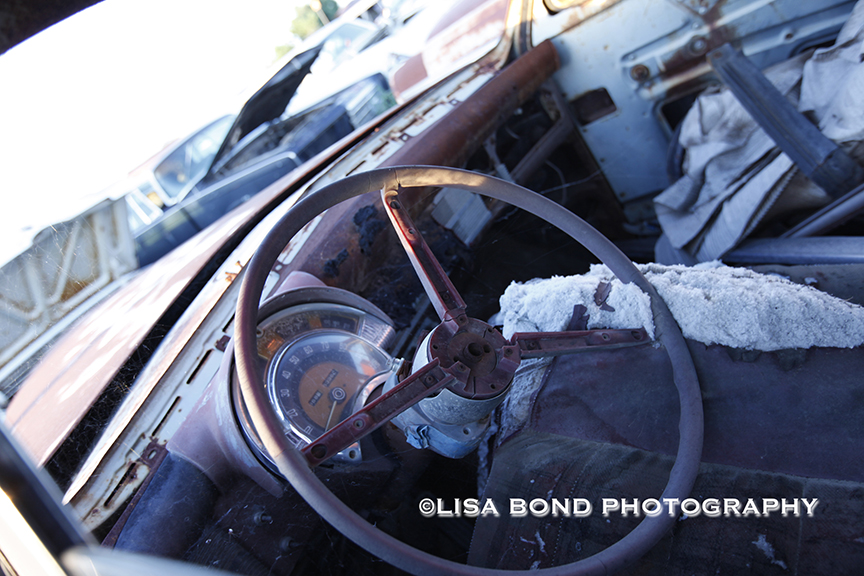
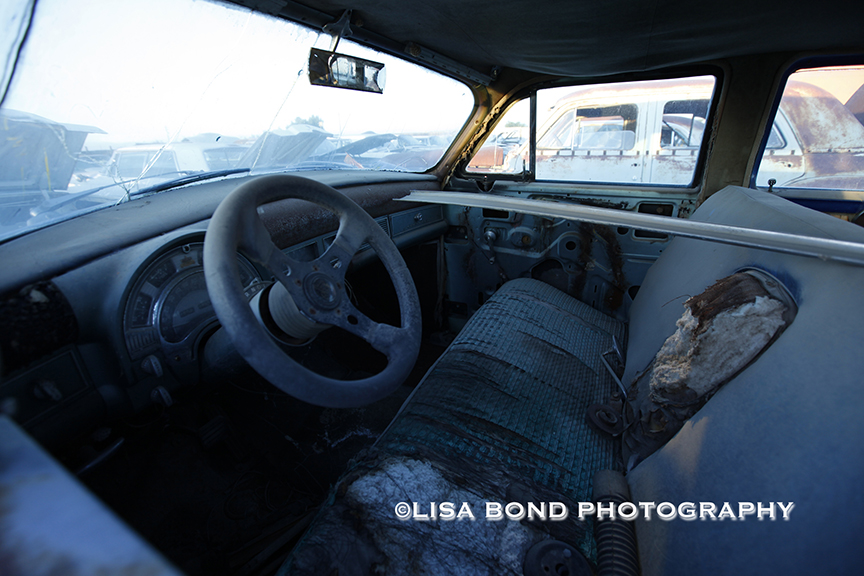
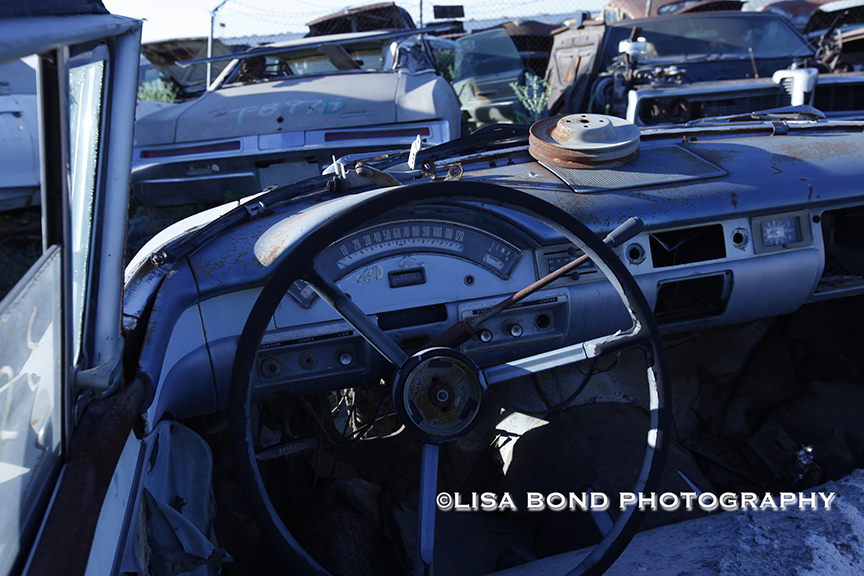
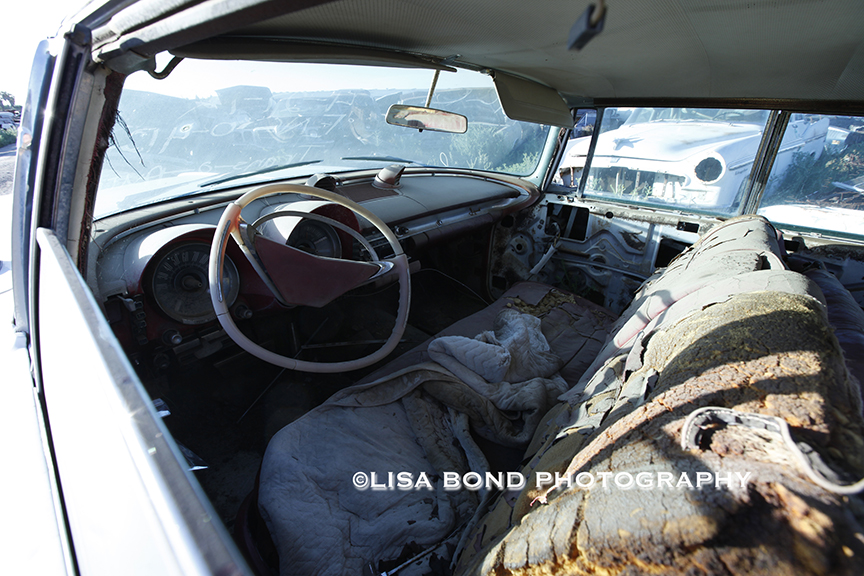
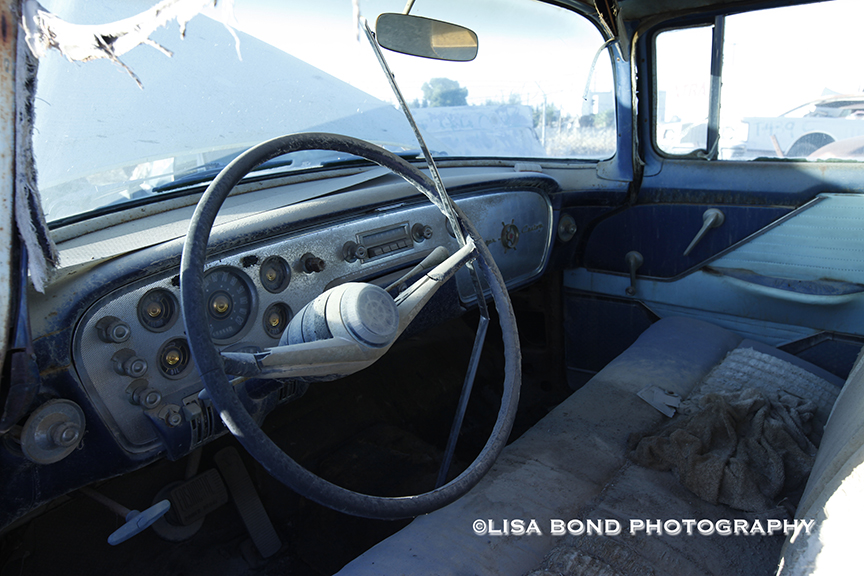
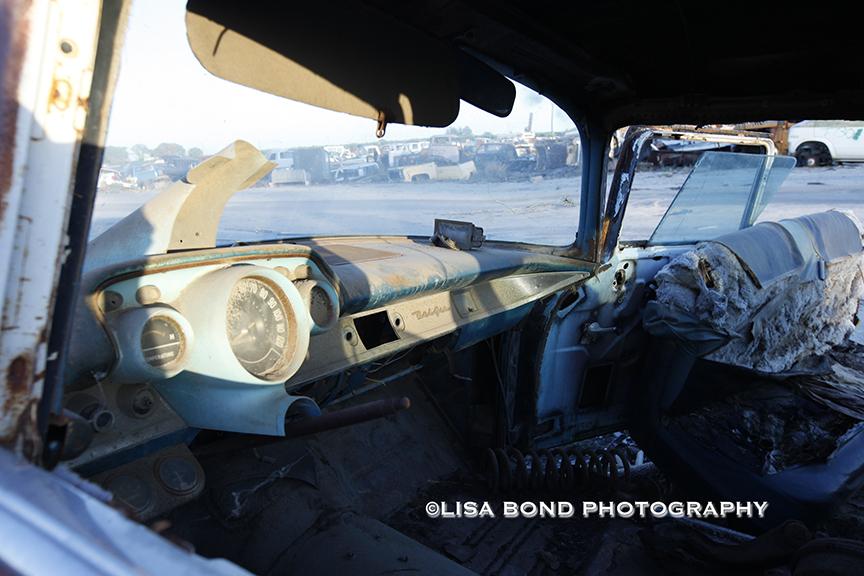
In the end, there was one thing I couldn't forget. Those potatoes. In fact, I might have to track down that food truck one more time before the snow starts flying. In the meantime, thanks for stopping by and I hope you have the pleasure to try a food truck someday. On a recent car photography workshop, we spent some of our daylight hours figuring out what to shoot at night. It was really helpful to have the sunlight available because once it got dark, the entire landscape seemed to change. If careful notes were taken, one could find their way back to the cars that caught their eye in the light. Here are a few from the first day that I liked. These cars have so much style, personality and class. The interiors were very cool, when the parts are still there. I wonder if people will be saying the same thing in 70 years about the cars we are driving now?
Come back next week when I plan to show you one or maybe two of these autos when they were taken at night under the almost full moon. Thanks for stopping by! I made it safely to my workshop destination. The little plane was no problem and it turned out to be one of the smoothest flights I've ever had. Just for the record, there were at least two "saloons" in the Utah airport.  Copyright 2014 Lisa Bond Photography Their services were not needed for this passenger who was flying on self-assurance. It helped that I had to engage full-scale overprotectiveness with my camera gear when they tried to stow it in the cargo hold, telling me as I boarded that the plane was too small for my large carry-on bag. I got lucky and they said I could try to get it on. The lady sitting next to me, who was a double for Susan Sarandon, was not very happy about me wedging it under the seat in front of me, but let's just say that everybody survived. She did not bother saying goodbye to me at the end of the flight, despite my explaining that it was all camera gear and if it were clothing I would have been more than happy to put it under the plane. We went our separate ways. But we (my camera gear and I) made it safely and we're ready to start working. [Note to non-photographers: do not try to get between a photographer and their stuff. Do not suggest you stow it in trunk or on the roof rack for a trip, unless you want to intentionally rile them up.] During both flights I used a little point-and-shoot to look for aerial compositions. I had a lot of fun doing it. I thought about getting out the "good" camera, but airplane windows are usually so scratched up (here's another addition to the bizarre list of life questions: what scratches an airplane window? the air? imaginary tree branches? microscopic bugs with sharp feet skating along upon the ice skating rink of airplane windows?) that it is difficult to get great images anyway. Even if the window was wide open, there is usually a layer of something (pollution? clouds? haze?) that make it hard to get crystal clear shots. These are more for fun than anything else. Today I'm off to see the giant sequoia forest. So I'd better get going. This is my only free day before the workshop starts.
Thanks for visiting and I hope you are enjoying the warmer weather and longer days! Last January I was on a photography expedition and headed out one morning at about 5:30 a.m. to catch the sunrise. That's pretty early for winter, but there was a full moon and I knew I'd be able to catch it setting before the sun came up. I was fully outfitted with multiple layers, very little skin showing, and toe warmers to buy a little extra time before I had to come in and warm up. My biggest concern was being all alone on the lake and possibly getting sized up as a tasty bowl of Frosted Flakes breakfast cereal by a traveling wolf pack. 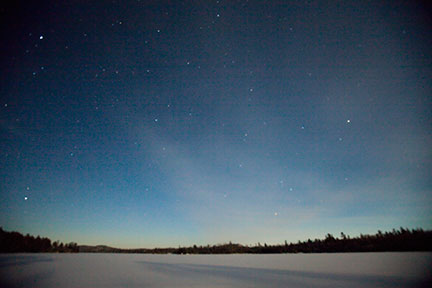 ©2013 Lisa Bond Photography It was unbelievably still and peaceful out there. Not a sound was to be heard. I took my time getting across the lake, photographing the full moon when the composition looked good, and made it to the car about 45 minutes later. My next destination was 3/4 mile down the road with another hike from there. I could have walked the entire distance but since I was trying to beat the clock and reserve any warmth I had left in my body for the sunrise shoot, I wanted to get there without further delay. 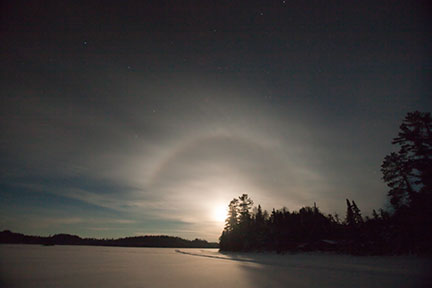 ©2013 Lisa Bond Photography 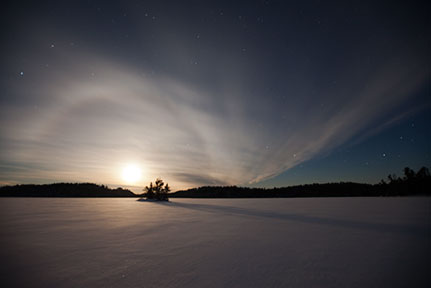 ©2013 Lisa Bond Photography Once the car was parked, I hiked up about 2 blocks of incline and maybe another block or so of flat terrain when I found a spot to work from. I was on the edge of a cliff and the temp was around 1 degree F. The wind would have felt nice on a hot day, but this morning it was gusting over 20 MPH and that made it feel like below zero temps. I quickly learned the biggest obstacle I was facing was my own breath. I am no stranger to working in wintery conditions but this had never happened to me before. Despite having my face covered with a ski mask, my breath was freezing on the filter and all around the back of the camera. The real problem was the filter though. They are necessary to hold the sun back when it is that close to rising. Sunrise colors change by the second and even 5 minutes of waiting could be a deal breaker. I tried to wipe the filter off but to no avail. I had to take off my gloves and use the warmth of my fingers to melt the ice and that meant exposing my hands to the bitter cold.  ©2013 Lisa Bond Photography It really wasn't working but there were some other filters I was able to try. That's about when I realized how much my toes were starting to hurt. The toe warmers seemed like they weren't doing anything. I knew I had to get back to the car and fast. When I got there, I took a self-portrait to show the frozen hair that had sneaked out of my cap and scarf. That's the same culprit that was creating havoc with my filters. 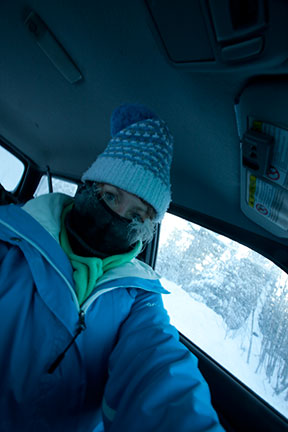 ©2013 Lisa Bond Photography I sat in the running car hoping it would generate some heat so I could thaw out before had to face the hike back across the lake to camp. Even the car didn't want to warm up, so I finally headed back encouraged by the warmth the lodge would bring. Now that I am about to embark on my next journey up there, I am a little wiser for the wear. My trusty old Sorel boots which I have worn since college won't be going with me on this trip. I have invested in a pair of Steger Mukluks. This pair. Some of the warmest ones they make. 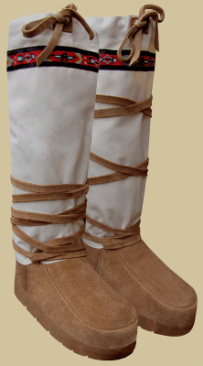 ©Steger Designs, Inc., Reprinted with Permission, thank you Steger Mukluks I bought the extra wool and reflective foil liners for maximum heat retention. They were expensive but I don't ever want to end a photography gig again due to frozen toes. Word out there is that these are the best and I'm about to put them to the test.
In the meantime, here is a link to Steger Mukluks: http://www.mukluks.com/ Until next time, I hope you all have a very Happy Valentine's Day and thank you for stopping by. |
AuthorI am a photographer who lives in Minnesota. I blog about Minnesota, photography, music, food and miscellaneous topics. Archives
November 2016
Categor
All
|


 RSS Feed